Another DIY Project, Brought to You by the Avocet Crew
After all of the projects we have done aboard Avocet, I am pretty positive that Chris’s biological makeup mostly consists of fiberglass- just think about all the reconstruction, sanding, and fairing we have done… It is hard to believe he would be anything but glass and resin at this point. Although I myself have fostered an affinity for laying new glass and its therapeutic process, I can’t say I enjoy the work once the sanders come out. Chris, on the other hand, embraces this aspect of the job and uses it as both an opportunity for an upper body work out and to refine his craft which has given him notoriety around our neck of the sea as a very knowledgeable and capable boatright – which is why when he hatched the idea to completely redesign our dodger I supported it without any doubts.
Why Build a New One?
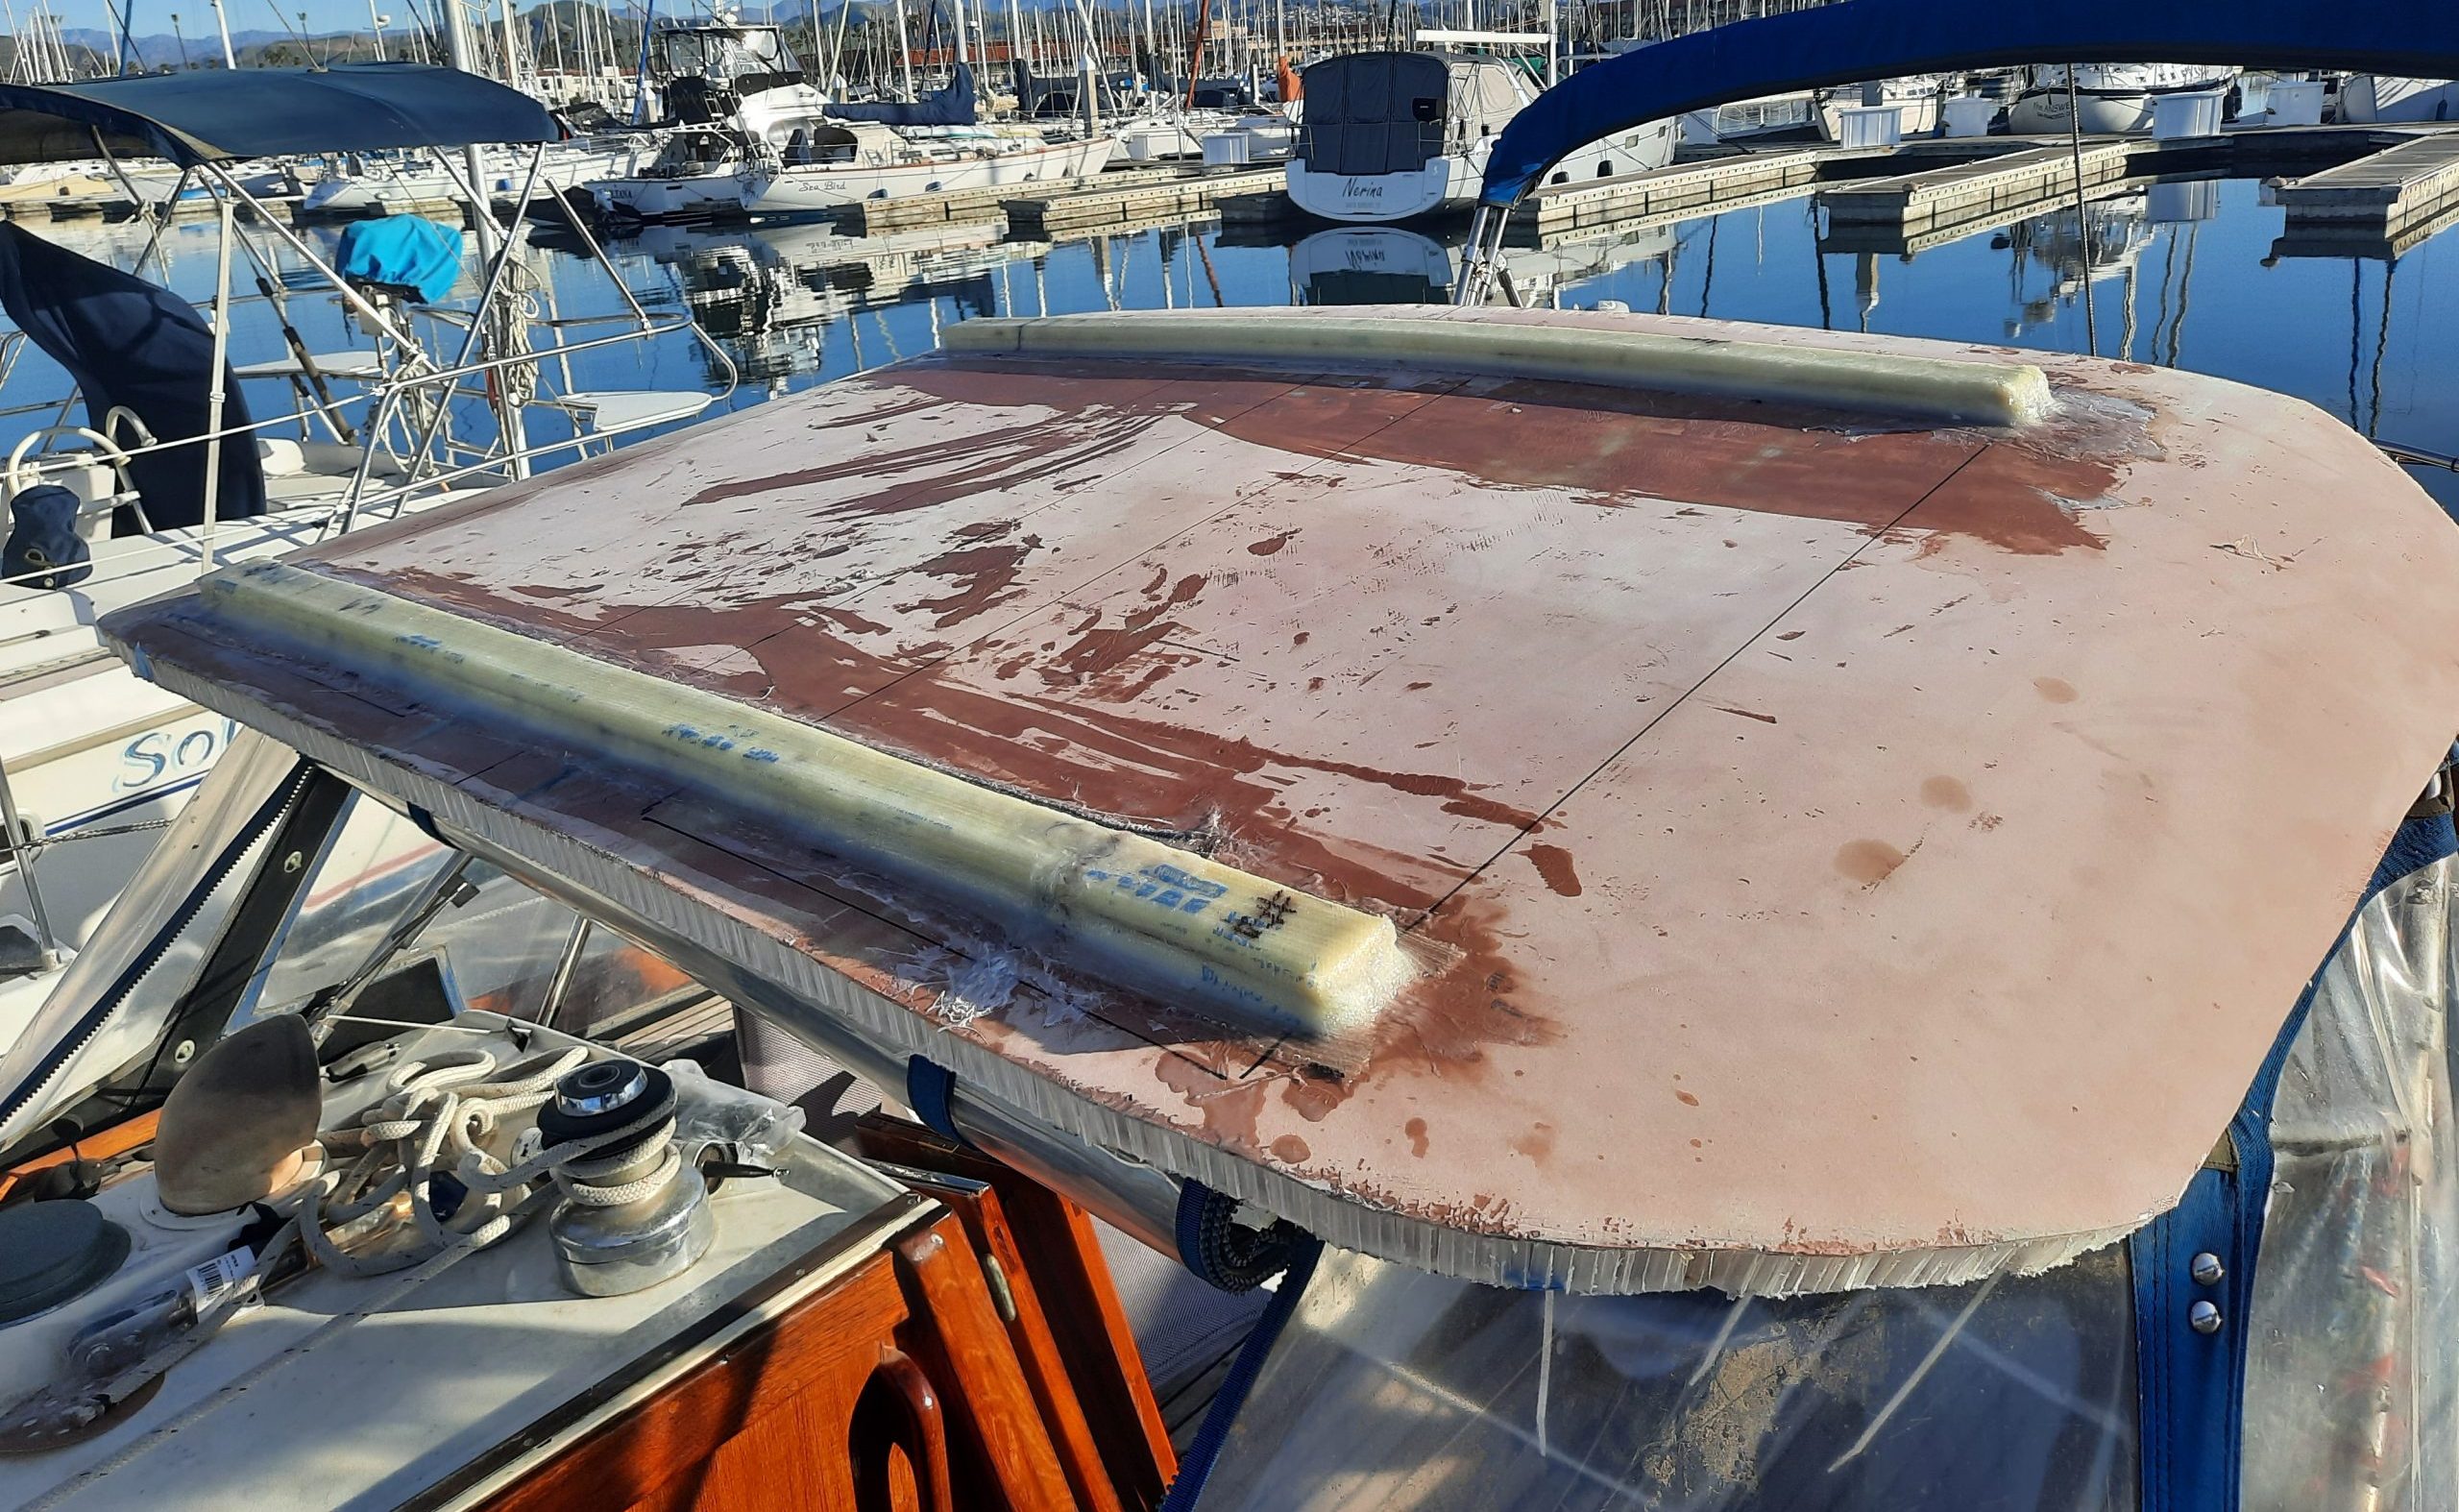
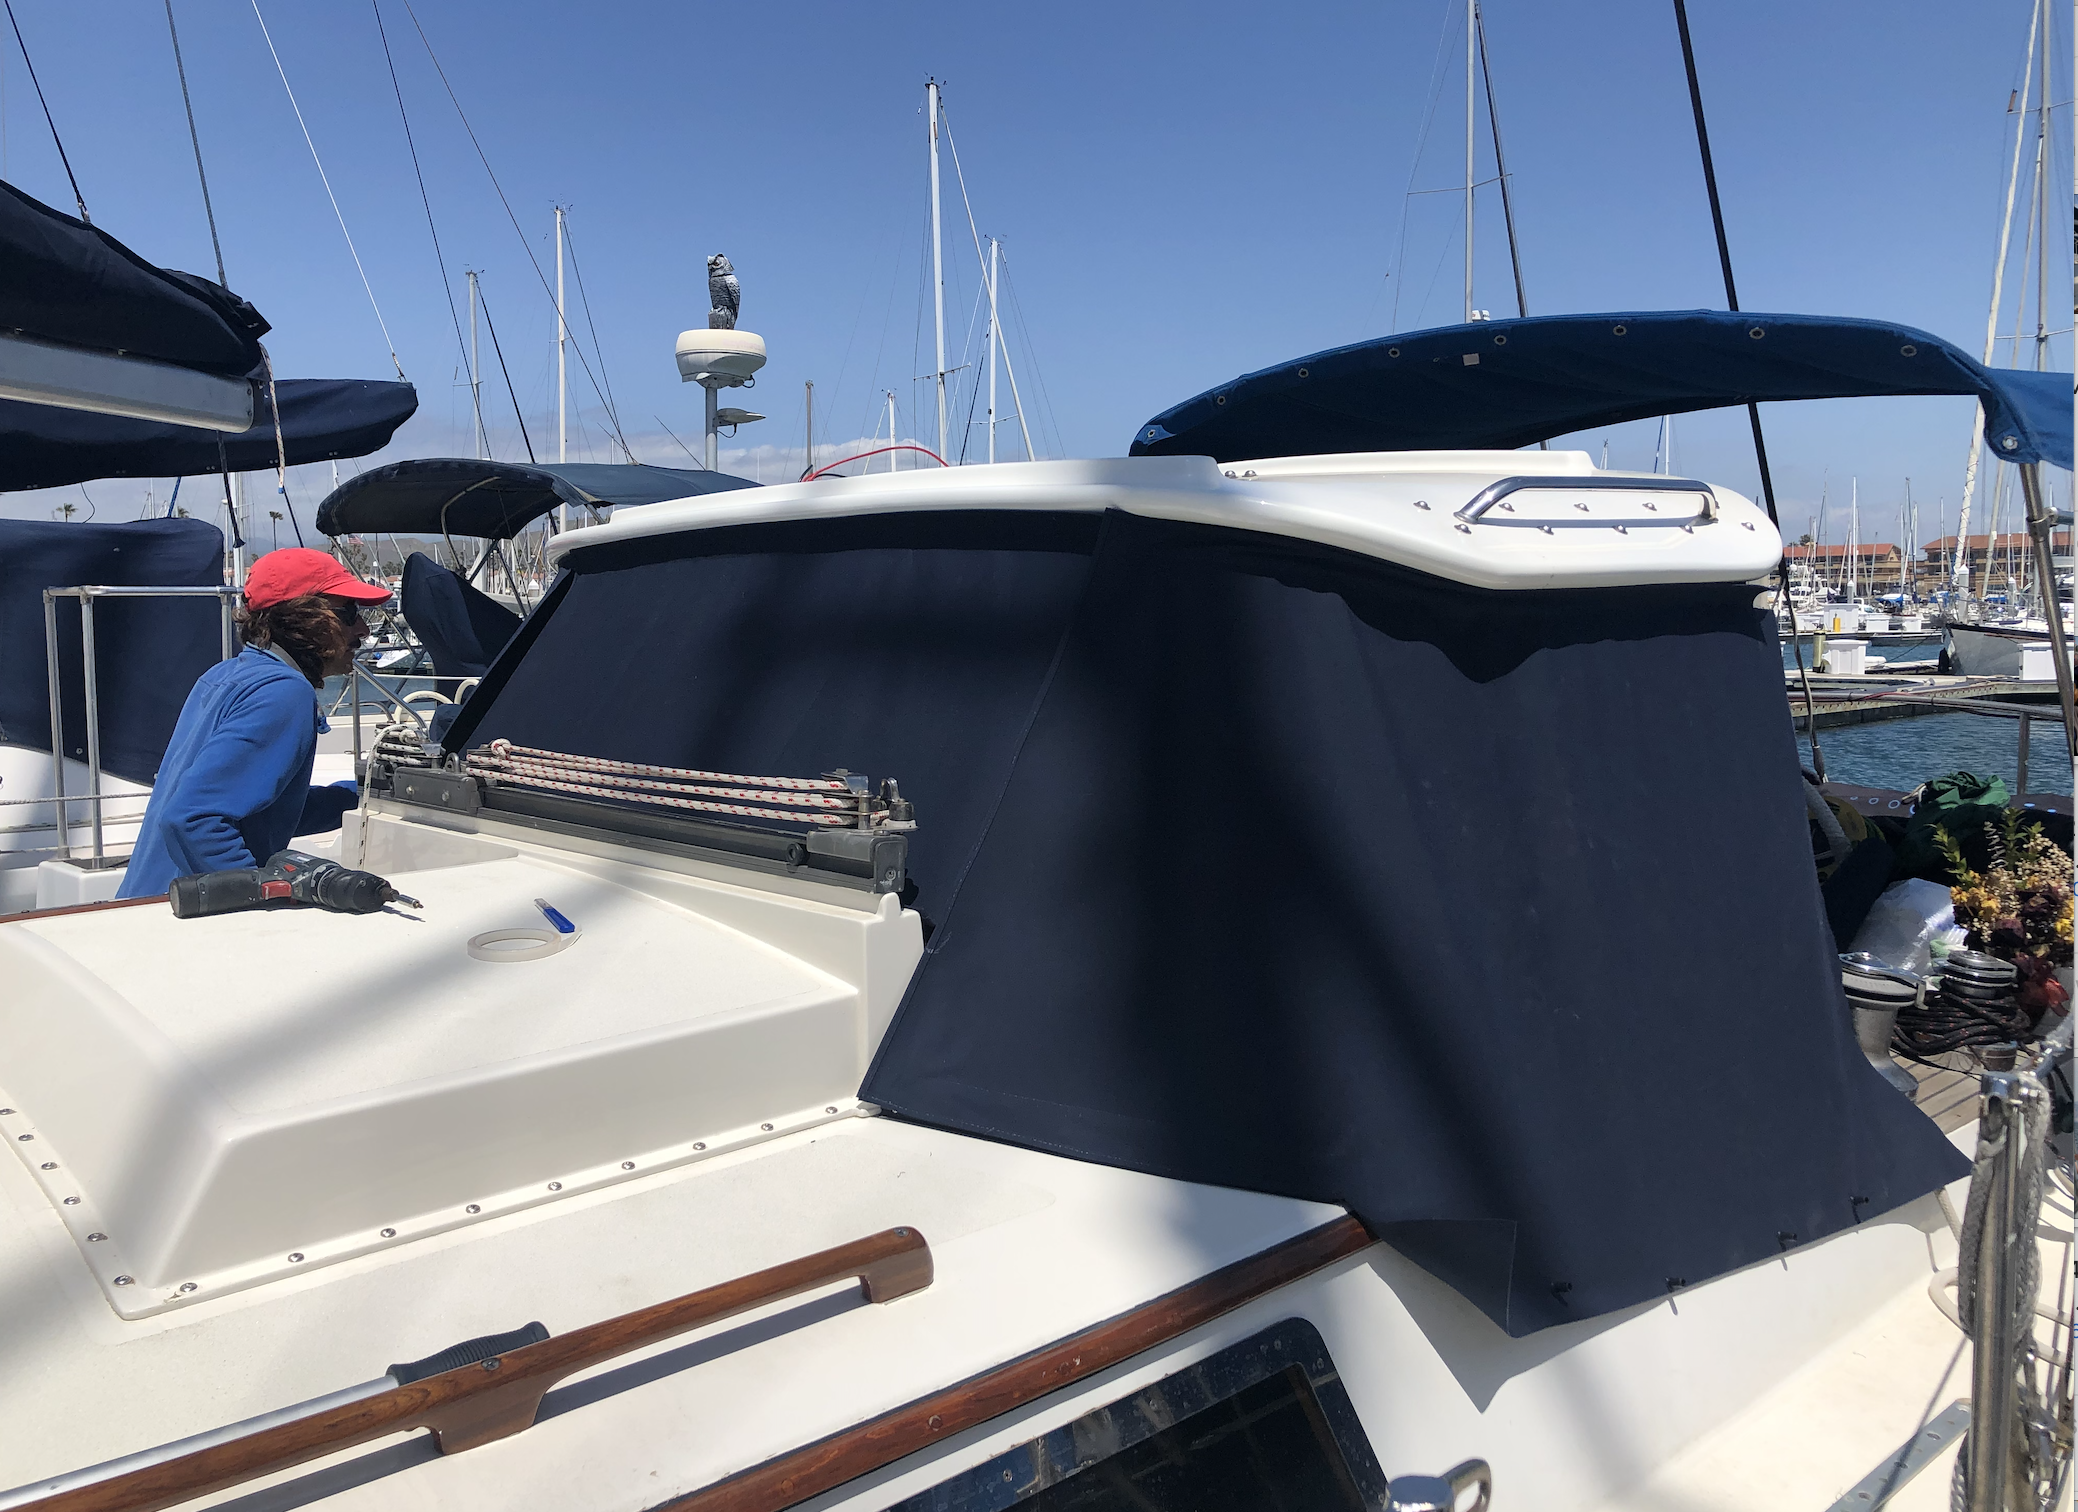
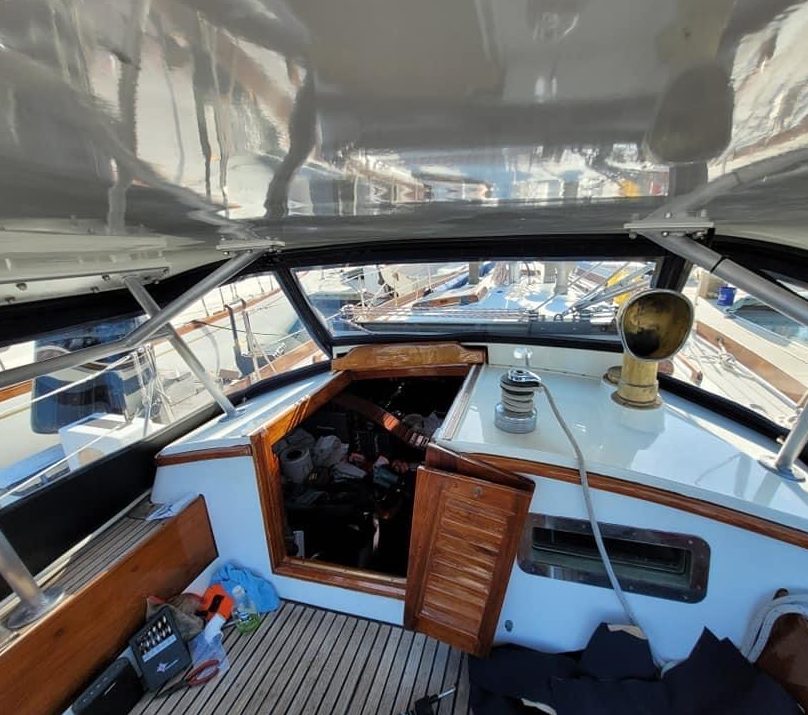
A good look at how bad the dodger was
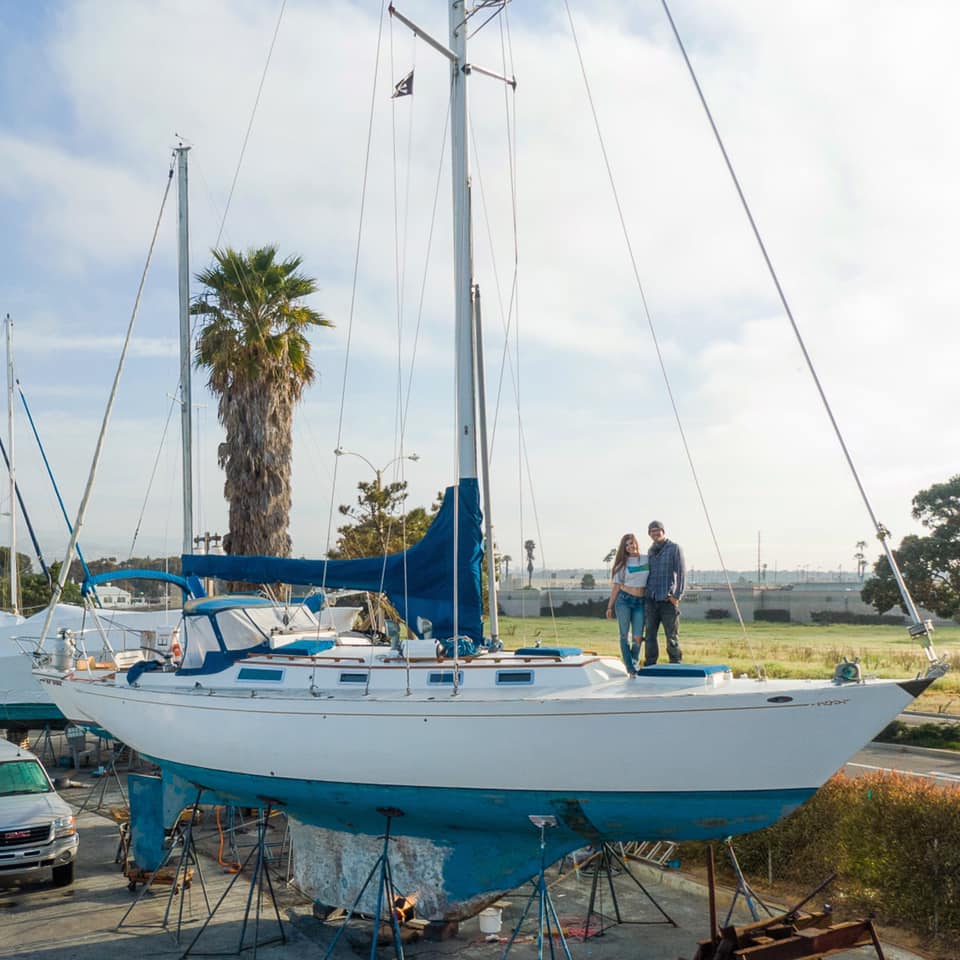
The canvas dodger we had inherited aboard Avocet had seen better days; the frame was not stout, the dark blue canvas had been sun bleached and abused over the years, and perhaps the worst trait of all was that the strataglass was as transparent as milk making any sort of attempt to see through it impossible. Although it served us well as a windbreak and had gotten us this far in our journey we knew it was time to upgrade. Originally we had the idea to create a completely rigid hard dodger and forgo the hassle of sewing canvas, but then at the advice of notable sailors (such as Lin Pardey herself) we decided to create a hardtop that could support solar panels with canvas sides that can be removed for easy cleaning and air flow on the particularly stuffy days at anchor.
Having researched plenty of DIY and professional hard top/hard dodger configurations, Chris had a concept in mind regarding how he wanted the dodger to look, scribbling design after design onto a yellow legal pad for me to review. With the final sketch approved by yours truly he got to work cutting materials and bringing his drawing to life. He was surprisingly quick to kick off this build, but considering this had been the third time we had purchased the necessary materials, he was seriously itching to use them – and that’s not just because of the fiberglass. You see, we had intentions of starting this project much sooner but each time we purchased materials we found other projects that took precedence. As they say, third times the charm.
Hard Top Materials and Creation
The Honeycomb Nidaplast cut and ready for glass with the old dodger underneath.
The overall shape of the top was really determined by two things: the length of our solar panels (that would be mounted on top) and the length of the core material that was exactly four feet wide. With those two things taken into account we established that the length fore and aft would equal the length of the solar panels, while the dodger width would remain four feet (just a hair larger than the previous dodger) to keep us from cutting away more material. Using a pretty basic FRP construction plan, we decided on using a factory scored Honeycomb Core called Nidaplast, at 1’’ thick which could bend to match the arch of the previous dodger. This material is a great option for marine construction given its lightweight, rot resistance and its flexibility. Given Chris’s experience with boat building and previous projects, he had become accustomed to using 1708 fiberglass cloth and chose to use it again for this project due to its strength in layers. “1708” is composed of 17 ounce biaxial glass and 8 ounce matte glass, from which it got its nickname. 1708 is a very good “one and done” fiberglass due to its interweaving fibers that when bonded with resin offers excellent torsion rigidity. After careful consideration he decided that two layers of 1708 glass on each side would give us the desired strength.
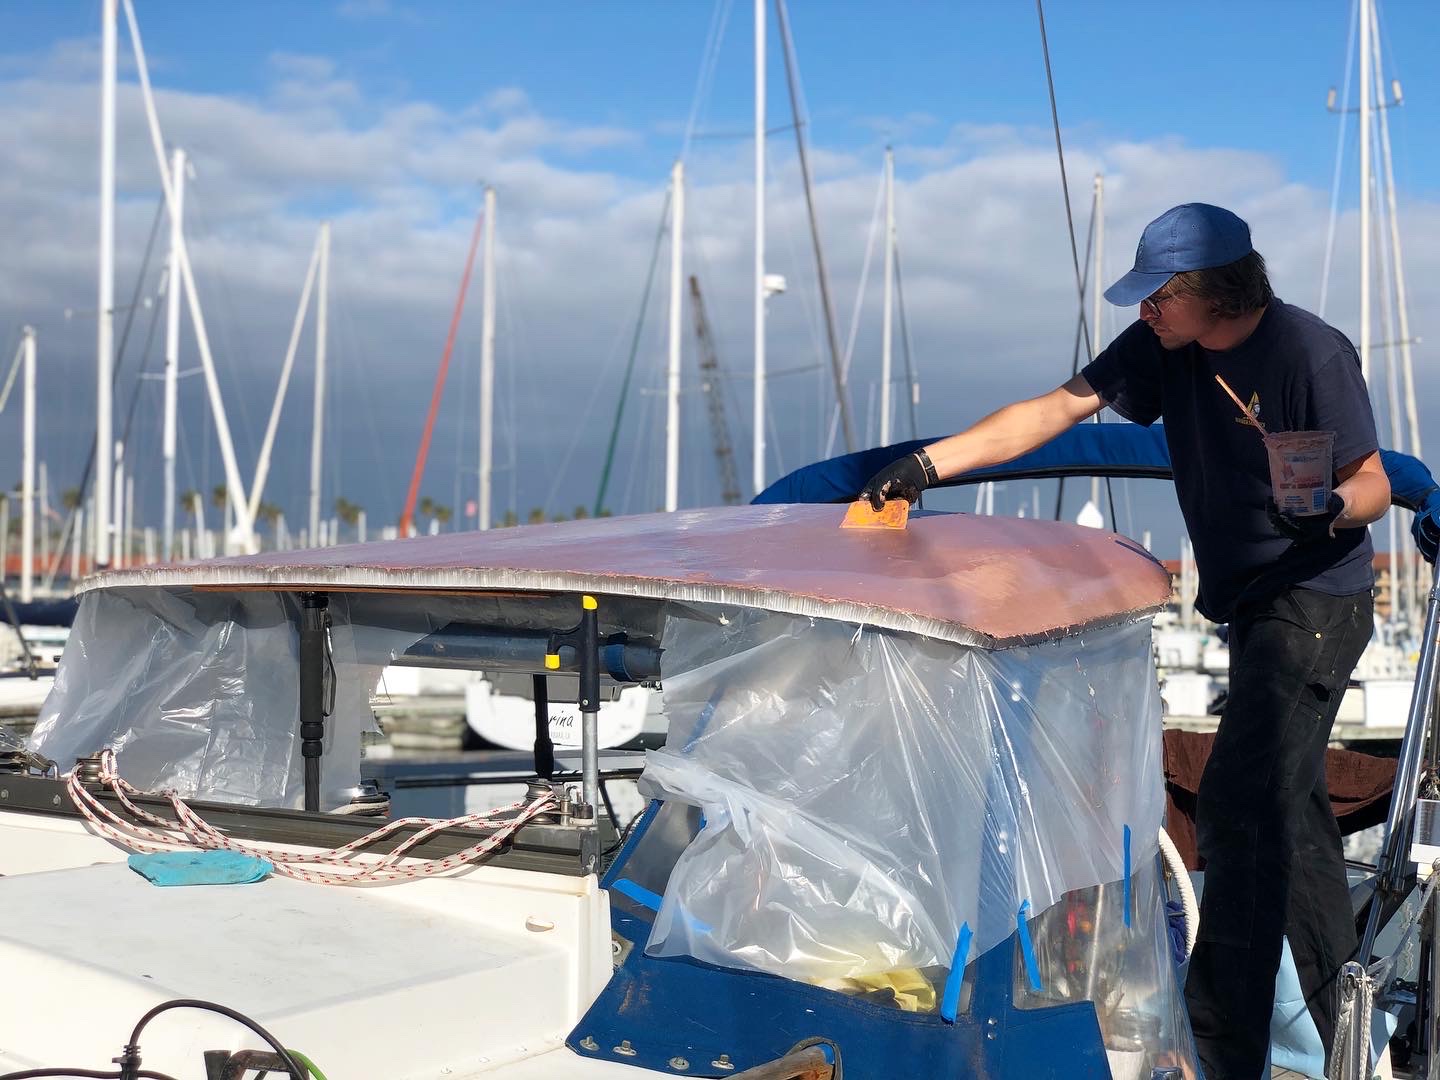
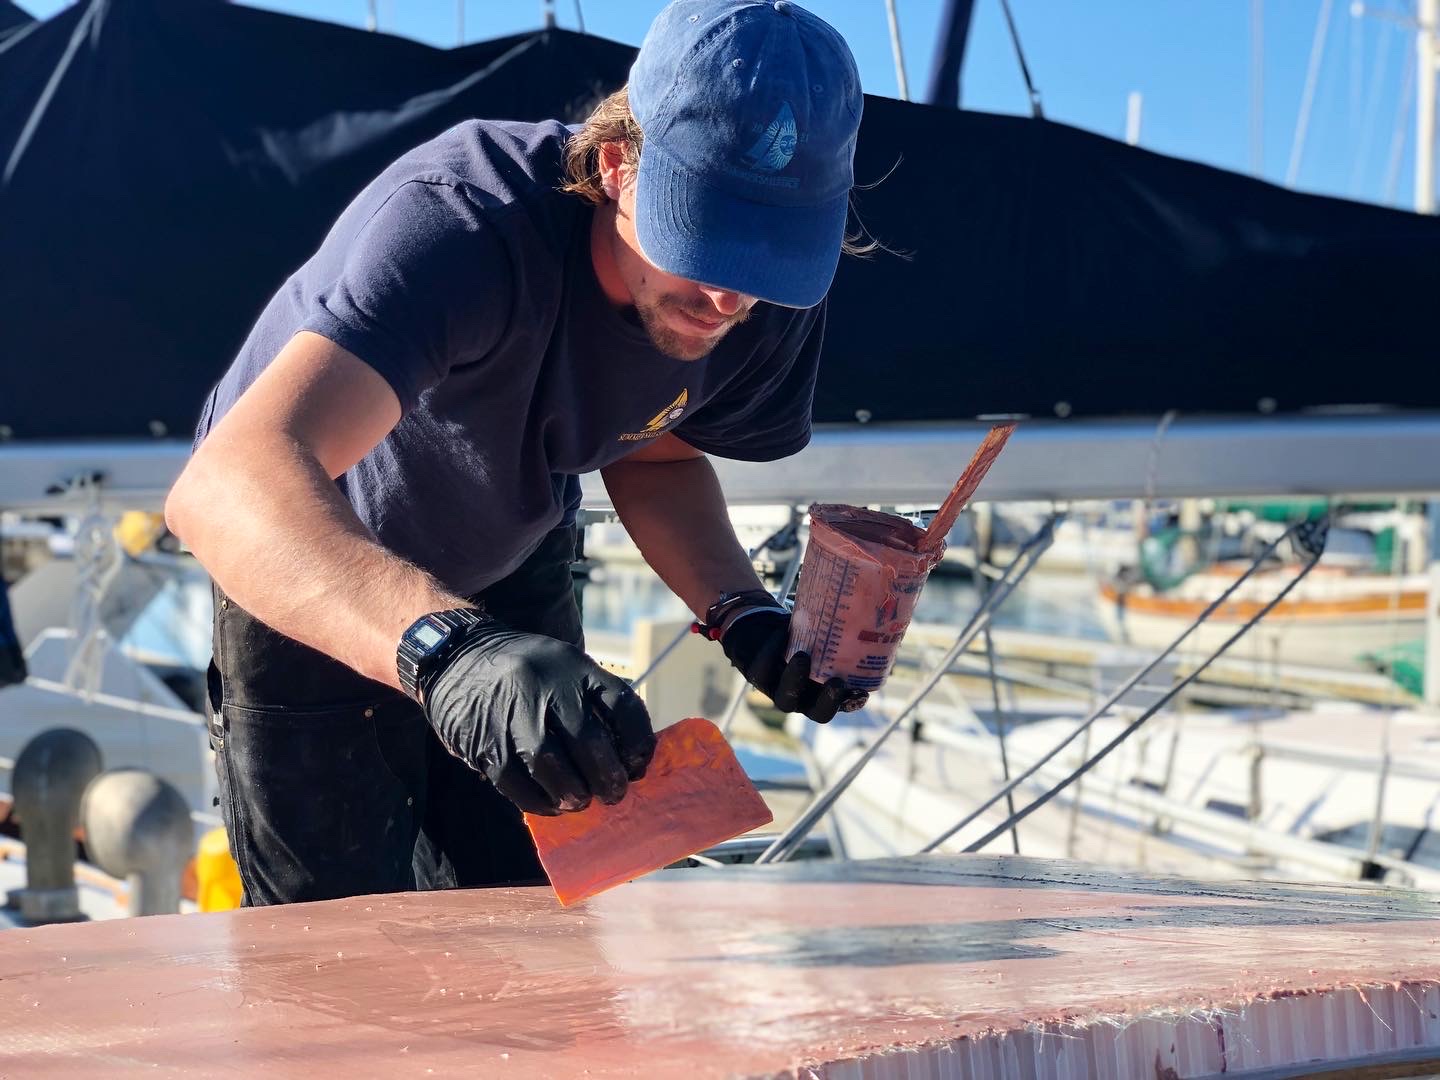
The first day Chris cut the core to shape, utilizing the old dodger as a template and support to work on top of, ensuring we would create the perfect arch and soft corners with our new design. He then cut the fiberglass cloth for the top skin, making sure to overlap where the edges of glass met to ensure there were no weak spots. Since the size of the cloth was so large it was tough to tackle laying the resin alone, so Chris enlisted the help of our friend Mitch (from Esprit) to assist with the layup in my absence. With the glass still wet, the boys applied a fairing compound so it would chemically bond making this about a four hour process.
-
- Chris hard at work
-
- Attention to detail
-

- a closer look at the honeycomb, glass and fairing compound
With epoxy you have two types of adhesion: A mechanical bond and a chemical bond. A mechanical bond happens when you score the surface you intend on glassing over with sand paper to give a “tooth” for the epoxy to bond with. This bond is very strong but relies completely on the prep stage. A chemical bond is one where two resins go through the exothermic reaction together, which is like having two liquids with a magnetic pull towards each other. Once the reaction is complete the two surfaces you were bonding become one whereas with a mechanical bond there is one separate layer atop another.

The obstacle course of support beams
With the weight of the glass and goopy fairing compound, the once very light core material became very heavy, causing some unforeseen “dips” throughout the dodger top. Working quickly to prevent the dips from setting in place, Chris utilized every camera tripod, paddle board paddle, and boat hook he could find to better support the structure while it cured. Once dry, we removed the obstacle of “support beams” and went to relocate the dodger top dockside, but Chris realized that the top was not as rigid as he had intended… which made sense considering there was no glass on the underside to structurally support the lateral and torsional forces. This was a perfect opportunity to implement a design technique that would benefit us in more ways than one.
Using two divinycell 2”x 55” stringers laid parallel across the beam of the dodger top and secured in place atop a layer of 1708, we increased the structural integrity of the dodger top while also creating the perfect raised platform for our solar panels to mount to, which would allow proper airflow. We added a layer of 1708 glass on top of the stringers, and then faired them to match the rest of the dodger top. Chris was confident in this stringer layup not only because it was something he learned back when building fishing boats but we also put the concept to the test when we successfully stiffened up the decks on our Victory 21’, Geronimo. With this unexpected creation complete, we moved the top dockside on two sawhorses so we could finish glassing and fairing the underside which was a lot easier now that the topside held its rigid form.
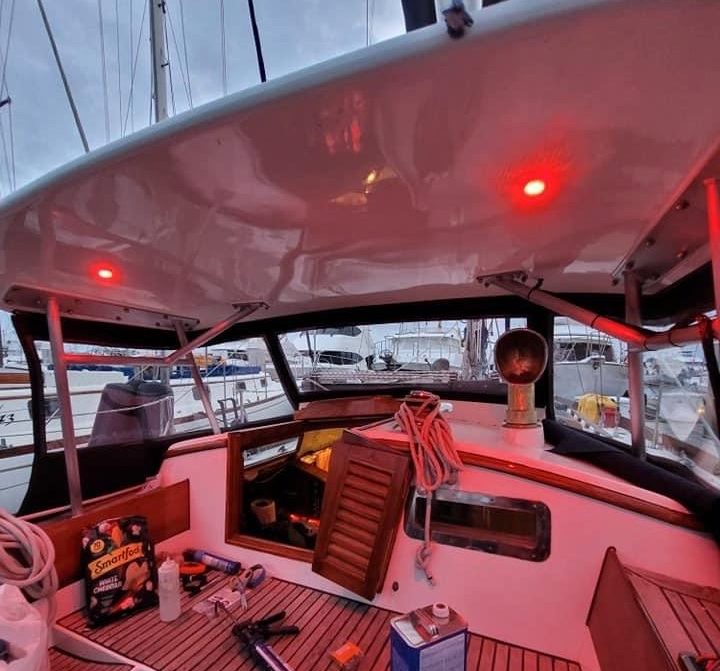
With the bottom of the dodger top easily accessible, Chris was able to locate where he wanted to implement two red lights that would help illuminate the cockpit at night. Part of his decision to use 1’’ thick core was so that he could inlay conduit for not only the lights but also our solar panels, keeping the wires neatly out of sight. So, before he got busy with glassing the bottom skin, he mapped the paths for the conduit and used a router to cut away the core for the garolite conduit material. Using a generous amount of thickened epoxy he glued the conduit tubes in place and then resumed with glassing. Unfortunately I had to work while this part of the project was happening, but thanks to our incredible friends Quincey (from Esprit) and Alan (from ValHowell) Chris had all the hands needed to get the job done.
With the entire dodger top glassed and faired, we could then determine where the 4×32’’ aluminum mounting plates for the aluminum frame would be glassed to the underside. This process looked pretty funny as we hoisted the now-fairing-compound-pink hardtop above the cockpit using a dyneema bridle that we stabilized with a rope off the backstay and four lines on each corner anchoring the top to the boat. This allowed Chris to find the proper dodger height and utilized the four anchor lines to raise and lower the front and back until we were happy with the “tilt.” With the mounting points mapped out, we were able to de-rig our levitating hardtop and get back to work glassing, starting with the two ¼” G10 backing plates that the aluminum frame would be bolted to. By utilizing G10 (which is a high pressure fiberglass laminate) we could ensure a flat surface immediately, rather than fairing two parallel flat spots on the areas that had the most amount of curvature.
After 3 days of glassing, fairing, and planning we were thrilled to move the dodger top to the Ventura Harbor Boat Yard where Chris could do some serious damage and sand his heart out before getting wet and wild with the primer and paint. Due to the amount of sanding needed, this project would have been inappropriate dockside, so we were very appreciative of our friends at the yard who supplied us with the perfect corner to tuck into and finish the necessary work. In true Chris fashion, he carefully elevated the top so he could ensure not a single spot went untouched by the two coats of Tuff-Stuff primer. He had just finished his last coat simultaneously with my arrival at the yard, when all hell broke loose.
*SNAP* In less than a breath the levitating dodger top was settled on the rocky ground, pushing dust and other residue out of its way as it made its way down. Unlike Chris who had proclaimed every profanity in the dictionary, I was speechless and remained so as he dropped everything in his hands and took a walk around the yard, undoubtedly to cool off. I acquired some new paracord left over from a neighboring mast project and began carefully rigging the top again. With Chris’s help the top was suspended in air once more and we could assess the damage. Fortunately, there were only a few areas that would need new fairing and primer, while the majority of the unit remained remarkably unscathed. It can never be too easy when it comes to projects!
After a little repairation work from the damage of the day prior, Chris had finished priming the dodgertop for the awlgrip paint that we had our friends at the yard spray to save us time and materials. Had we opted to roll and tip it ourselves we would have had to paint three separate coats, sanding between each. Not to mention, Chris had a videoshoot which would have pushed off this project another week had he decided that we would DIY the painting process. In his absence the yard utilized the Oyster White Awlgrip leftover from our cabin top paint on Avocet and sprayed the dodger top beautifully.
After we rigged the top the second time
Metal Frame Construction
While the painting process unfolded in the boatyard, we shifted a majority of our attention to building our dodger frame with the help of our friend, “Metal God” Ryan. After extensive research and consideration we decided to build our frame out of 1 ¼” aluminum tubing for a few reasons: It is durable, easy to work with, cheaper than other metals and light, complimenting the lightweight top which is important considering it would be high off the waterline.
After a couple of visits from Ryan and his welding mastery our metal frame design was brought to life. Considering we wanted to eliminate horizontal torsion or any general movement at all, Chris implemented some key elements into the design to ensure the structure was incredibly stout, such as utilizing gusset tubes. Before the boys could build laterally they had to first build the bases to support the structure, which took a bit of time to plan out but eventually they decided on placement of the four circular aluminum bases that would be through bolted onto the boat and where the aluminum tubing would be welded to. Two 4×32” plates were welded atop of the tubing that corresponded to the reciprocating G10 plates that were glassed into the underside of the hardtop. Of course between each bolt we used a fair amount of Tef Gel and G10 washers to separate the stainless bolts and nuts from the aluminum to help the metals withstand the harsh sea environment and prevent corrosion. We chose to finish the frame with Nyalic which we had success with during our mast rebuild.
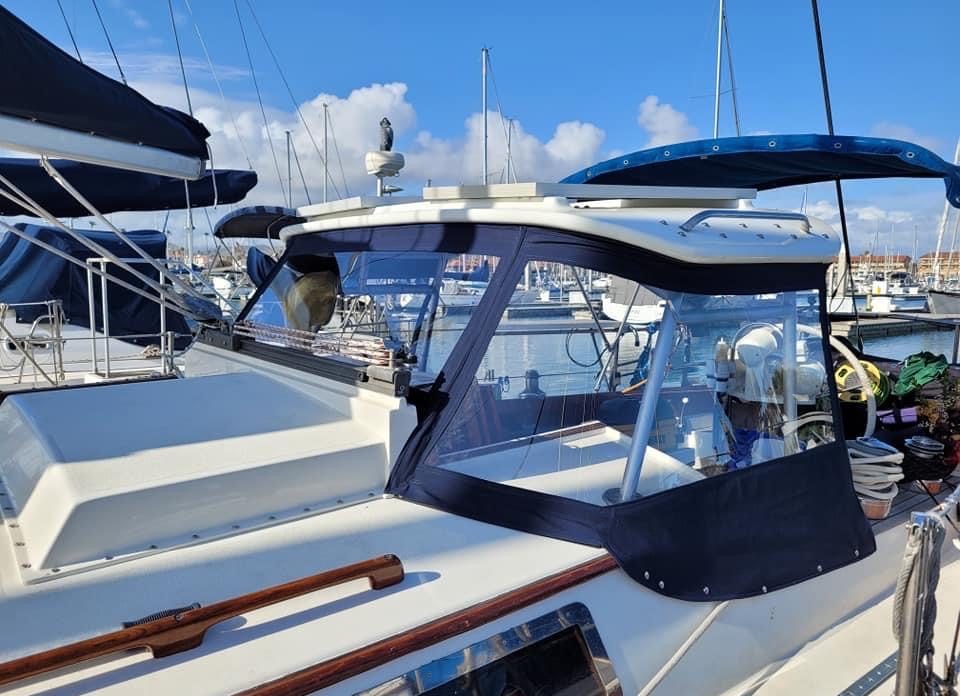
Before uniting the pieces of the dodger together aboard Avocet, Chris installed the bolt track for the canvas and ran the wiring through the conduit. Chris and I carefully carried the dodger top from the dock to the boat, doing our best not to drop it in the water before resting it upon its frame. I nearly guillotined myself as I got my head stuck between the top and frame, but luckily Chris helped me maneuver out of the sticky situation. After some gentle nudging and adjusting, we finished bolting the top to the frame and completed the wiring into the boat.
“That looks niiiiice” Chris said as he flicked the “Cockpit Lights” switch from our Nav Station. The two red led lights illuminated the space beneath the dodger and glowed into the cockpit, complimenting our red/white spreader lights overhead. With the construction complete we couldn’t wait to put our hard work to the test, and took Avocet out for a sail a few days later despite not having any canvas to protect us from the wind or spray. We didn’t care, the dodger was strong and flattered Avocet’s lines well. Back in the marina with a renewed sense of determination we pulled out our trusty Thompson SailRite machine and bolts of sunbrella fabric to begin perhaps the most challenging part of all.
-
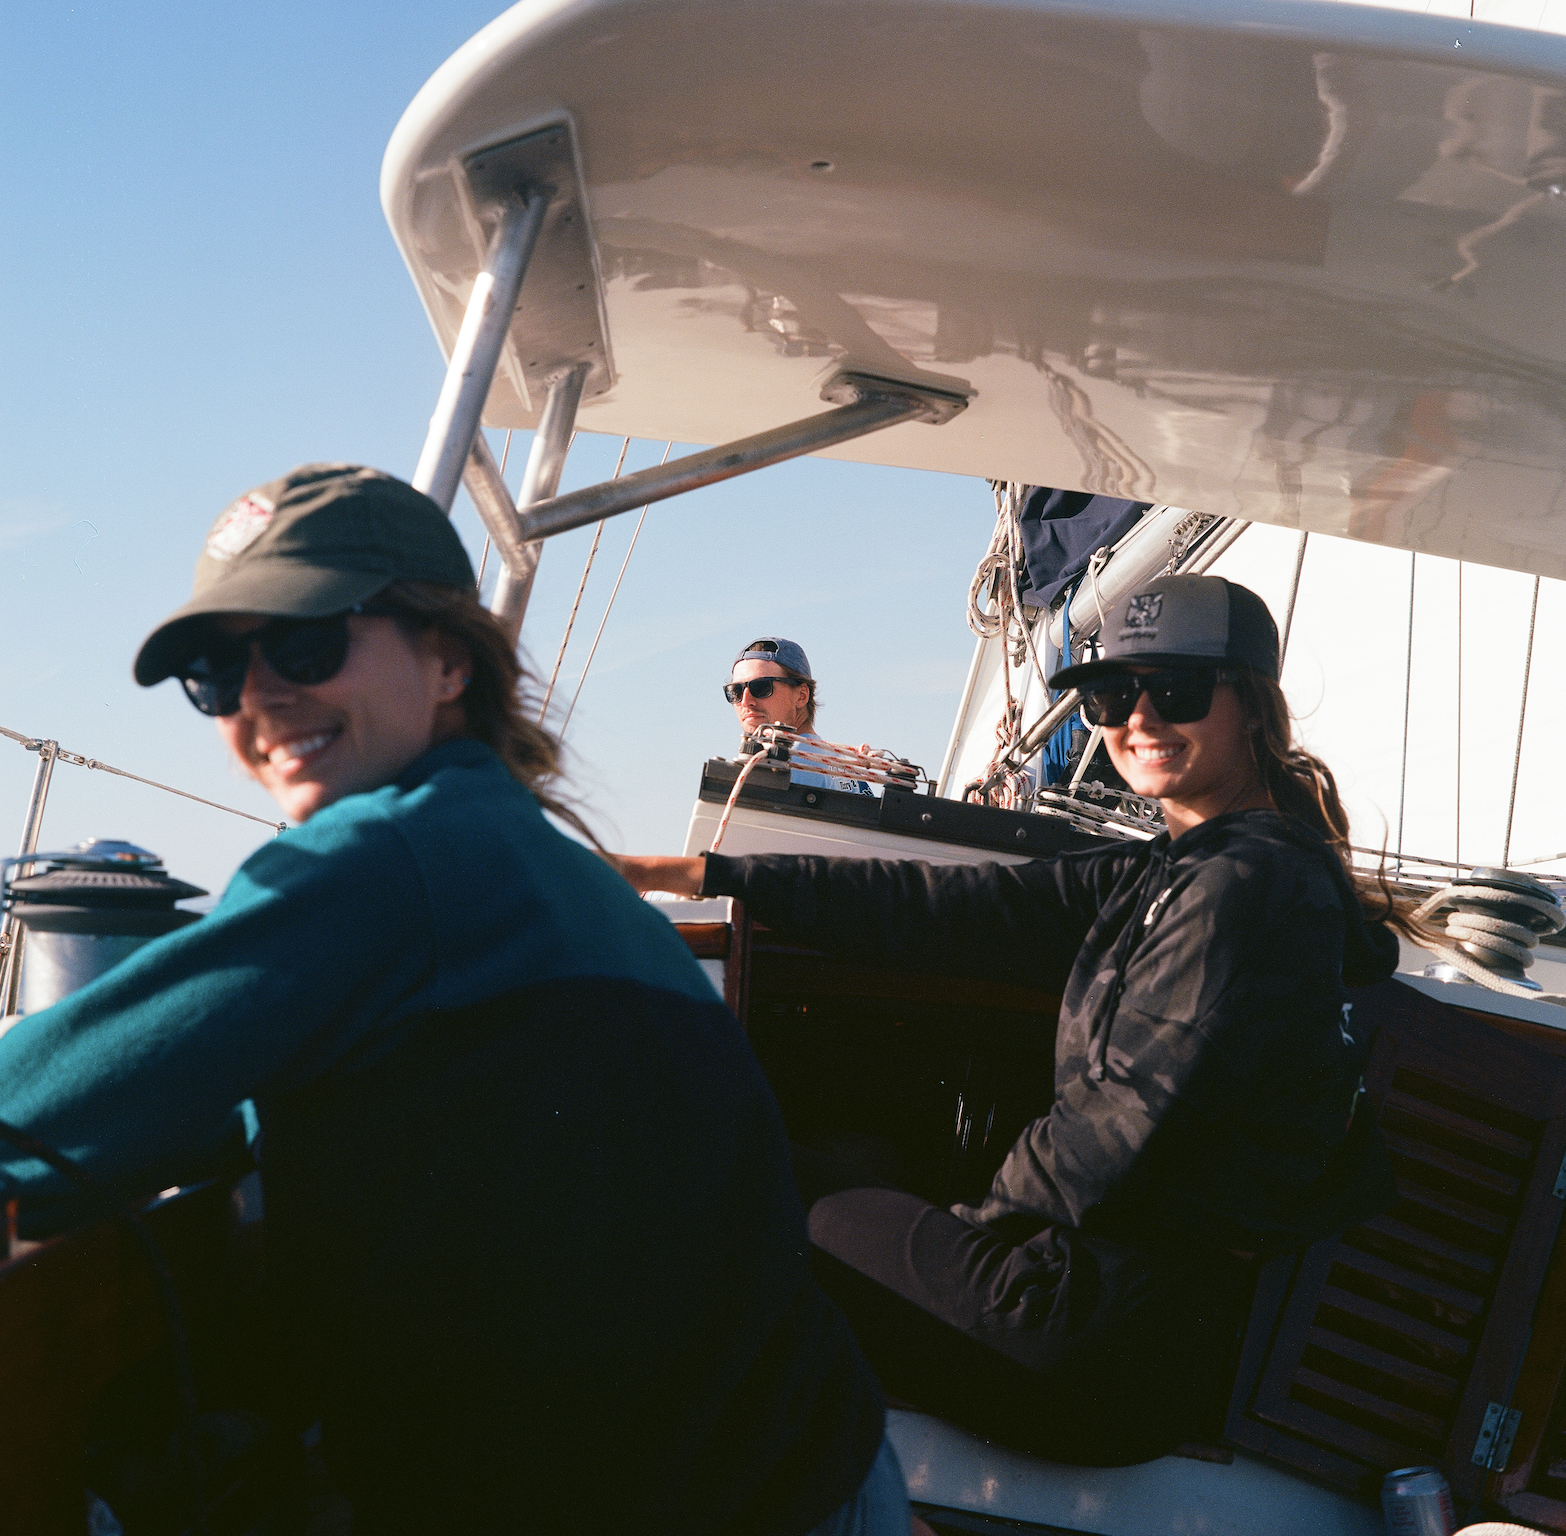
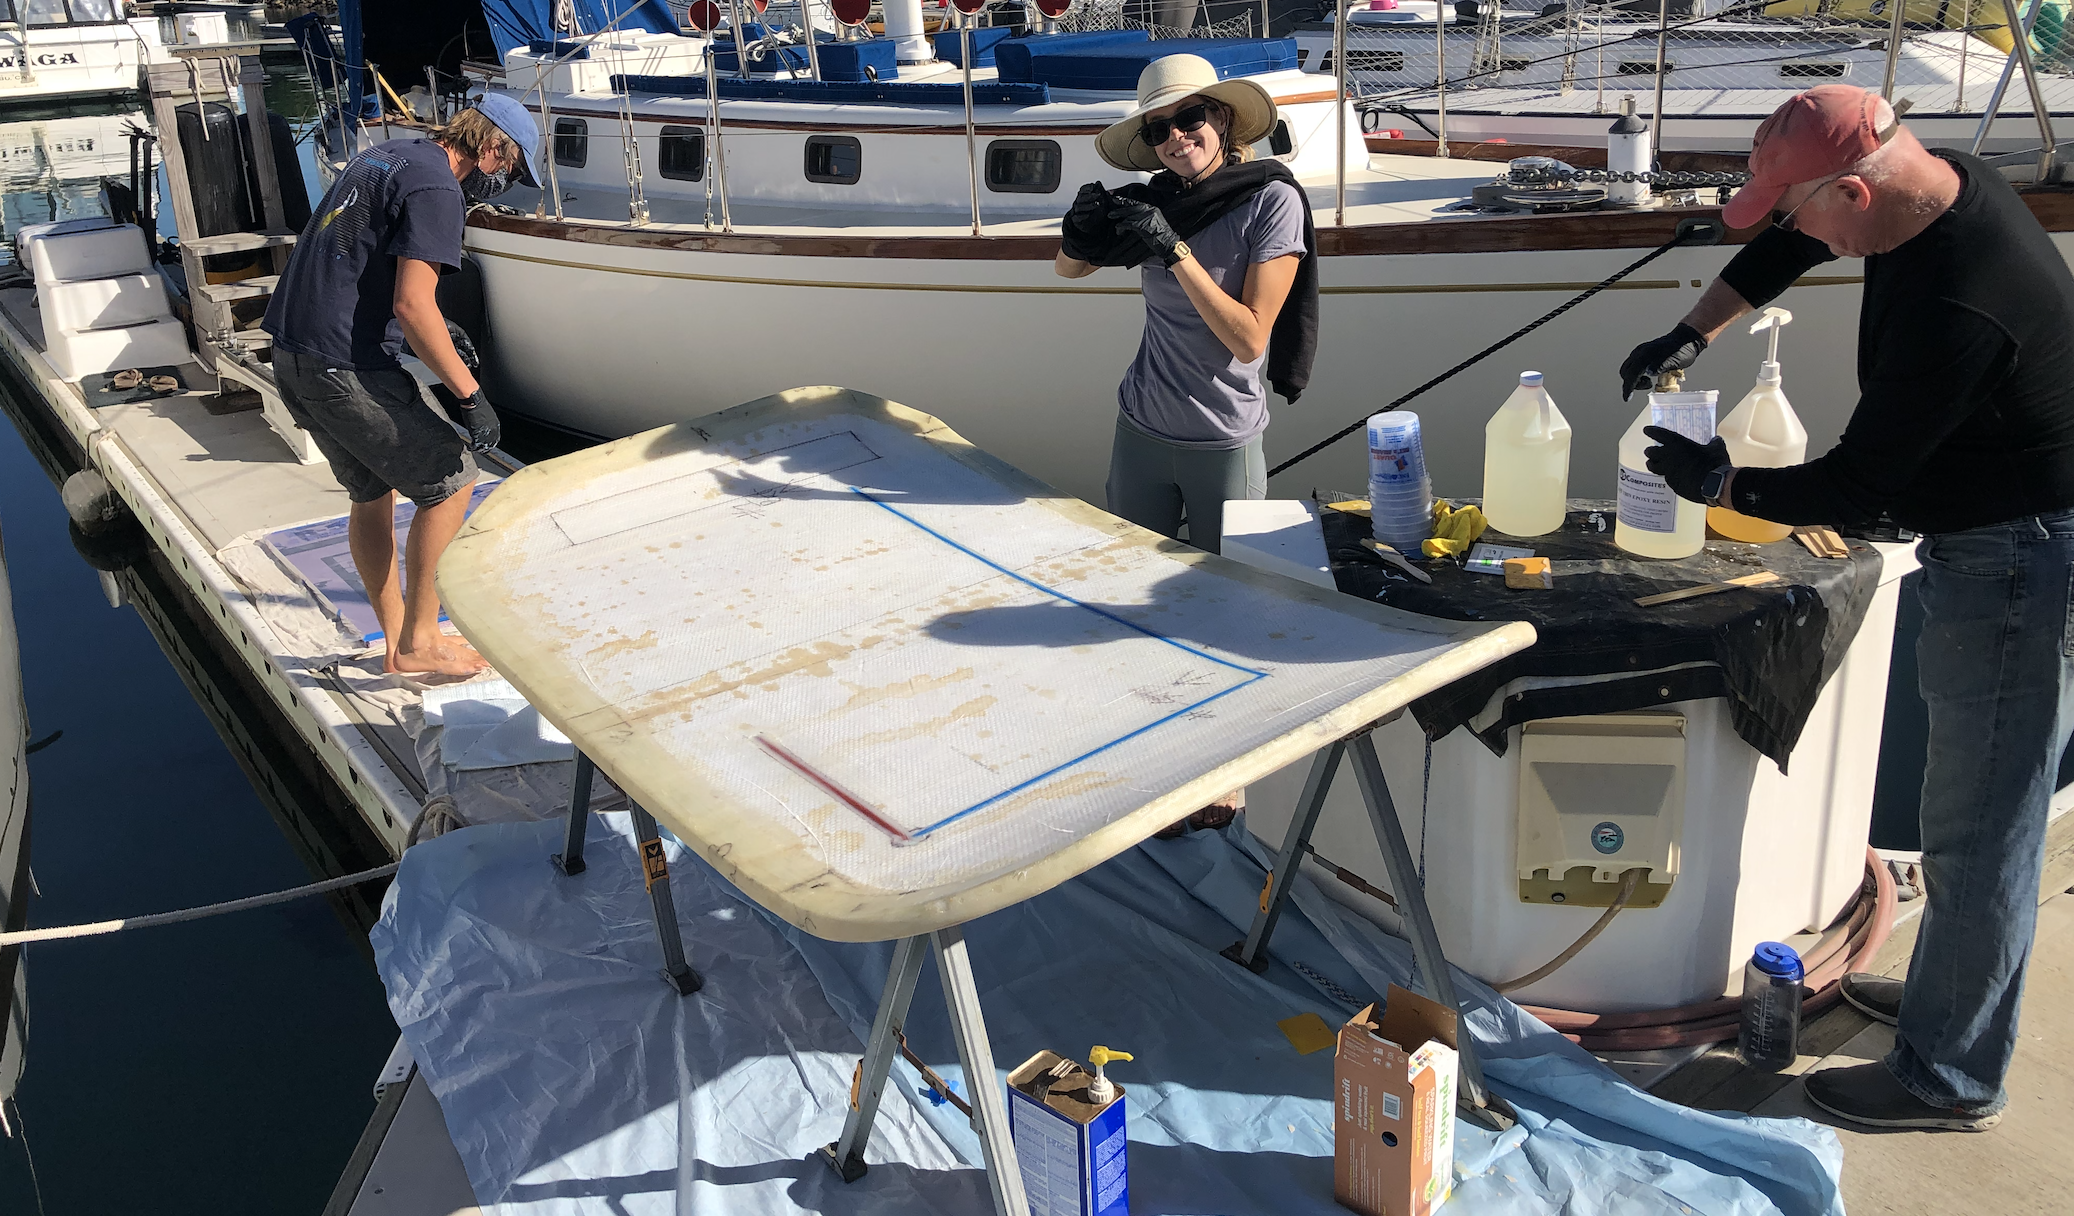
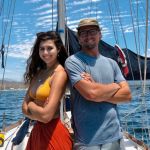
- The lady Captains; PC: Mitch
-
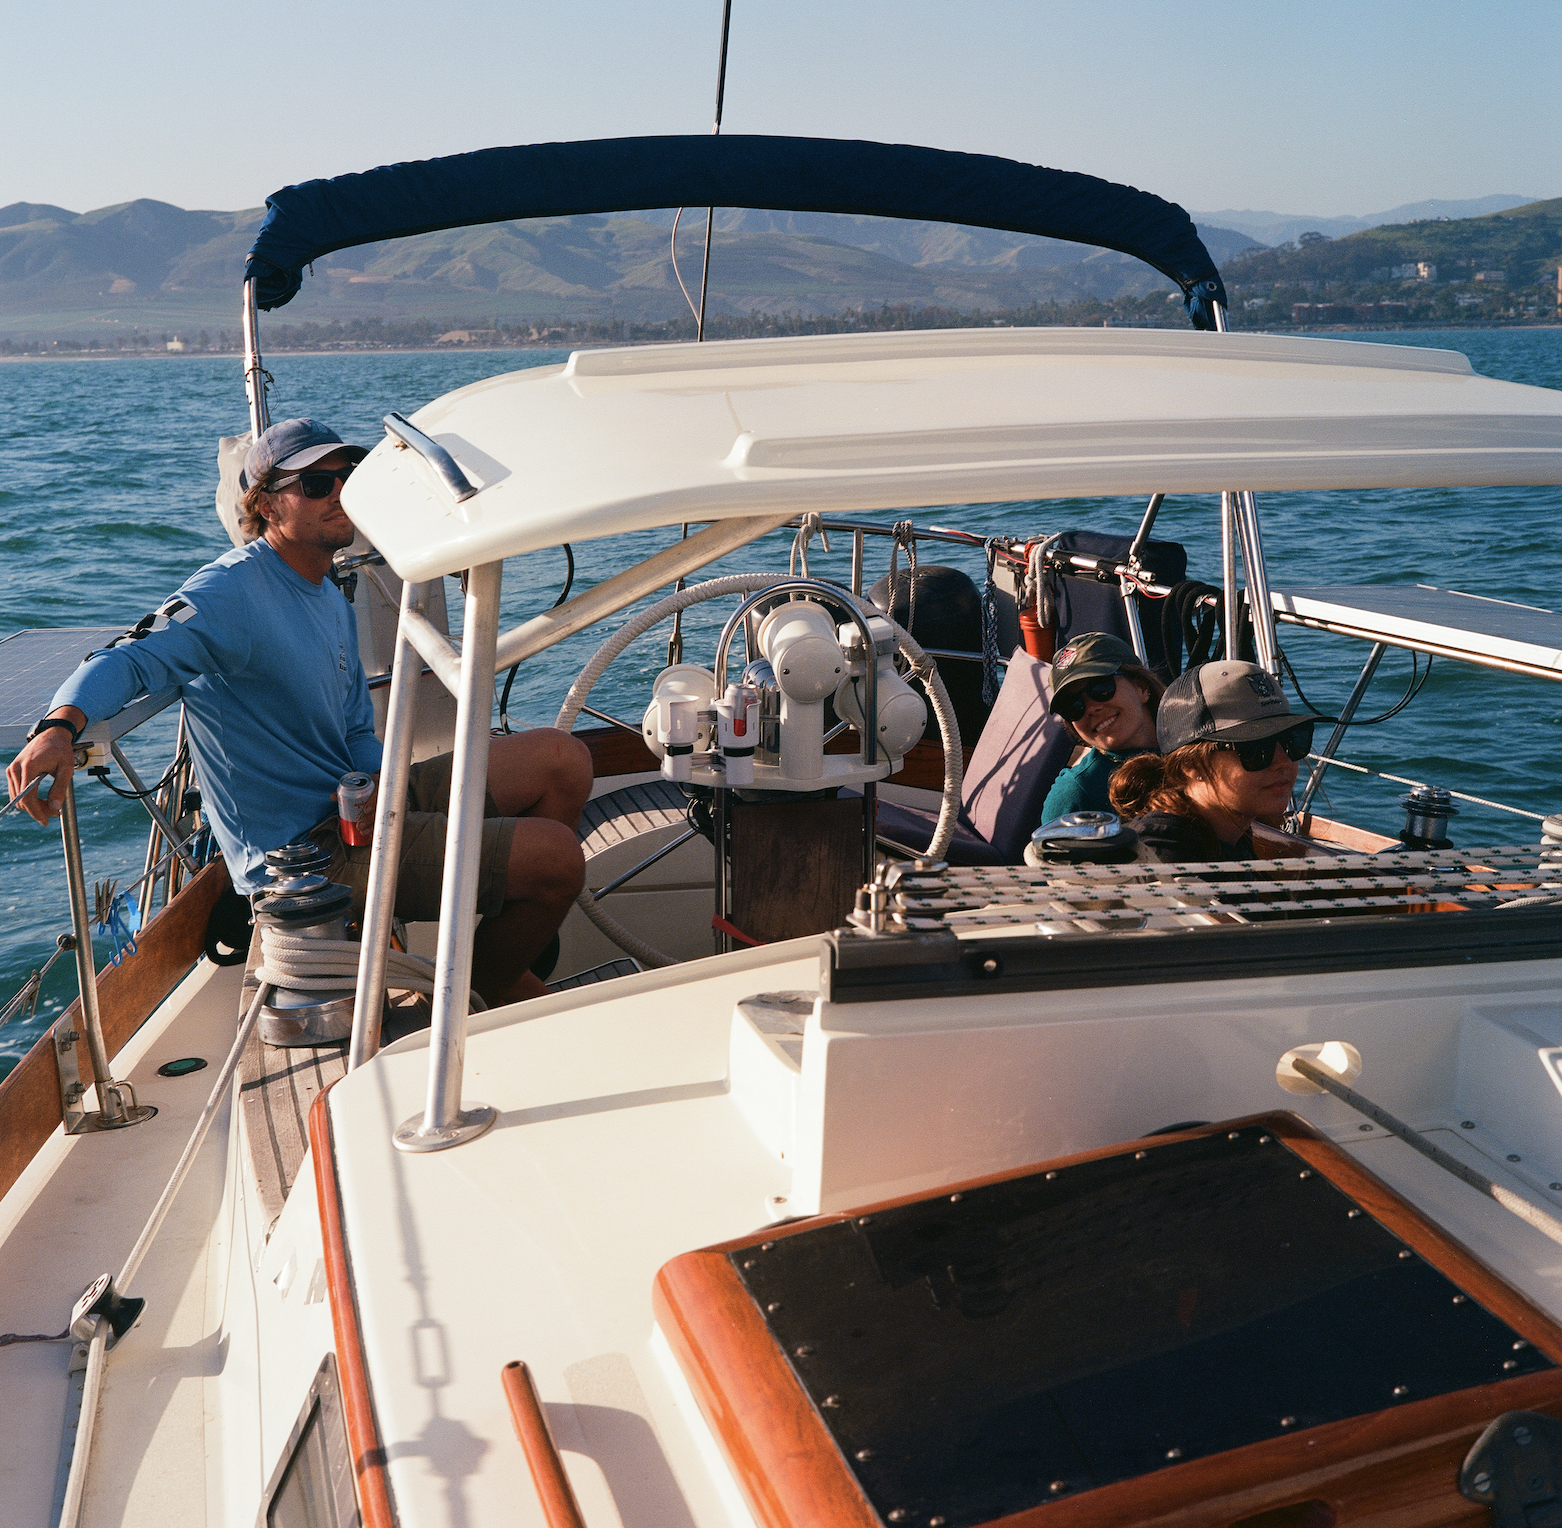
- The dodger sans canvas PC: Mitch
Sewing the Sides
It’s always nice to have friends that are experienced with things that we aren’t. For instance, Mitch’s mother is a talented seamstress and taught him a lot about sewing but his own experience working for a canvas company solidified his skills that he could then teach to us. With his guidance we felt confident in taking on this critical part of our dodger creation and jumped right in to get the job done. The first thing the boys did was measure the distance from the starboard corner all the way around to the port corner, which provided them the necessary measurements to order the correct amount of Navy Blue Sunbrella, tuffak for the windows, and eight YKK #10 finished zippers.
With materials in hand Mitch offered a technique that was new to us, where you don’t use a canvex template and instead stretch the canvas out over where the finished product will be, using pins to form the shape and hold it all in place for sewing. Although this worked well for the front panel, the complex curves of the two side panels proved to be too difficult for the boys to manage with the sunbrella, so resorted to using some canvex that was graciously gifted to us by the ValHowell crew. Canvex is great for this type of canvas work because it is easy to bend and can be cut as many times as you want in order to make the perfect template before taking the cuts to your expensive canvas. After a day of trial and error, Chris had the templates needed to make the cuts in the Sunbrella that would become our dodger.
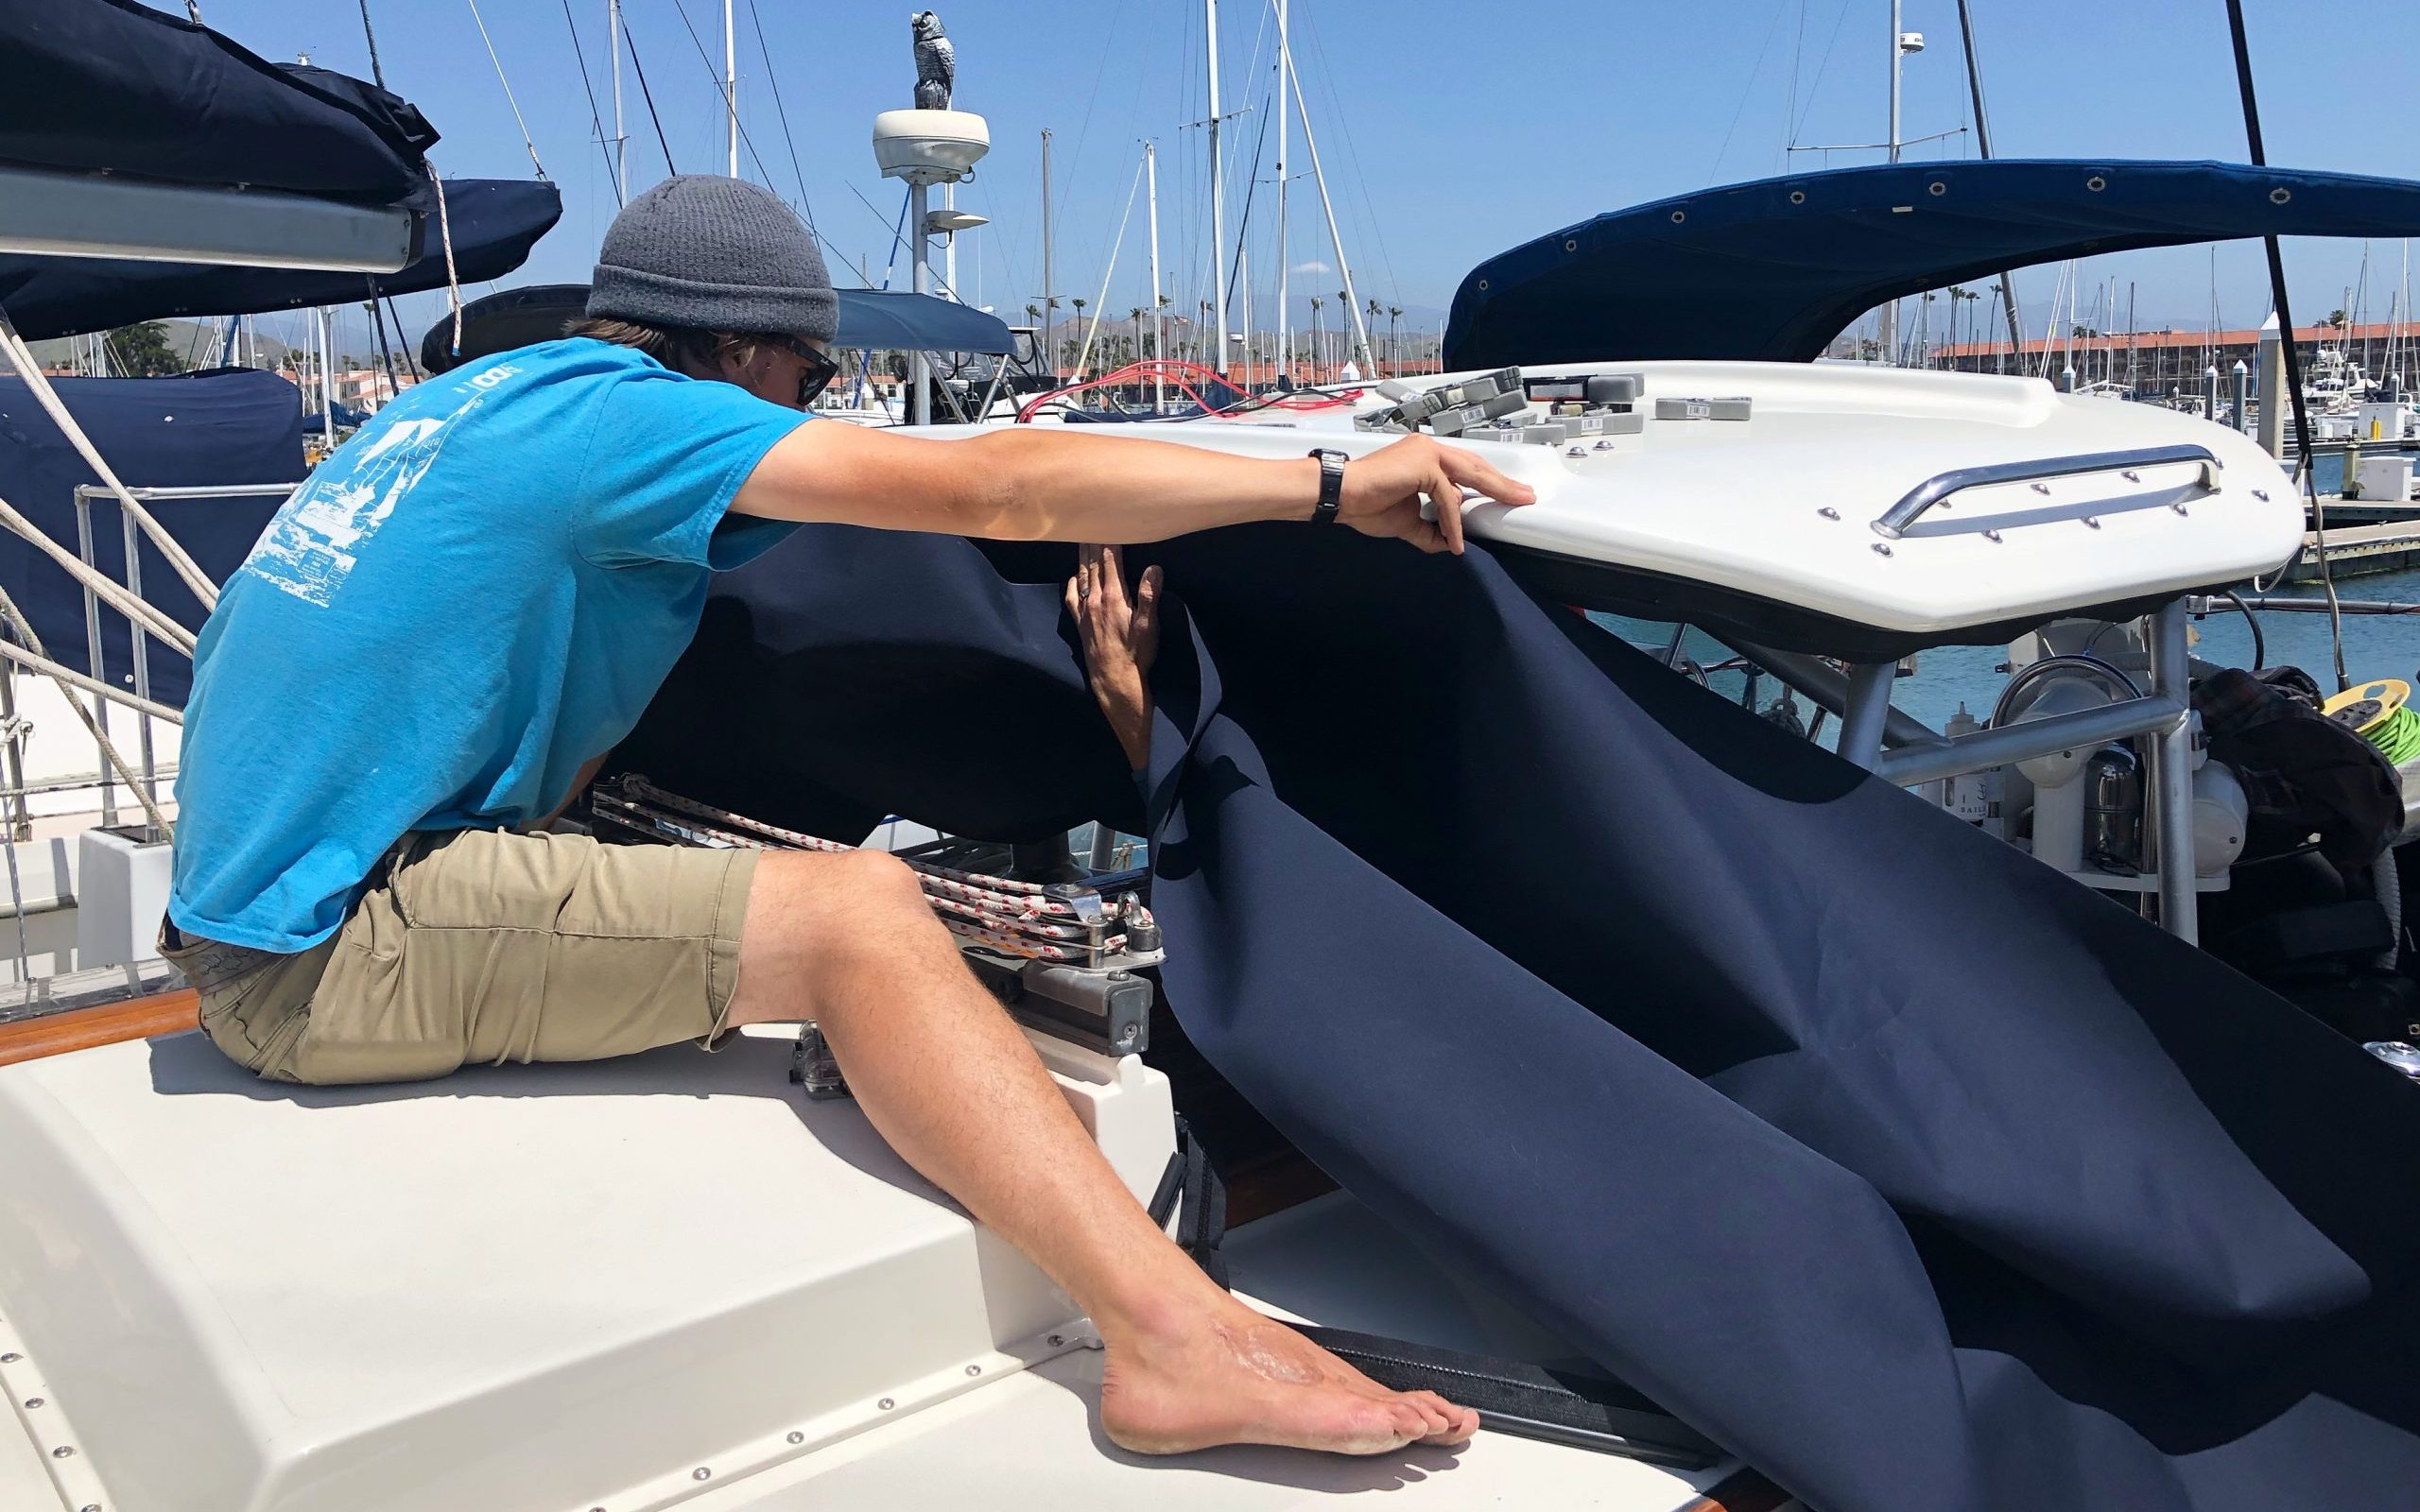
Trying Mitch’s technique
The following day Chris found himself in the ValHowell “sail loft” which is our friends’ storage unit that has essentially been transformed into a sail maker’s paradise. With plenty of room to lay out materials, sew, and take measurements this part of the project went by like a breeze. Living aboard a sailboat is great, but sometimes you just need a little more space! Using Lifetime Thread by SailRite he had sewed the binding, chafe protection and some zippers, leaving the three panels ready to be test fit.
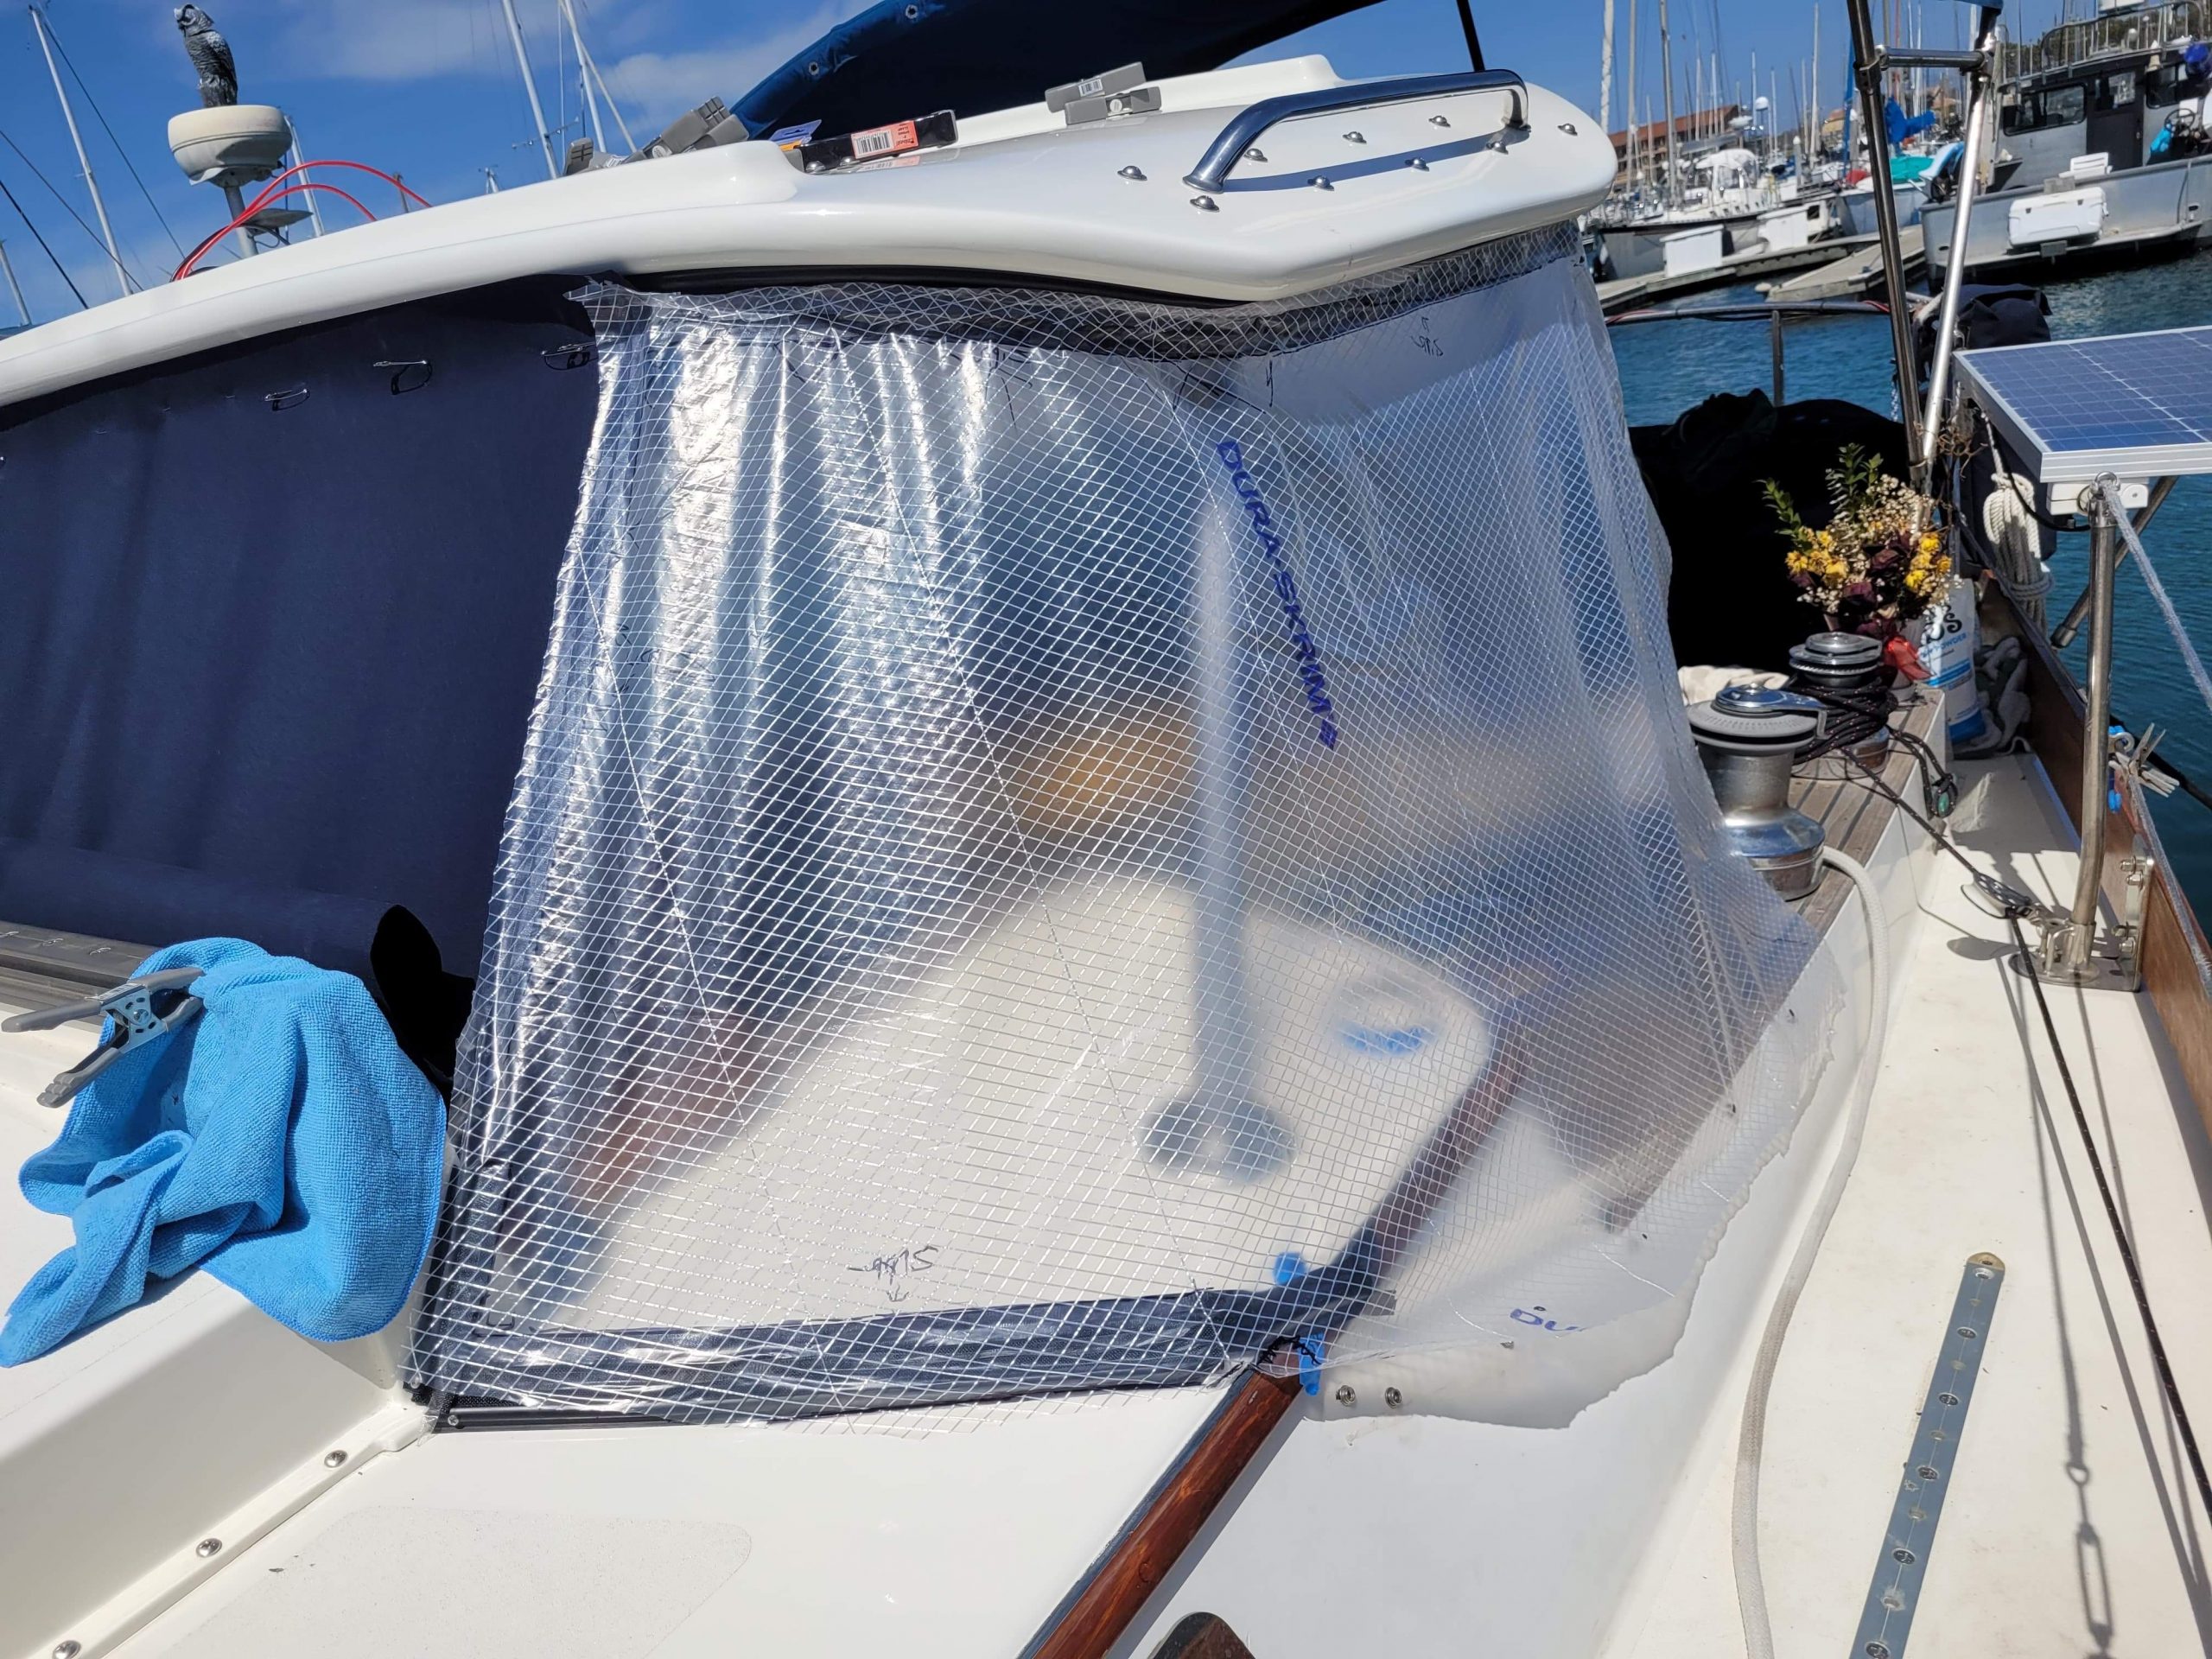
Making the Canvex templates
Everything fit as it should with the exception of a few minor adjustments such as tightening the front panel and recutting where the side panels meet the front to affix the lateral zippers. Back in the sail loft Chris busted out these updates, installing the remaining two zippers then sewed the tuffak windows into place before cutting out the canvas. The tuffak material comes with a plastic protective sheet exactly for this purpose so you don’t accidentally scratch the final surface while sewing. This is when the project really came together, seeing the navy blue canvas attached to the dodger was like the icing on a cake – but we were still missing the cherry.
Let There Be Solar!
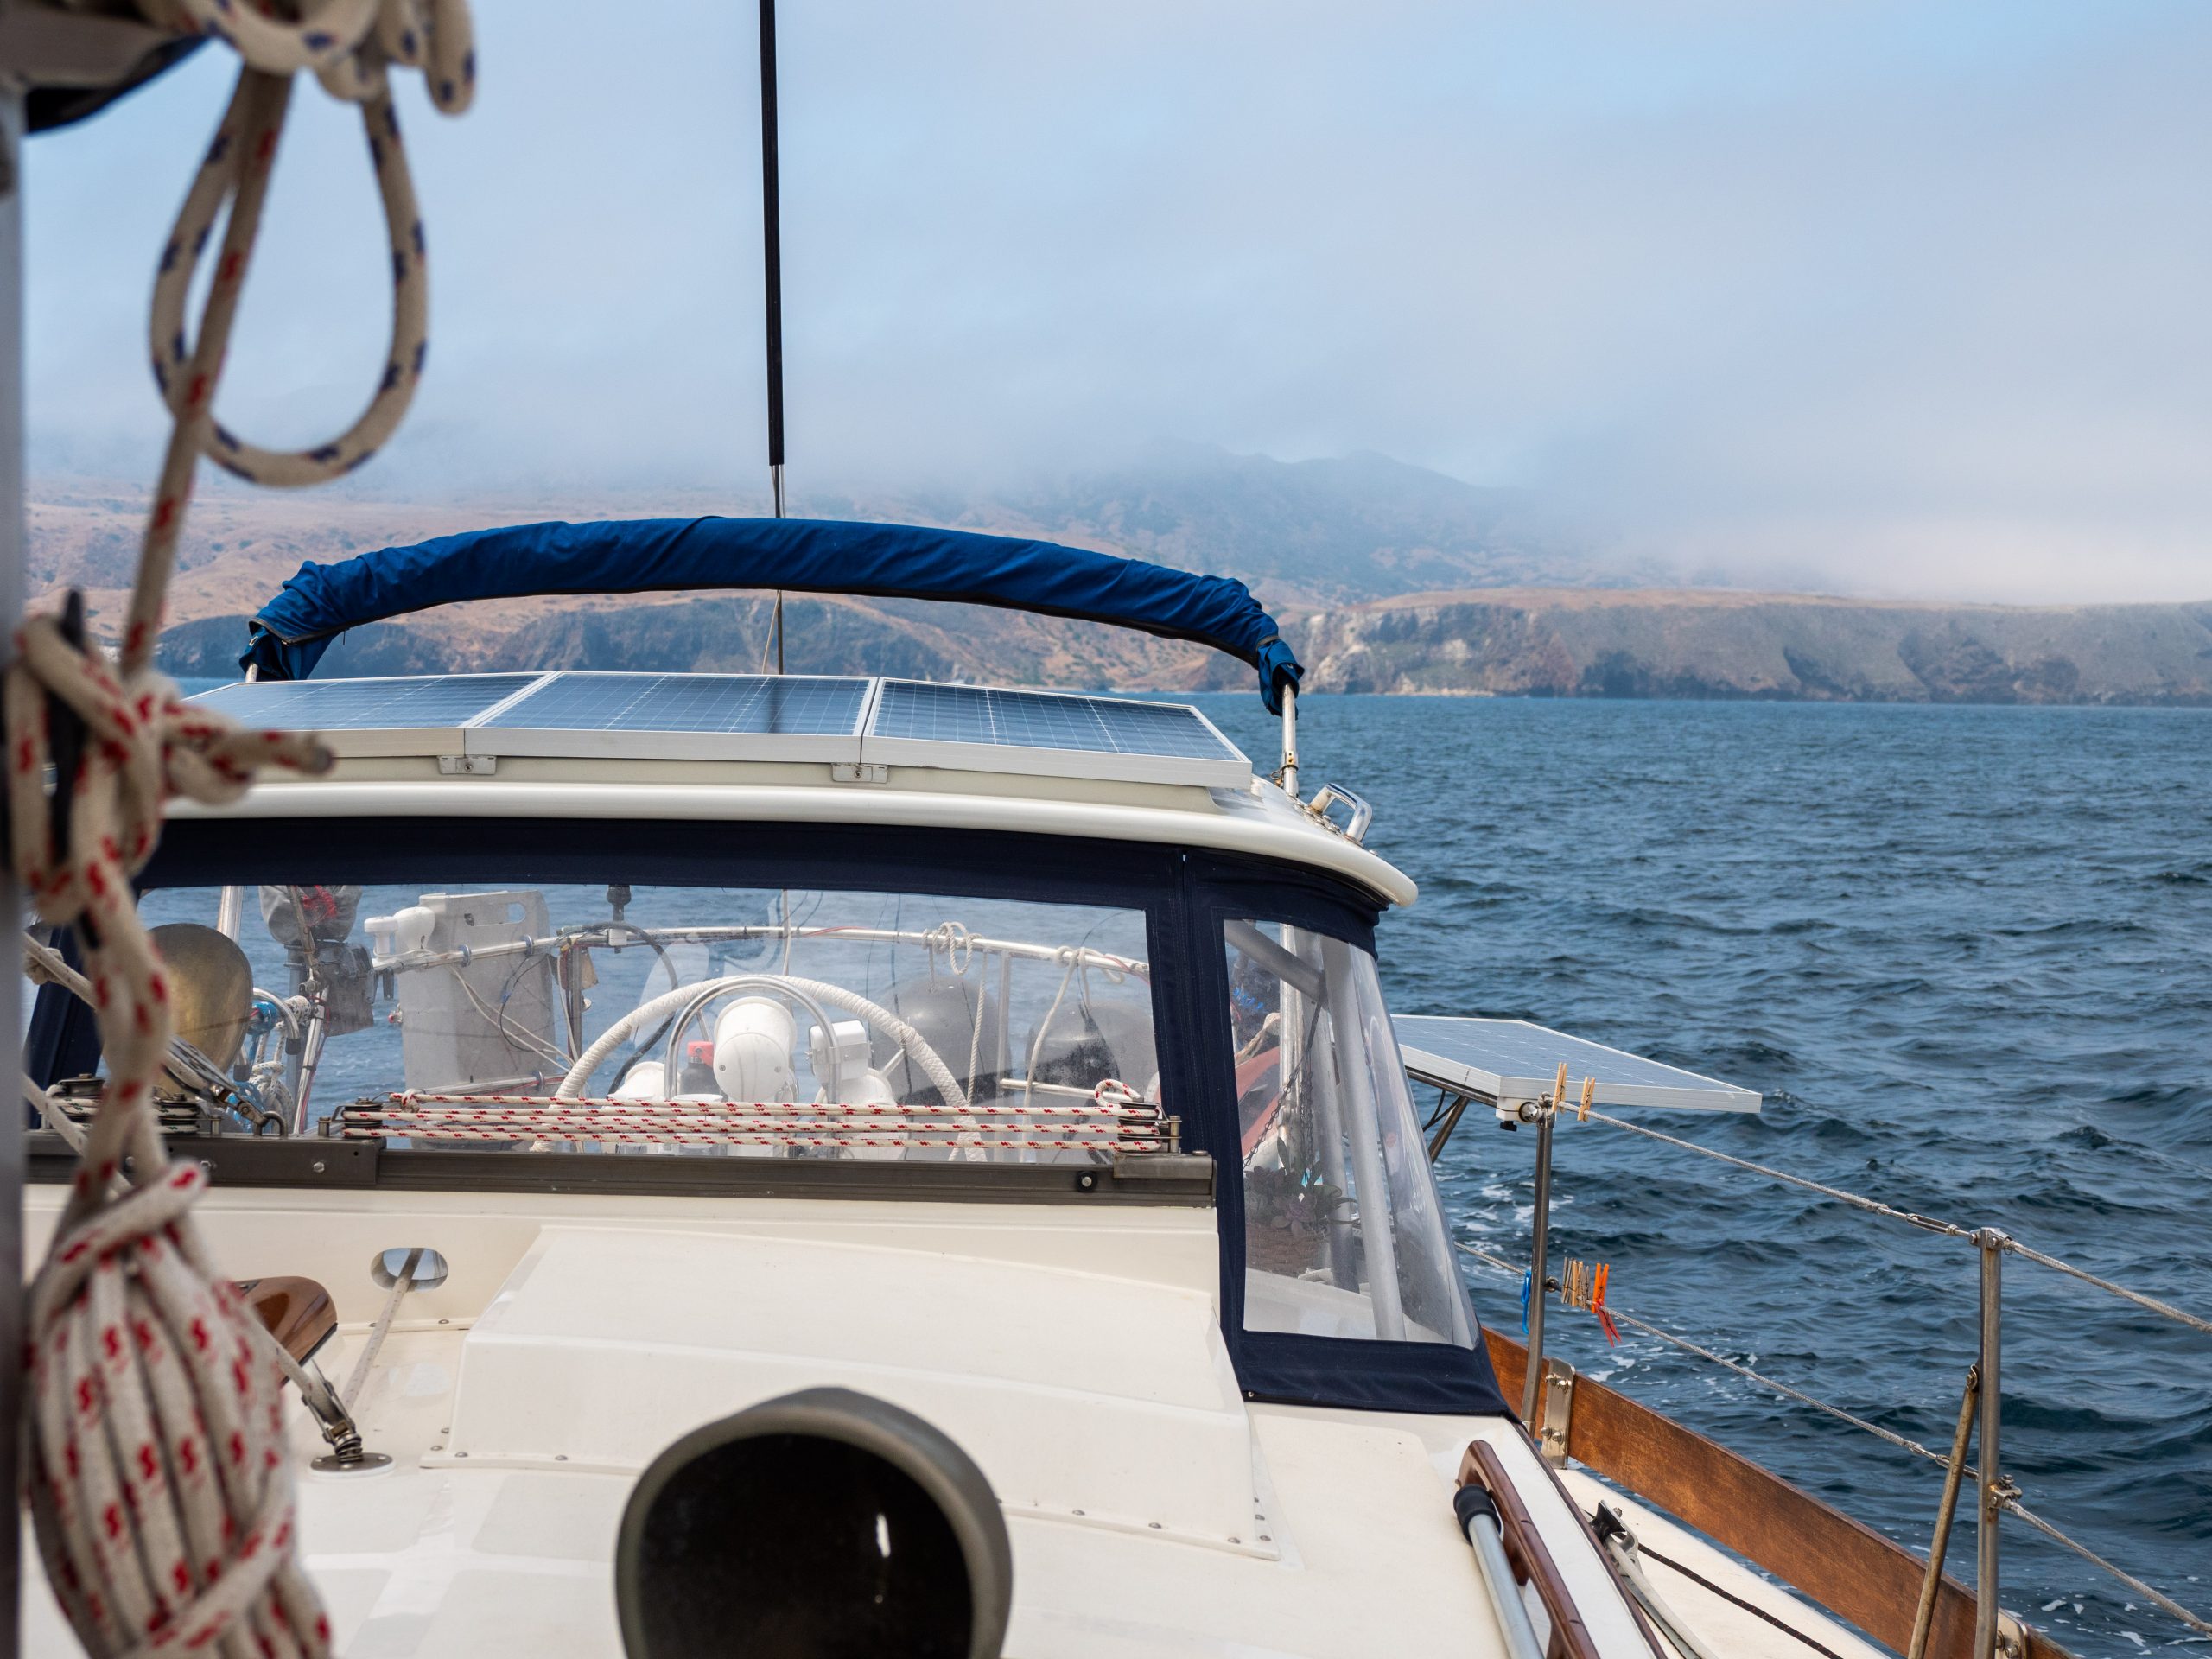
The dodger was nearly done with all of the structural, aesthetic and protective bits in place, but we still needed to install our solar panels on top so we could start farming the sunshine. We had been holding onto two Renogy compact 100 watt panels for a year or so, just waiting for the right moment to purposely install them aboard Avocet. Realizing we had room for an additional panel, we relocated one of the panels that was affixed to the side of the cockpit to sit beside the other two on top of the dodger. Now equipped with 300 watts of power potential on just the dodger, our lithium batteries were well fed and ready for cruising.
Mounting the panels to the stringers was simple after drilling four small holes to accommodate ¼” G10 tubing and 3/32 pins. By securing the panels with pins, we could remove them easily for cleaning or replacing.
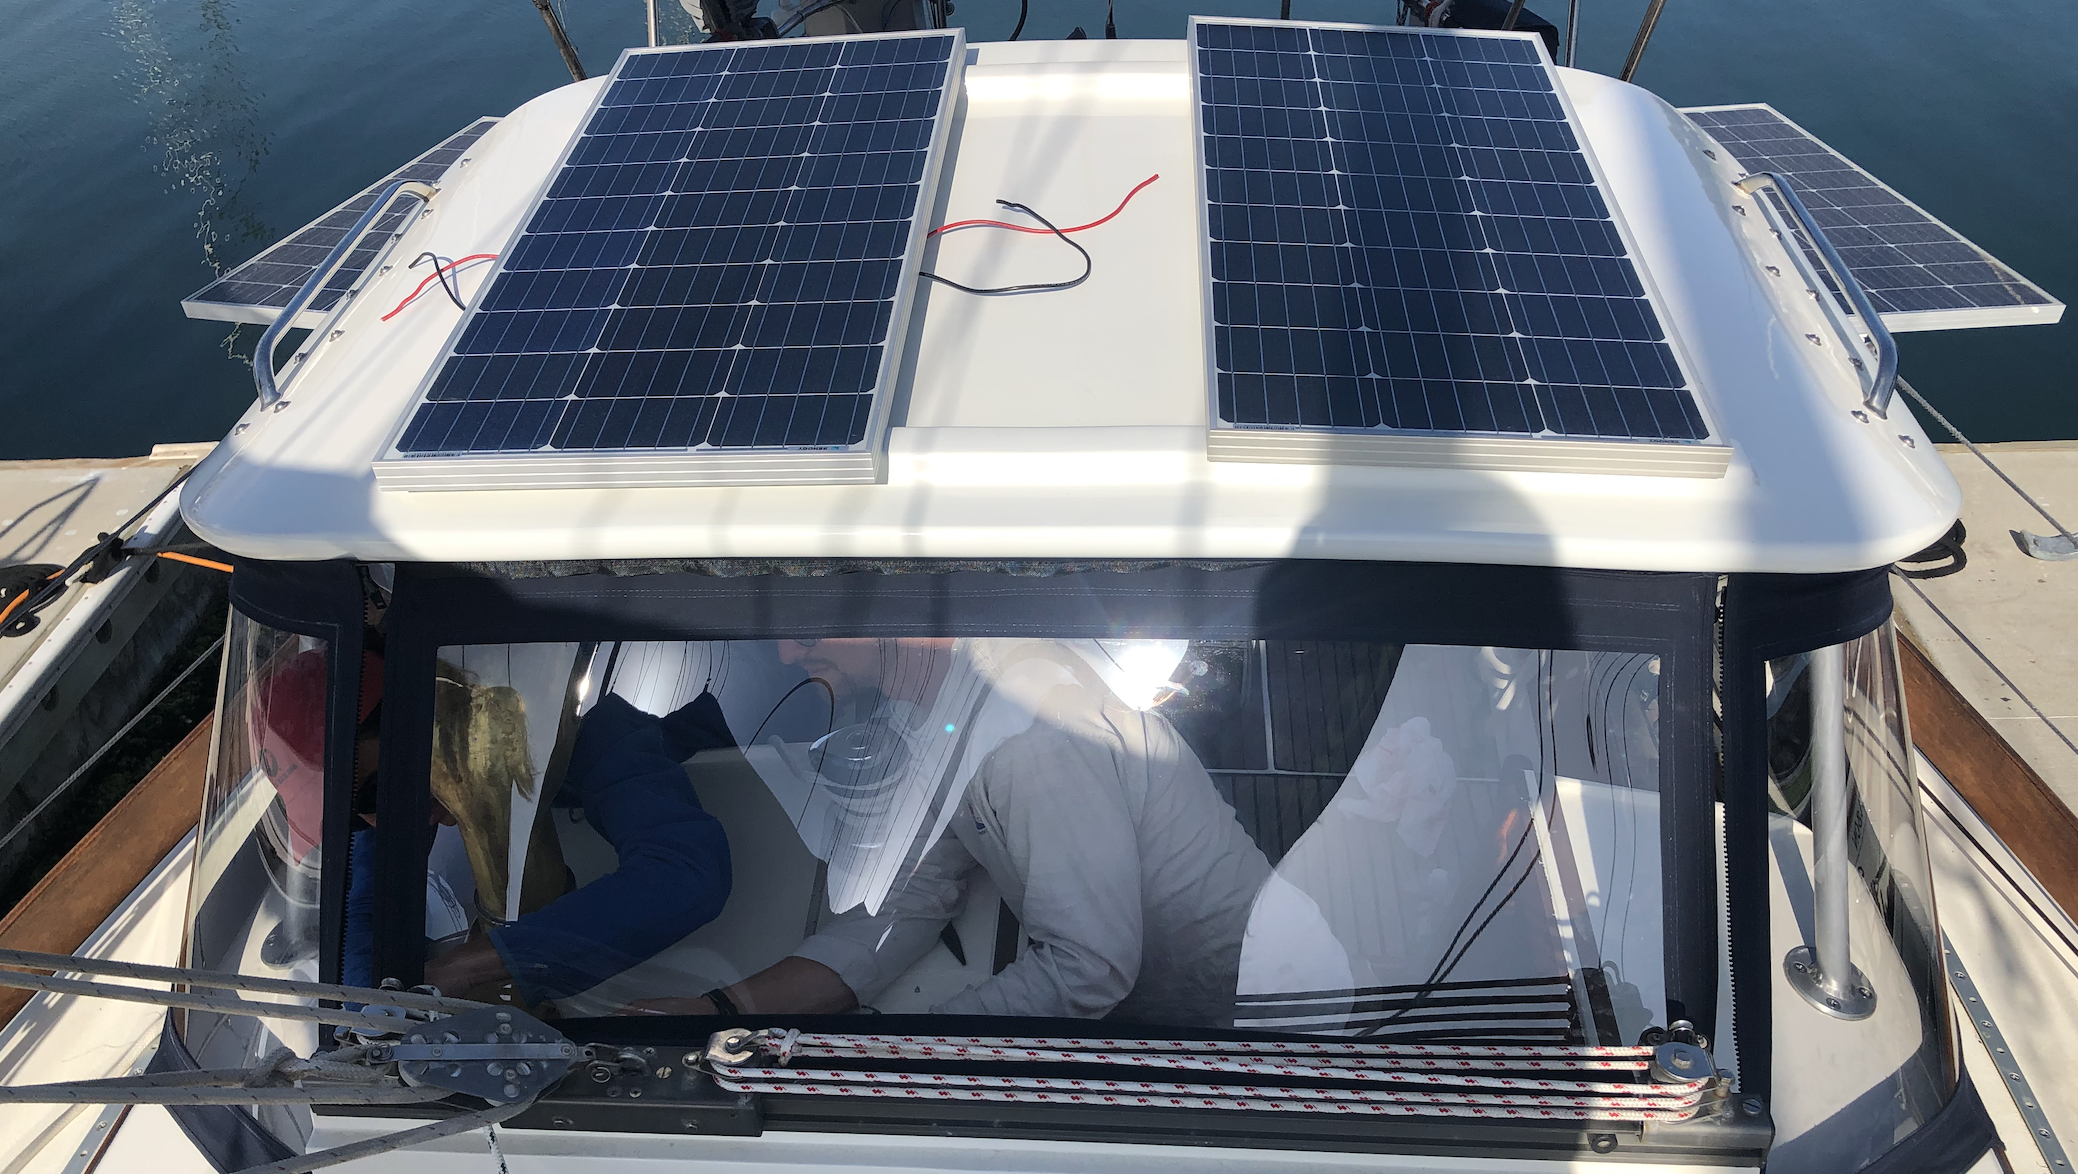
Before we installed the panels
Dodge, Dip, Dive, Dodger – Closing Thoughts
This project combined a lot of DIY elements like FRP, metal work and sewing making it a well rounded project. Although we had a lot of the necessary skills under our belt to execute this project on our own, it would have taken longer or perhaps included more trials and errors without the foresight and guidance of our friends. We would like to formally thank Mitch, Quincey, Alan and Elizabeth for their extra set of hands and sewing advice; Ryan the “Metal God” for once again working his magic; and last but certainly not least our friend Dale at the Ventura Harbor Boat Yard for the last minute accommodations and paint services. Chris and I are so grateful to have had so many hands involved in the history of Avocet’s project list and can’t wait to make all the hard work, sweat, blood, and tears pay off soon. Speaking of “pay” here is the rough project cost breakdown:
Fiberglass, Core, Resin and Notions: $1,000
Metal Work: $2,000 (for materials and Ryan’s time)
Paint and Labor: $300
Canva, Thread, Zippers, and Tuffak: $500
………………………………………Total: $3,800
After asking around we learned that had we commissioned this to be built at a yard it would have cost anywhere from $10,000 – $15,000!
Funny enough, we were doing multiple projects at the same time we were building this dodger. During the natural project lulls (like while waiting for epoxy to cure) we busted out refinishing our decks with soft sand and refinishing our cabin sole. There is never a dull moment here and I am sure we will be sharing those project details sooner than later but until then…
Fair Winds,
Marissa, Chris and Cleo the cat
Don’t forget about the YouTube video!


Howdy – great article! I’m about to launch 8th this same project on my 28ft BCC Calypso. So far I’m planning on 1/2” Coosa core and 2 layers or 17 oz biax on either side. A couple questions: how did you finish the edges of your hardtop? Did you just put a few layers of tape there or use so prefab g10 edge material? Also tell me about the handles you installed. Where those off the shelf or custom fab? Thanks! Jeremy
Hey Jeremy,
Coosa is great, 4 layers of 17 biaxle should be enough, we used 1708 so it has a little more thickness and stiffness due to the Matt on the backside. For the edges I laid a lot of thickened epoxy to round over the hard 90 degree angles then used 3 layers of 20 oz cloth overtop. This stiffened up the top dramatically.
The Handrails I bought off fisheries supply: https://www.fisheriessupply.com/sea-dog-line-stud-mount-flanged-grab-rail However the studs weren’t long enough to go through the 1 1/4″, 1/4″ g10, and 1/4″ aluminum so we tis welded longer studs on. You should be fine with your 1/2″ core.
Let me know if there’s anything else I can help with. Great GOB article by the way!
Coosa is a pretty “hard” core. So far, I’ve just bullnosed it (the core) and will probably just glass right over that. We’ll see.
Thanks re GOB. It fills my heart to see her on the cover! And I take no credit for the writing – that’s all Nica.
Another question: how did you choose to affix the canvas to the underside of the hardtop? Did you use an aluminum extrusion like this (https://www.sailrite.com/Awning-Track-Aluminum-96)?
Cheers,
Jeremy