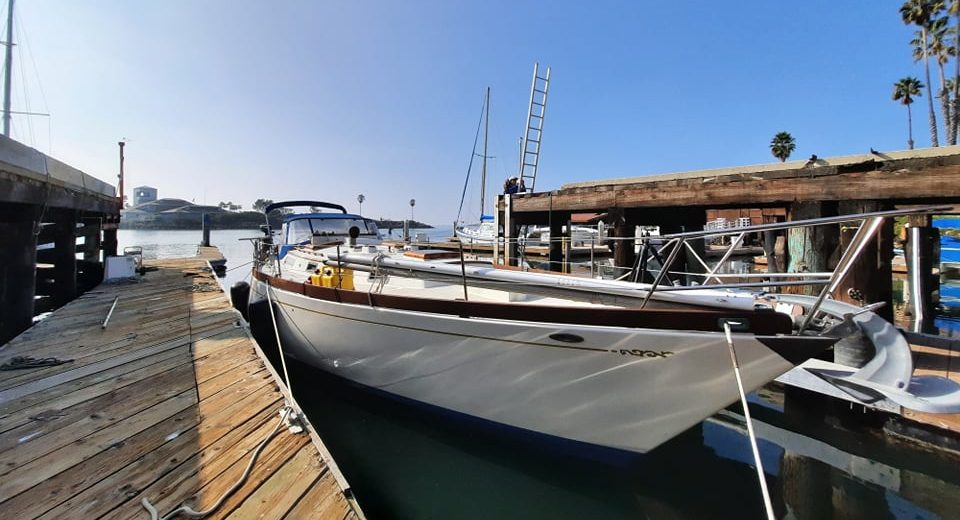
Since 2018 Chris and I have worked hard to reinforce the structural integrity of our boat while also adding our own personal flair.
Through every refit we have become more familiar with Avocet’s design and layup, touching nearly every inch of the boat in the process. While the major projects have ultimately come to a near end we have been making time to address the smaller yet equally important projects, budgeting our time wisely. With that said there was one final piece of Avocet that was left untouched by us and we finally had the time to address it – “it” being our mast.
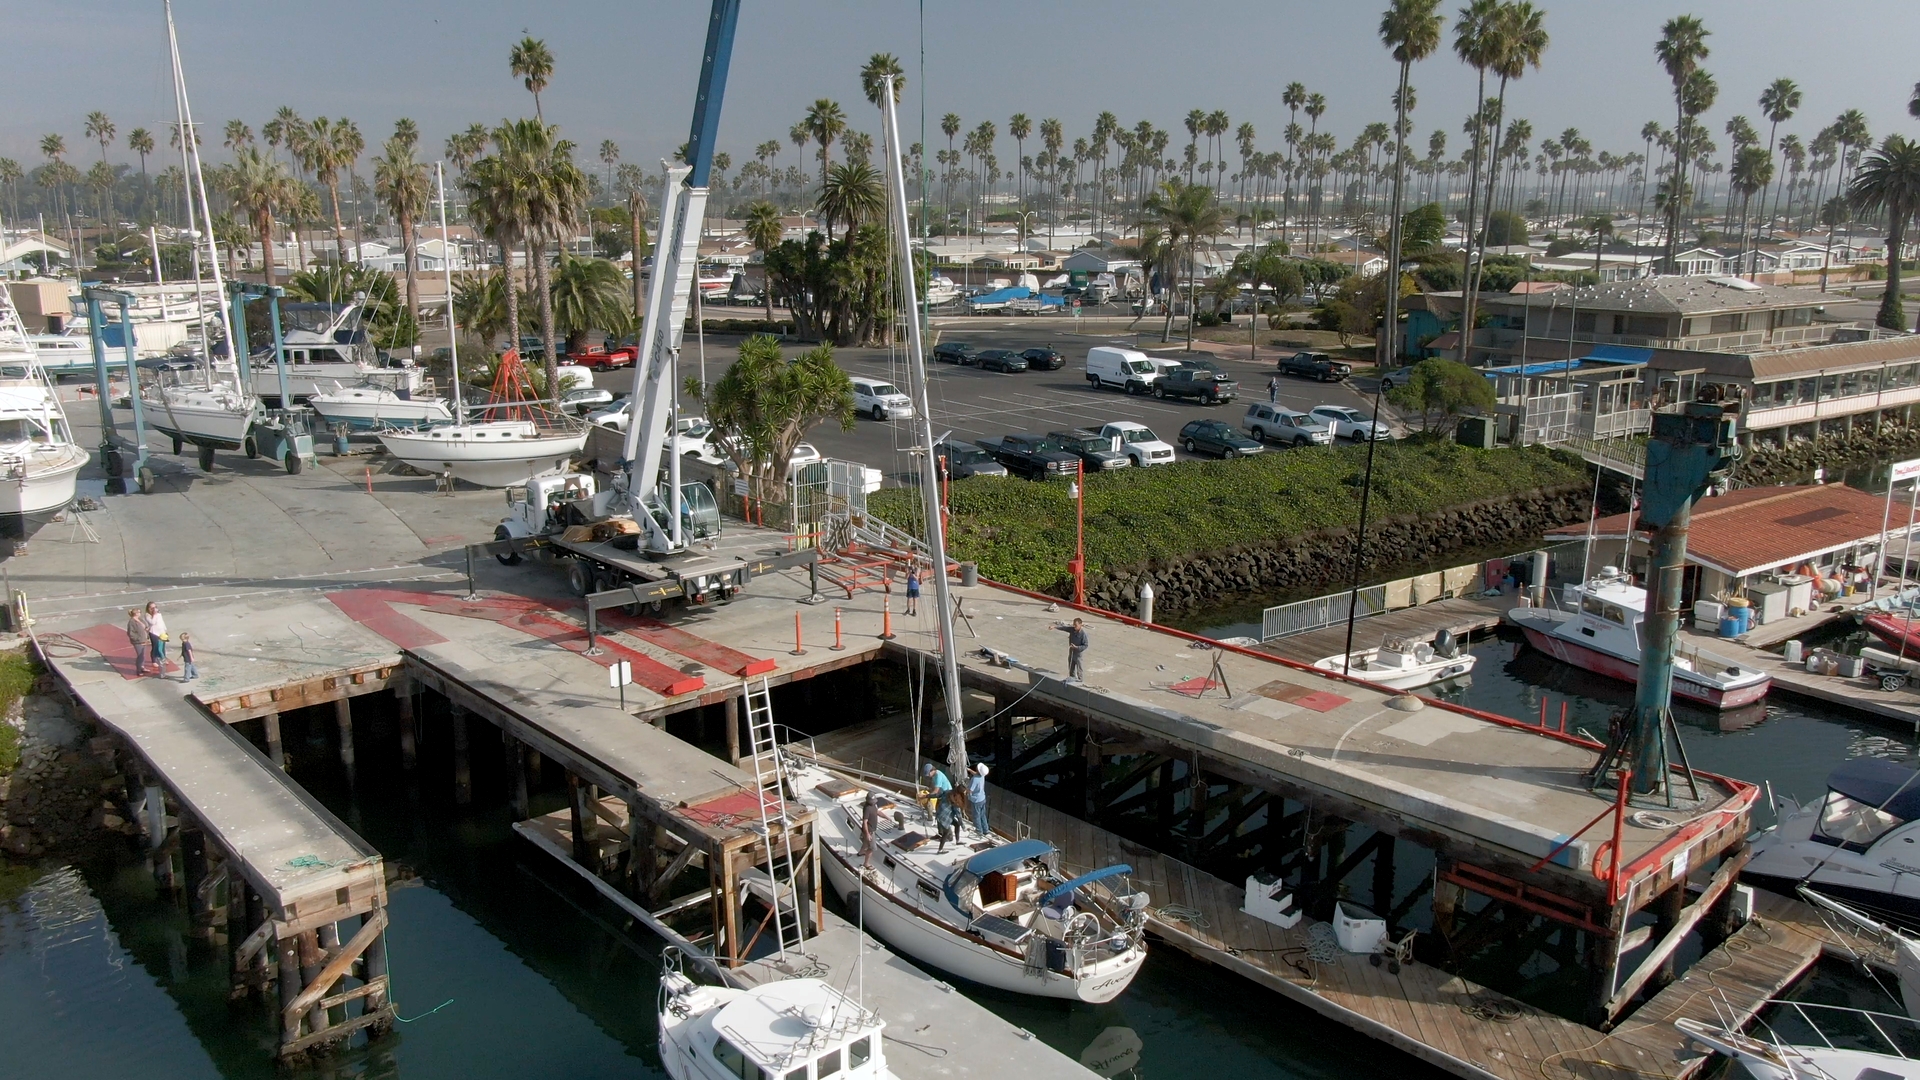
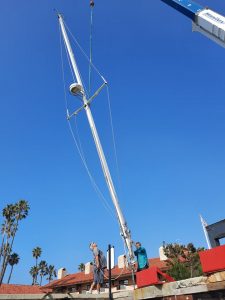 Nervous energy sat in my stomach like a rock as I watched Avocet pull into the boat yards slipway where boats are plucked from the water for their yard stay. Even though Avocet would remain afloat while only her mast would be checking into the yard, it is still somewhat unnerving to see your home beneath heavy machinery and to put your trust in the operators that all would go according to plan. Maybe we shouldn’t have varnished those hatches yet I thought as the yard crew walked around the deck and the cabin top with their steel toe boots. All I could do was clutch the camera and watch from the platform above, praying to Poseidon that it would be a smooth operation. “Good morning Marissa,” our friend Audie said from the crane. Having a familiar face be responsible for removing a vital piece of our boat brought a bit of comfort to my anxious brain.
I stood above on the launch platform beside the crane watching Chris and our friend Mitch work alongside the yard crew to secure the mast. After a few convincing swings of a rubber mallet our mast was free and Avocet became nothing more than an inefficient power boat. “Now is where the fun begins,” Chris said with an eager twinkle in his eye. With the mast safely tucked away in a corner of the yard and the boat back in her slip, I left Chris to remove the rigging alongside our friends while I returned to work to help fund this endeavor. In the few hours that were left that day, Chris managed to completely dismantle the mast and prep for the work that would take place that week.
Day two – California Strikes Again!
 Considering our mast is 48’ tall, sanding the paint off was not a part of our to-do list but the universe (and the state of California) had other plans. In our past experience with paint and metal we have used Aircraft brand Paint Stripper, which is a chemical product designed to remove paint, finishes, and coatings from metal while also cleaning the underlying surface. Chris confidently applied the product like he had many times before using a chip brush and let it sit for 45 minutes as per the instructions. Despite following the instructions to a T he knew that it wasn’t working because usually the paint is falling off within the first 10 minutes. Upon further investigation we discovered that this failure was another example of how California’s High VOC ban was biting us in the @ss – the formula for the stripper had been chemically changed to abide by the state guidelines which resulted in a less efficient, essentially obsolete product. It was only day two in the yard and Chris was starting to feel frustrated that things were already drifting off course, but thanks to our trusty Bosch Orbital with 60 grit sandpaper the job would get done, one section at a time.
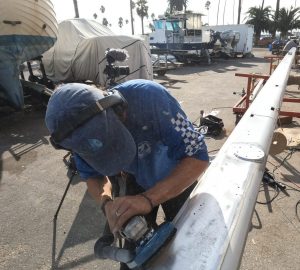
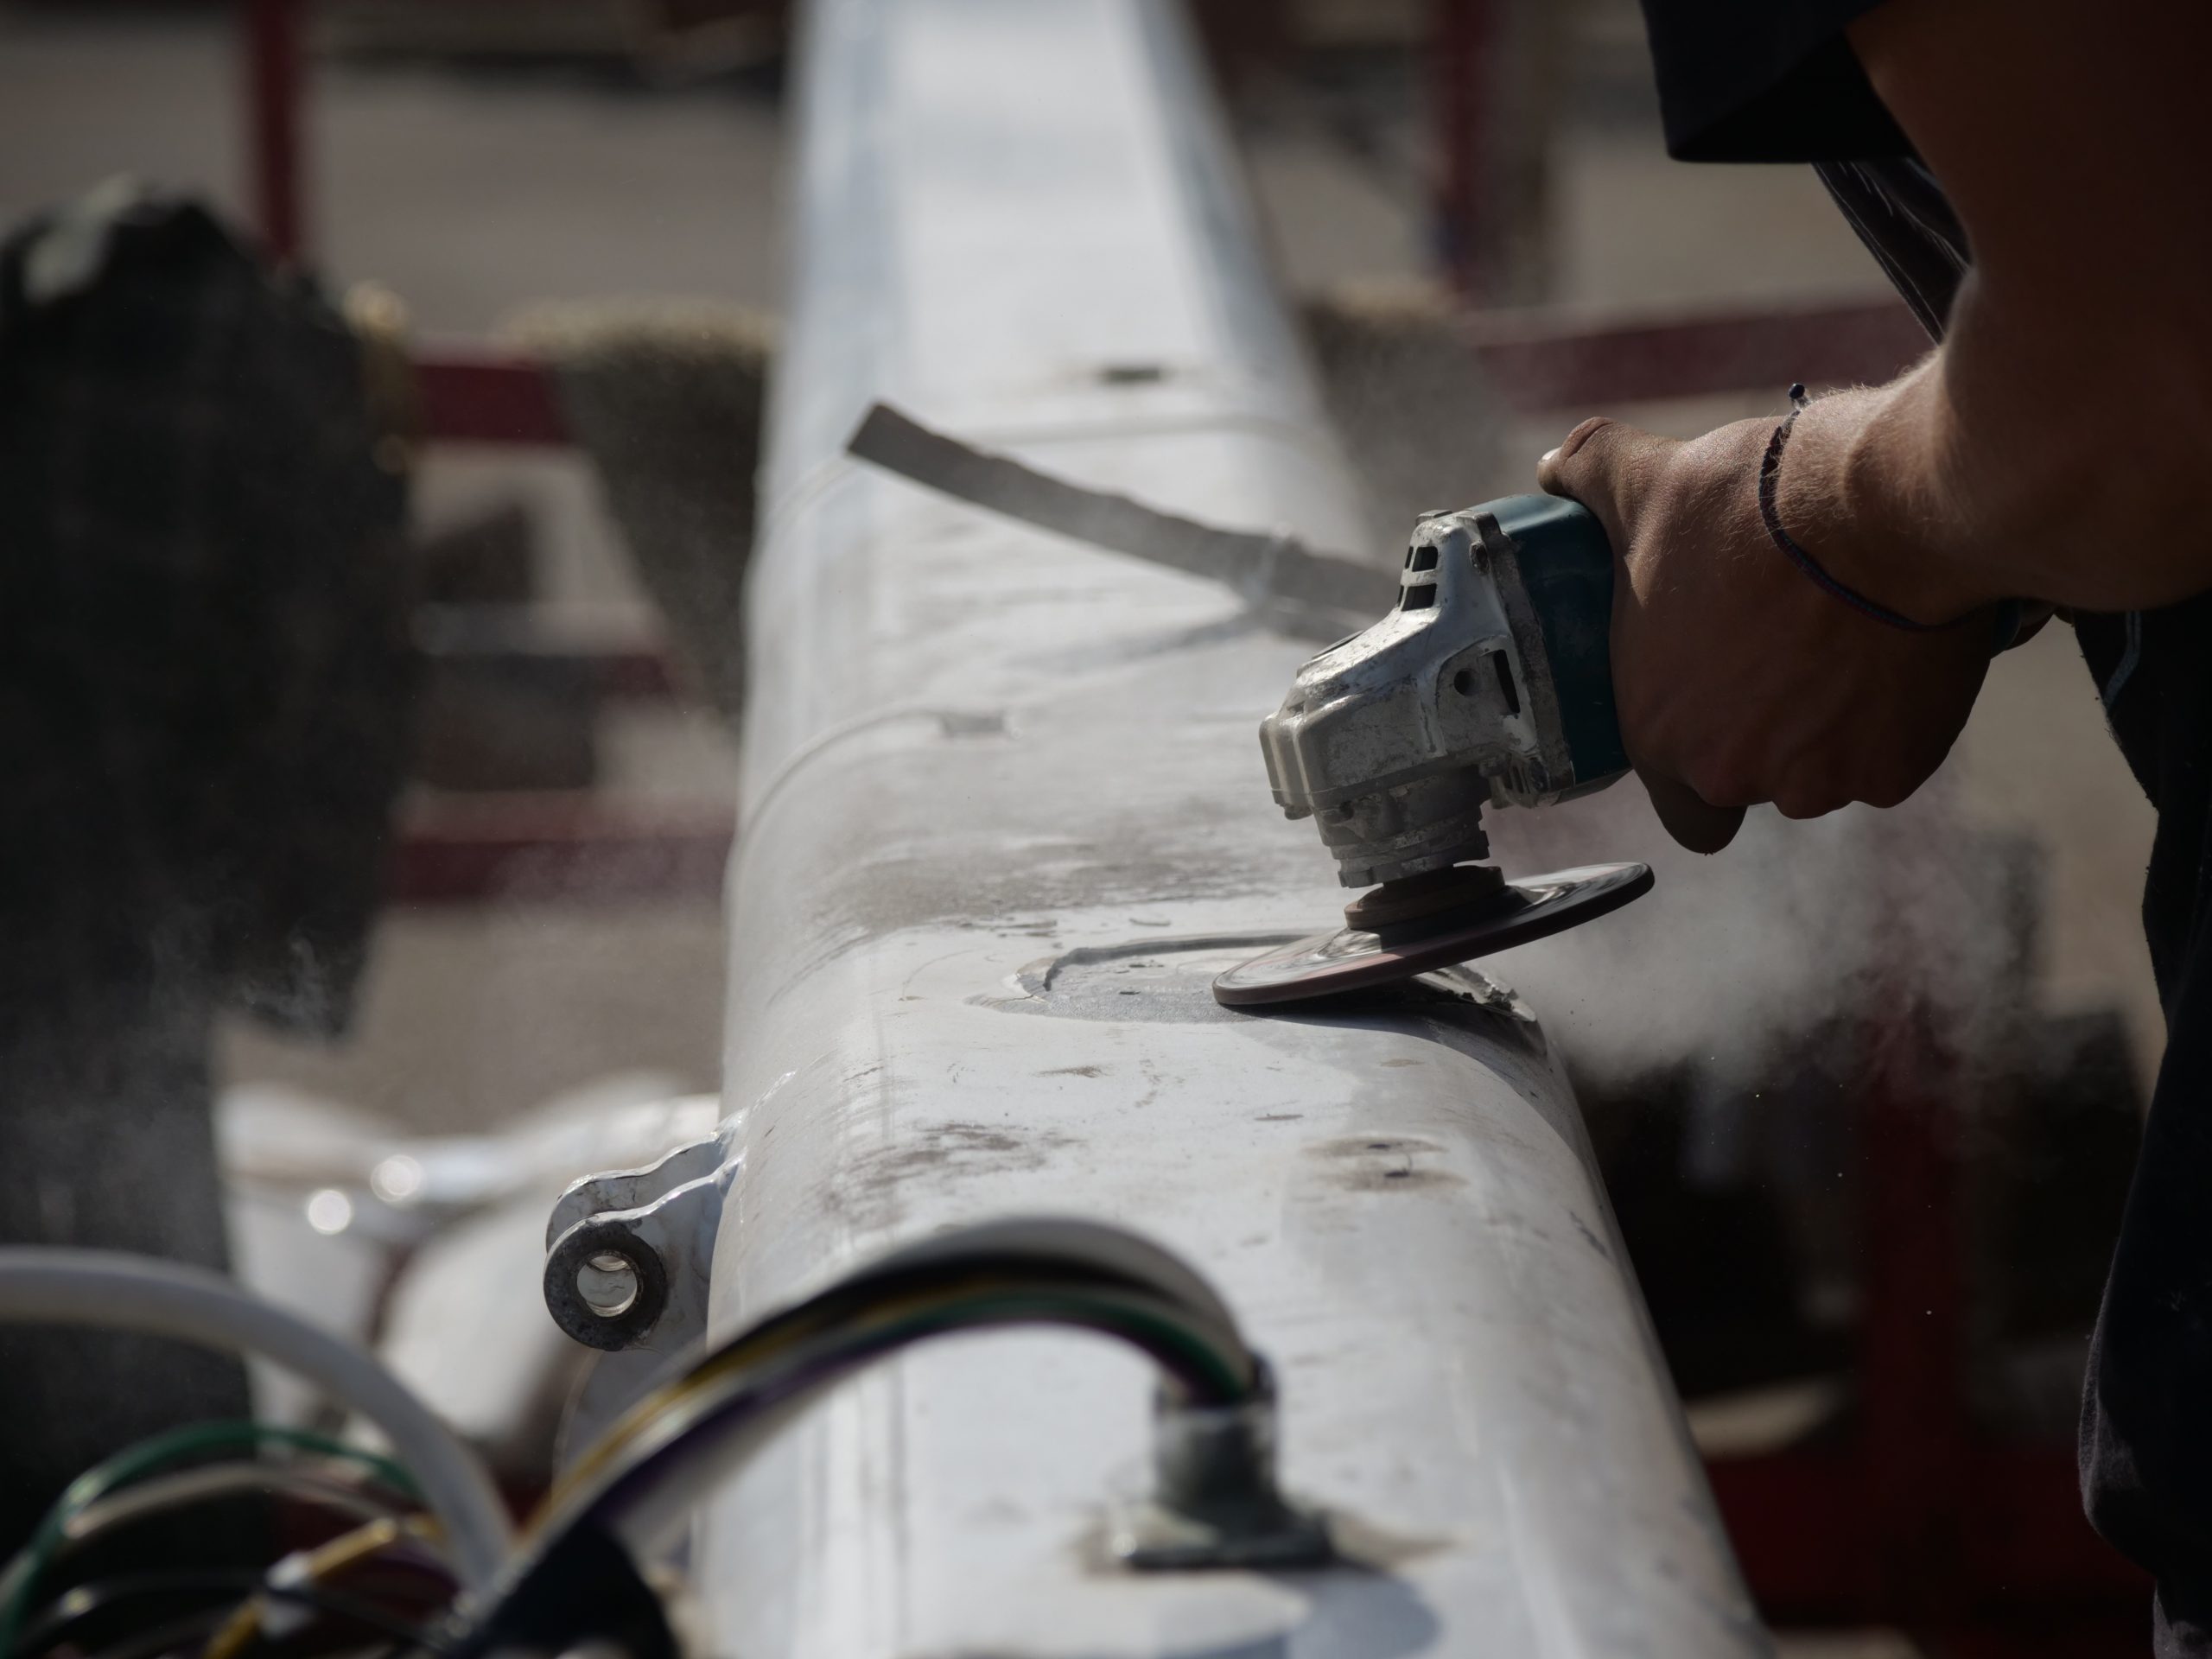
With the spreaders paint-free and sparkling Chris turned his attention to working on the mast. Armed with an angle grinder equipped a thin cut off disk he began to remove our old winch bases to make room for the new and improved bases (crafted by our friend Ryan) that would fit our new-to-us Barlow self tailing winches that we brought back from Annapolis. It took an hour or so to carefully remove all 3 winch bases and just as we suspected there was evidence of galvanic corrosion under them all, which we discovered was the case throughout the rest of the mast where stainless metal met aluminum.
-
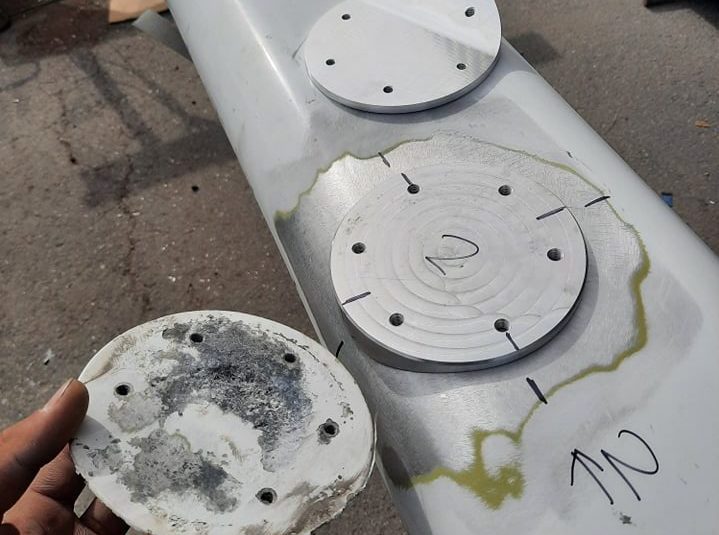
- Old winch base vs new

-
- Grinding our the welds
Once the winch bases were removed Chris used a grinder disk to smooth out the old welds so that there would be a fresh surface to weld the new bases on. We handed over the freshly prepped spaces for Derecktor’s welder, Jose, to work his magic and weld the new bases to the mast. It is worth noting that this was only the second time we have ever hired someone to do part of our project for us. Not only do the local boatyards usually not allow people to do their own welding (for good reason) but Chris is more familiar with MIG rather than TIG and didn’t really want to use our mast as a trial of his skills. Although DIY is always nice, safety and integrity come first so we decided to invest in a professional.
Welding aluminum is very tricky because aluminum has a higher thermal conductivity and lower melting point, which means that there is a smaller window of workability in comparison to other metals which can easily lead to burnthrough. This, in combination with it being harder to indicate weld progress and quality, is what makes aluminum deemed a challenging material to work with. Jose did a great job making sure he stayed within the window of workability without compromising our mast by keeping the surface hot enough to retain a good weld, but not so hot that it warps the material or damages the fragile conduit that was just just inside the mast, with only a few millimeters of aluminum in between.
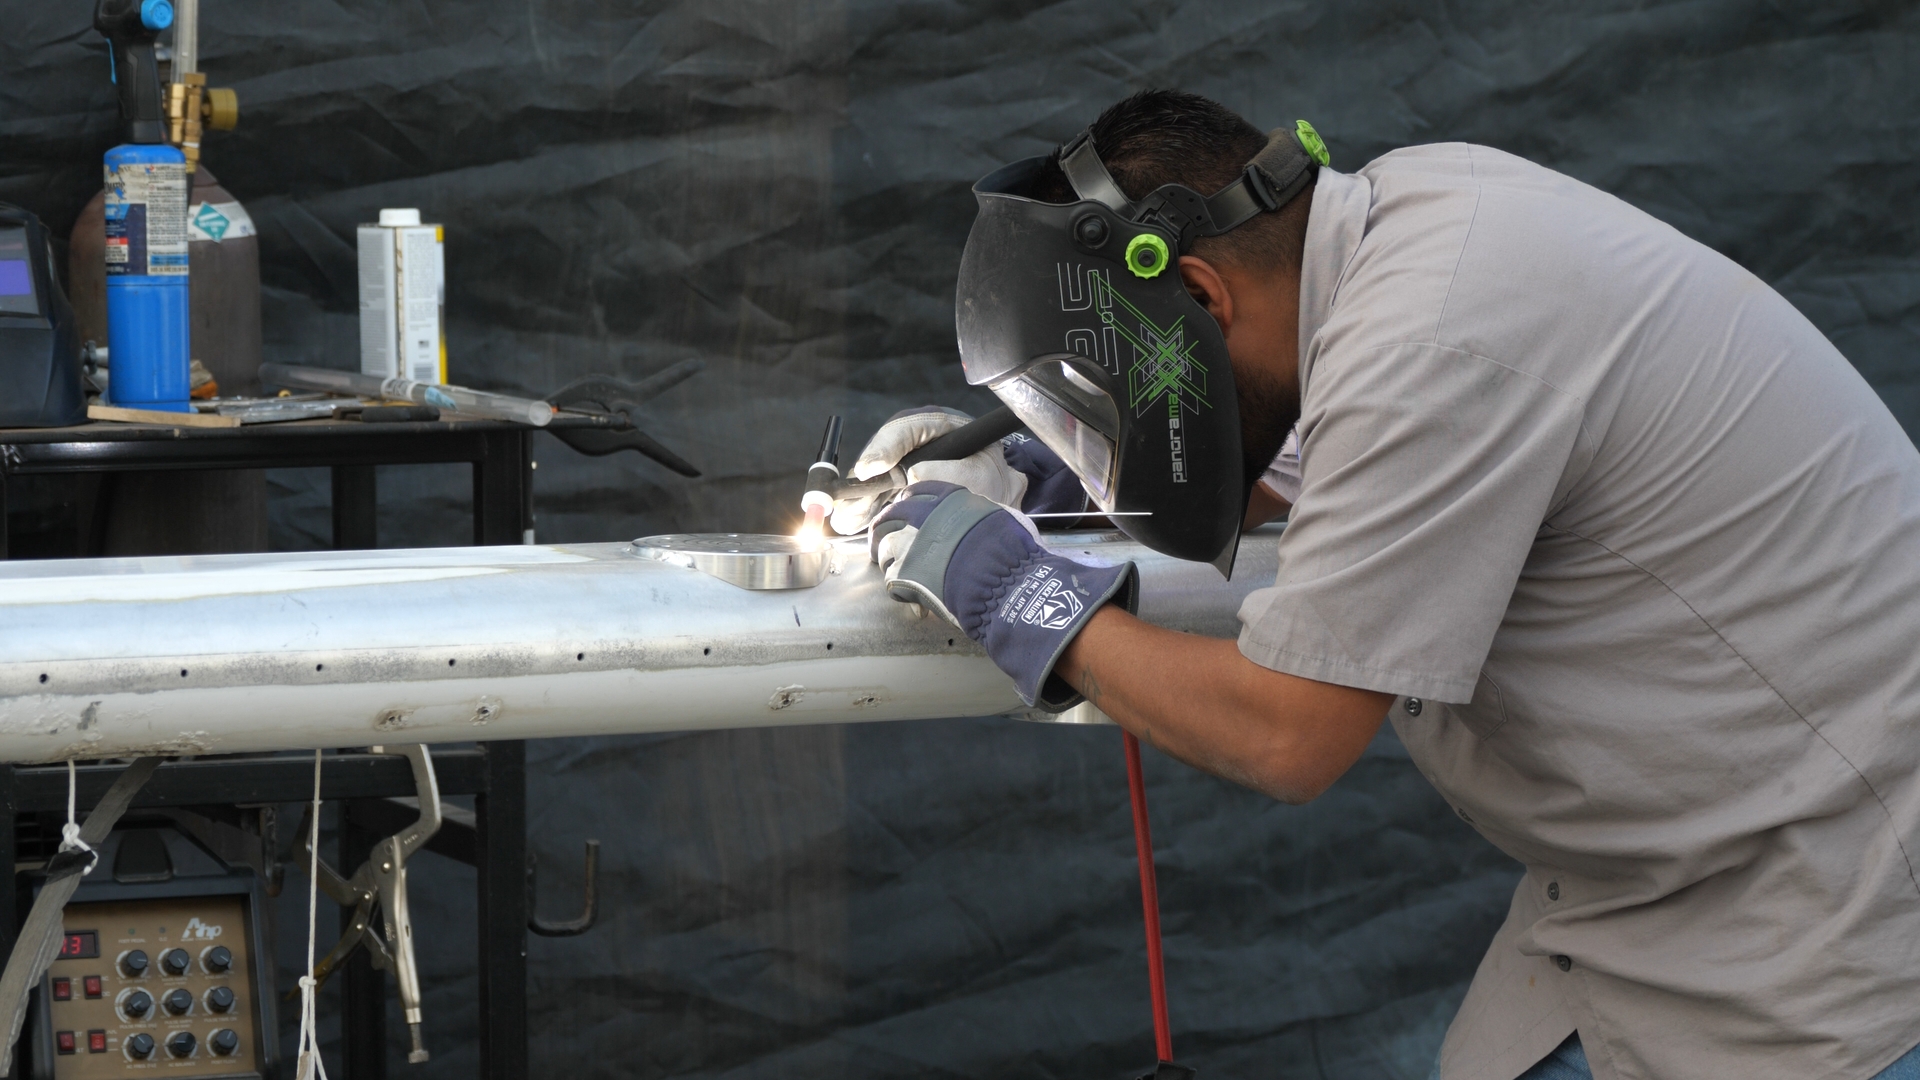
While Jose was diligently welding away on the winch bases, Chris noticed that there were a couple of cracks in our masthead. Although they were not necessarily structurally compromising, and many people argued that we should just leave them alone, Jose was already welding and we figured that it was a perfect opportunity to just get it done. Our mast head is very overbuilt and unique in it’s design which made it a bit difficult for Jose to skillfully repair the cracks and fill the bolt holes. After a few hours of scratching his head and trying his best to accomplish the task at hand we decided to table the project for bright and early the following day.
Day 3 – Friendsgiving
Chris and I arrived at the boatyard Friday morning at 8:30 with coffee in one hand and tools in the other. Jose was already at our mast finishing off the welds from the day prior. Thanks to his research he found the best way to make the necessary repair welds for our masthead given its complicated shape, material, and density. Jose was making his last welds when we arrived, so after a brief discussion and walk around Chris signed off on a job well done and we got to work sanding.
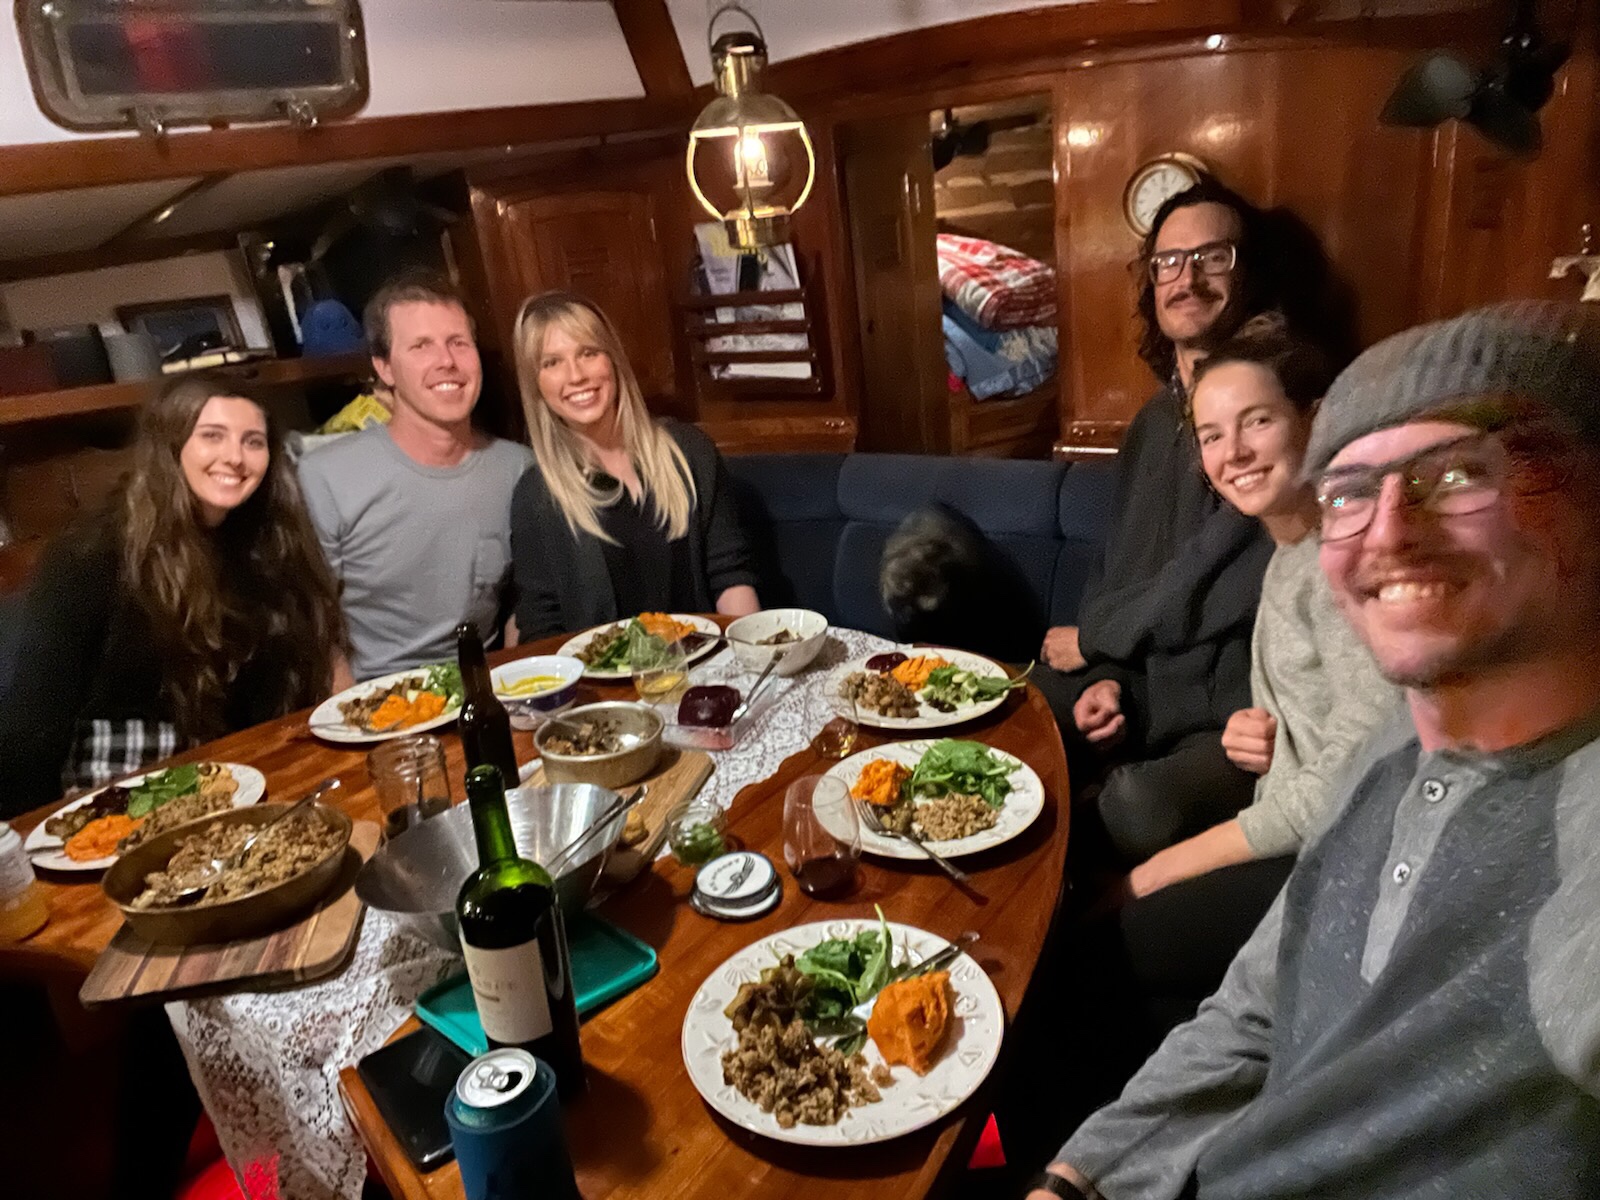 I had forgotten how sanding can truly be a whole body workout; my shoulders feeling sore and my arms like soggy noodles. By 1:00pm we had finished sanding the entire portside, just in time to settle down in our car to have a video chat with Annika from the Liveaboard Podcast. We were exhausted, dusty, and not totally “with it” mentally, so for anyone that listens to that podcast we are truly sorry if it seemed a little “out of character” but hey, that’s as real as “liveaboard life” gets! After the podcast interview wrapped, we cleaned up our workspace and headed home for the night. It was the week before Thanksgiving and Chris and I had decided to host “Friendsgiving” aboard Avocet to show off our freshly varnished table and floors. It was a great evening spent with our friends around the salon table that was full of wonderful food – we are truly thankful for the sailing community and this incredible life afloat.
Day 4 – Glorious Sanding
 The morning after Friendsgiving I woke up sore and still full from our feast. After a slower start to our day, we arrived at the yard by 9:00, fueled with caffeine and ready to tackle the rest of the sanding. The repetitive motion and brain numbing sound of the sander combined with the other sounds of the yard created a symphony of chaos that only my favorite podcast – Crime Junkie – could drown out. By 12:00 we had completed sanding the entire starboard side and celebrated by going out for veggie burgers while on our way to get more materials.
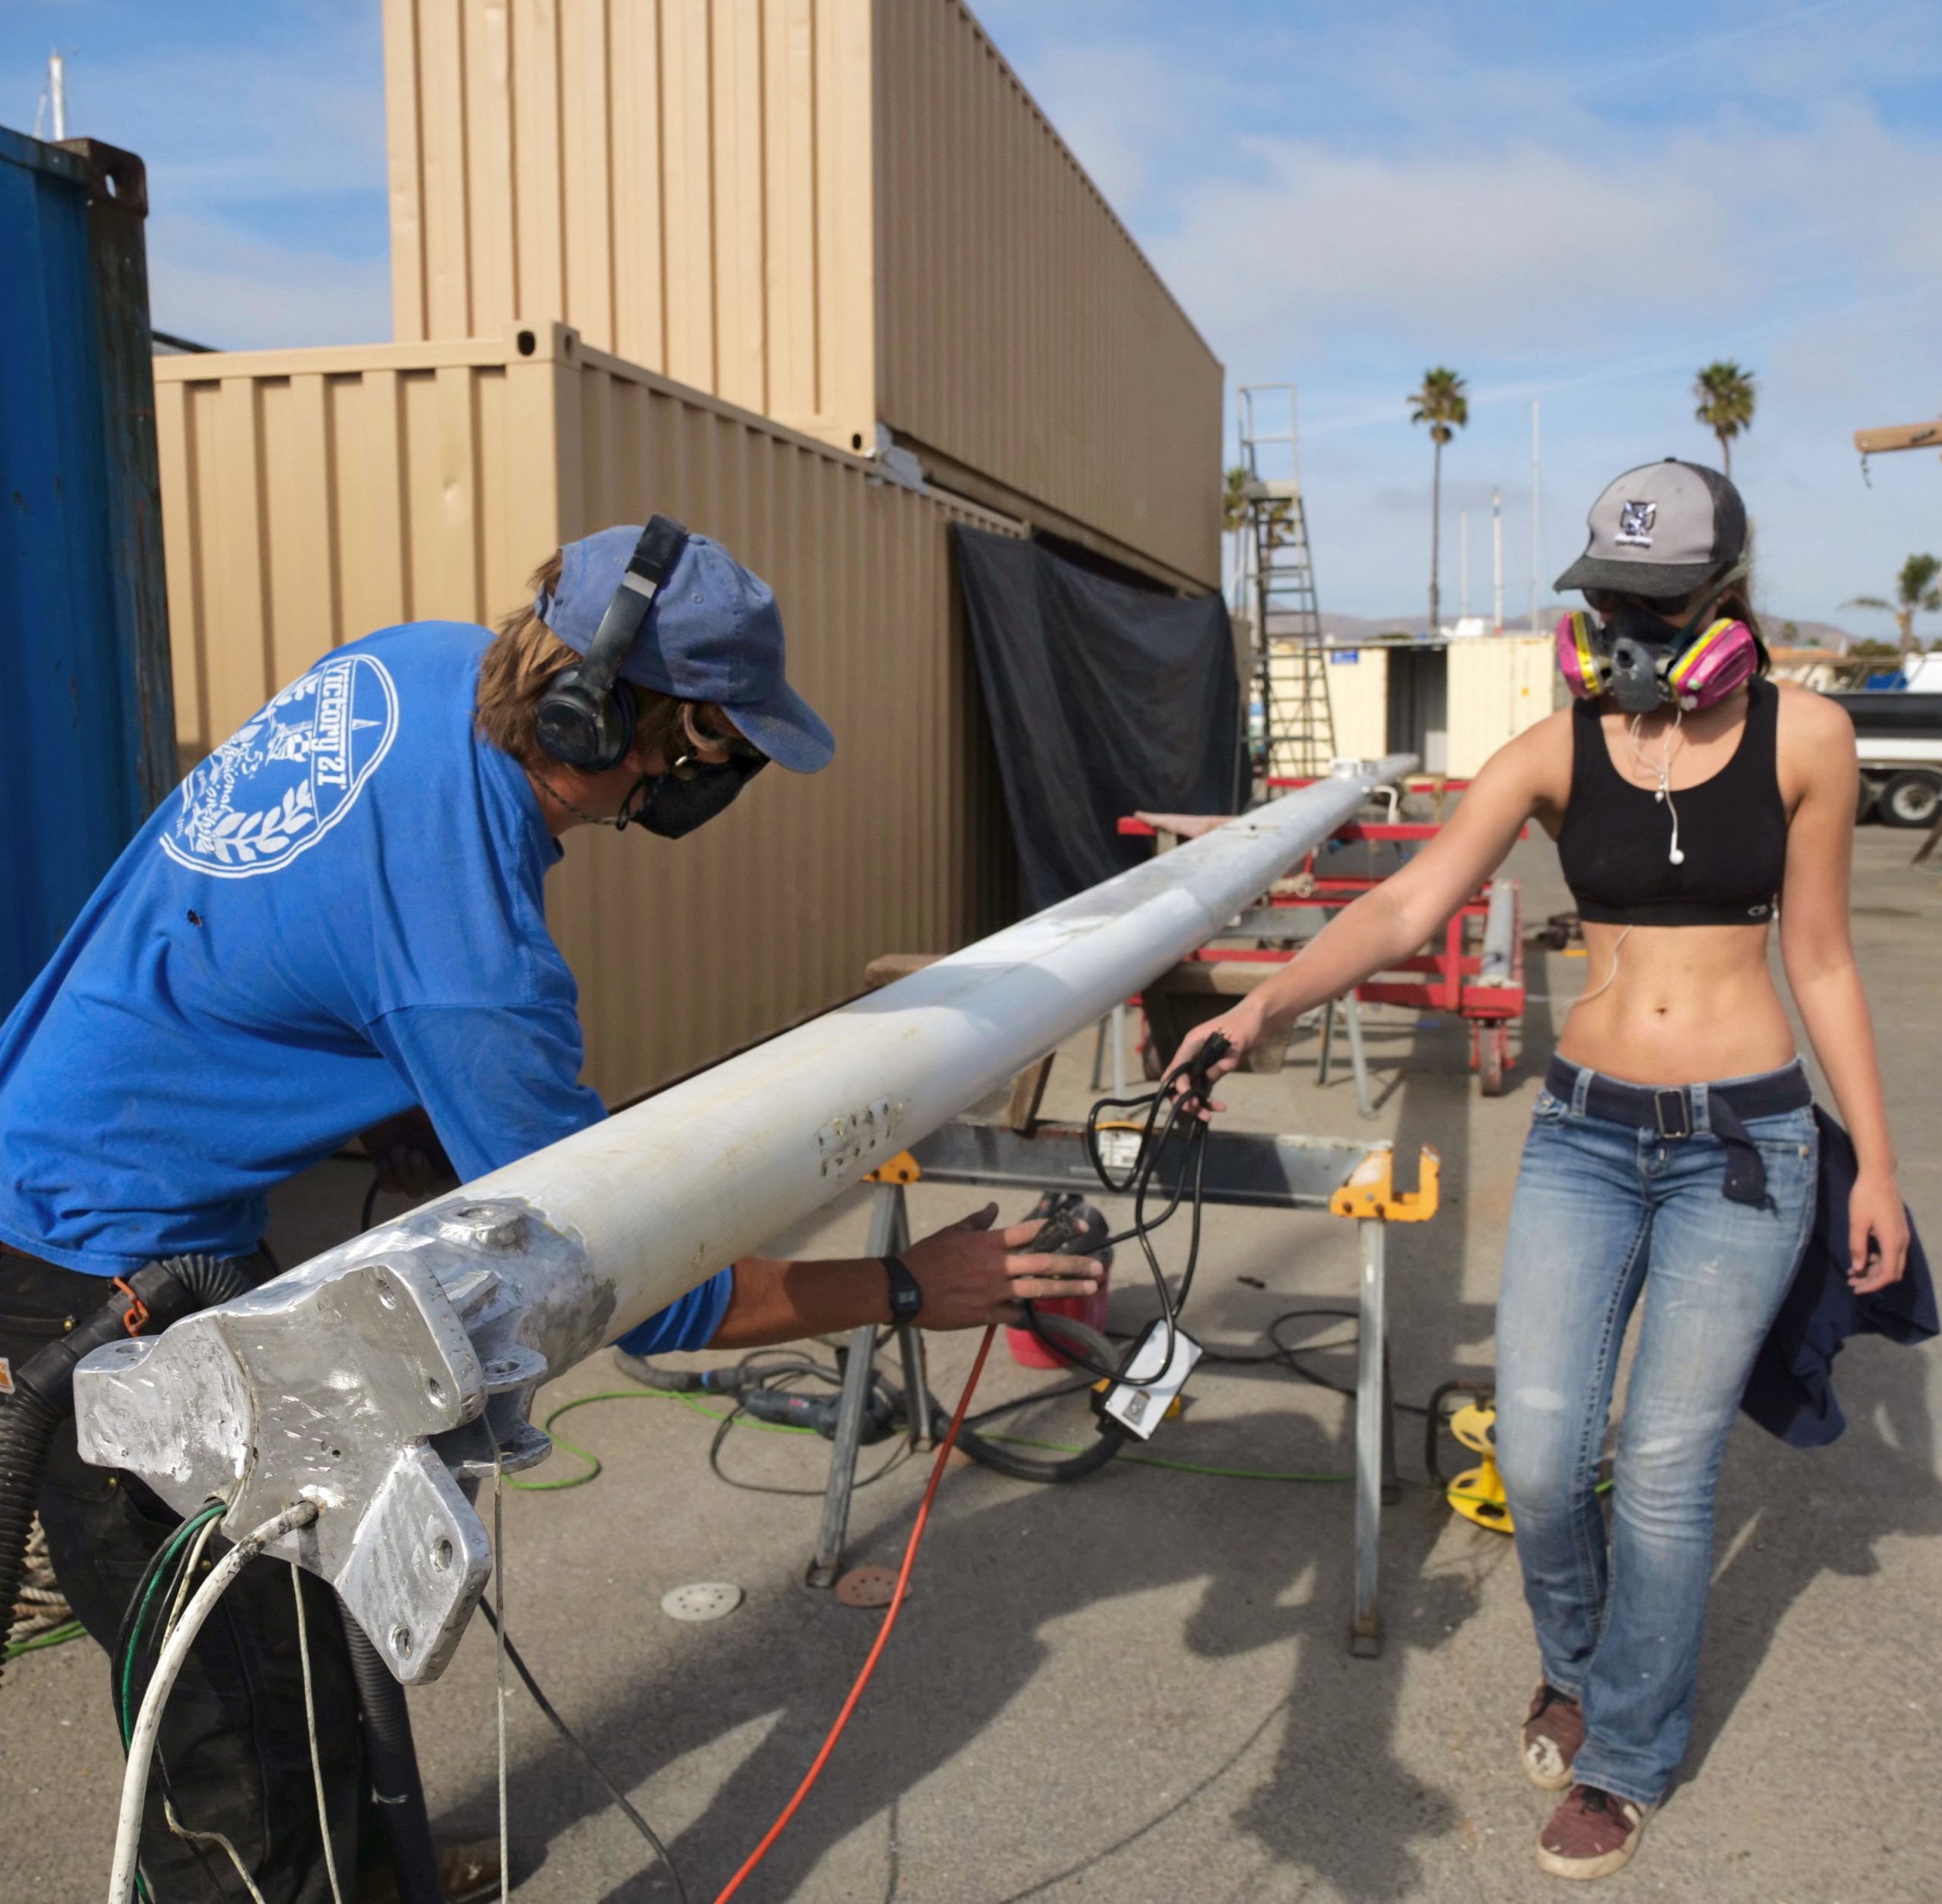
Although both sides of the mast were completely bare aluminum, the mainsail track still had flecks of white, failing paint stuck inside it. To remedy this, Chris took the grinder with a stainless steel wire wheel that fit perfectly in the track and used it to remove the last of the paint. While he continued on his mission, I sanded the starboard side with 220 grit sandpaper to create a uniform “brushed” look instead of the rough grinder and orbital swirls that were left behind from the 60 grit sandpaper. Just as I was finishing the mast head the sun had begun to set bringing a brisk chill to the shade where our mast was. Chris unplugged my sander, signaling that it was time to go home. That night we had to discuss the biggest decision that we would endure during this project.
Day 5 – Tough Decisions
Chris was majorly fighting for us to leave our mast bare, and although I agreed that I did not want to repaint it I wasn’t totally on board with the idea of the aluminum looking shabby overtime, especially when we have put so much work into making our boat shine, so we weighed our options. To Paint, or Not to Paint? Is the name of the articleI wrote after I did some intense research on the benefits of painting, anodizing, and leaving aluminum bare. You see, aluminum is one of the most popular metals for marine use. It is durable, relatively lightweight, and forms an aluminum oxide coating that creates a barrier that prevents the metal from corroding – which makes it essentially self-repairing. If the metal is maintained and kept dry (which can be challenging on a boat), the oxide will reform and continue to protect the metal. However, aluminum can become rather rough-looking after years of use and exposure to saltwater, so many people often turn to paint. When done by a professional, the paint finish can last for many years, but if misapplied, the paint will soon begin to fail, leaving room for errors like corrosion.
There is a common misconception that paint prevents corrosion but it can actually do more harm than good. Once aluminum is painted, its surface essentially becomes starved of oxygen, making it incapable of developing and maintaining its corrosion-resistant oxide coating. Provided that the paint coating remains intact and that your dissimilar fasteners have a barrier, there should be no issue; with no oxygen and no water present, corrosion can’t occur. However, once the coating is even ever so slightly compromised, it sets the scene for a corrosion cascade, killing your masts’ integrity slowly but surely.
A popular anti-paint option is anodizing, which is an electro-chemical process that converts the surface layer of aluminum into a specifically structured oxide which is electrically non-conductive and significantly harder than the base metal. In fact, aluminum oxide is so hard it is commonly used as an abrasive medium such as aluminum oxide sandpaper. The depth of penetration generally determines the quality of anodized coatings. The last step in the anodizing process is the application of a fluoropolymer sealer which fills in the microporosity of the surface resulting from the acid baths used in the anodizing process. An anodized spar may develop stains and an unsightly appearance but won’t have the rough finish of oxidized aluminum. Unfortunately for us sailors here in California, there is only one anodizing tank large enough to do masts due to the State EPA… and it would almost cost more than the mast itself to have it shipped there to be anodized. So, without the option of anodization, we wondered if bare is really better?
As mentioned, exposed aluminum will oxidize which is essentially the metal’s way of protecting itself from the elements. Although more aesthetically rugged, the crispy layer will uphold the integrity of the mast and bare all imperfections, if any, allowing you ample time to react versus waiting to see the signs of fault such as corrosion through paint. If you are truly concerned with the look of bare aluminum, there are a few tried and true products on the market that seal the metal’s pores to protect against saltwater damage, oxidation, pitting, white rust, and black streaks. In my research I stumbled upon a product called Nyalic that is a clear coat used to help to preserve the finish of aluminum boats. I was intrigued by this product’s glowing reviews and seemingly simple application process; plus the cleanup of a Nyalic-coated surface is fast and easy. 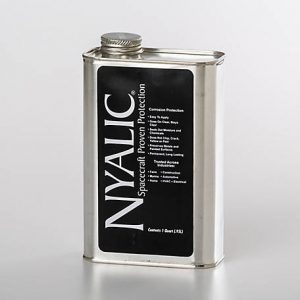
After days of hard research and following up with trusted industry professionals we had decided to give Nyalic a shot. What really sealed the deal was when Chris reached out to our old friend Olivier who had used Nyalic on his mast back in 2020 before sailing to French Polynesia. He had put well over 3,000 NM under his keel and said the Nyalic was still holding up great, with no issues. Chris was understandably very skeptical of this so-called-wonder-product’s perfect reviews so he is very eager to put it to the test to see if it meets his standards.
Due to supply issues and our short notice decision we were concerned that the Nyalic would not arrive in time. Luckily, we are surrounded by very generous sailors that happened to have just enough Nyalic to complete two coats on the mast and boom after prepping the surfaces with 220 and 320 grit sandpaper. Using a 4” roller and aerosol spray around the harder-to-reach-places Chris was able to get the aluminum coated in Nyalic, and with some help from our friend Jeff he moved the mast back to the spot by the haul out slipway where we had started, since the “messy” part of the project was complete.
Day 6 – New, New, NEW!
The glistening aluminum put our stainless fittings to shame, prompting Chris to break out his benchtop buffing wheel and make sure each little piece shined like new. To prevent galvanic corrosion in the future, we created rubber gaskets to go between anything stainless and aluminum and made sure that all of the stainless fasteners were heavily coated in tough gel. Additionally, we used nylon or G10 washers to separate stainless steel fittings – such as our mast tangs – from the mast which will further safeguard from potential deterioration. Slowly but surely the pieces were put back together again and our spar went from looking like an aluminum stick to a proper mast. Chris reinstalled the radar using ¼” x 20 aluminum bolts gifted to us by our rigging friend Scott, then moved to the mast head where he replaced the stainless steel U-bolts on the “Ears” of the mast head followed by reinstalling the port and starboard spinnaker blocks.
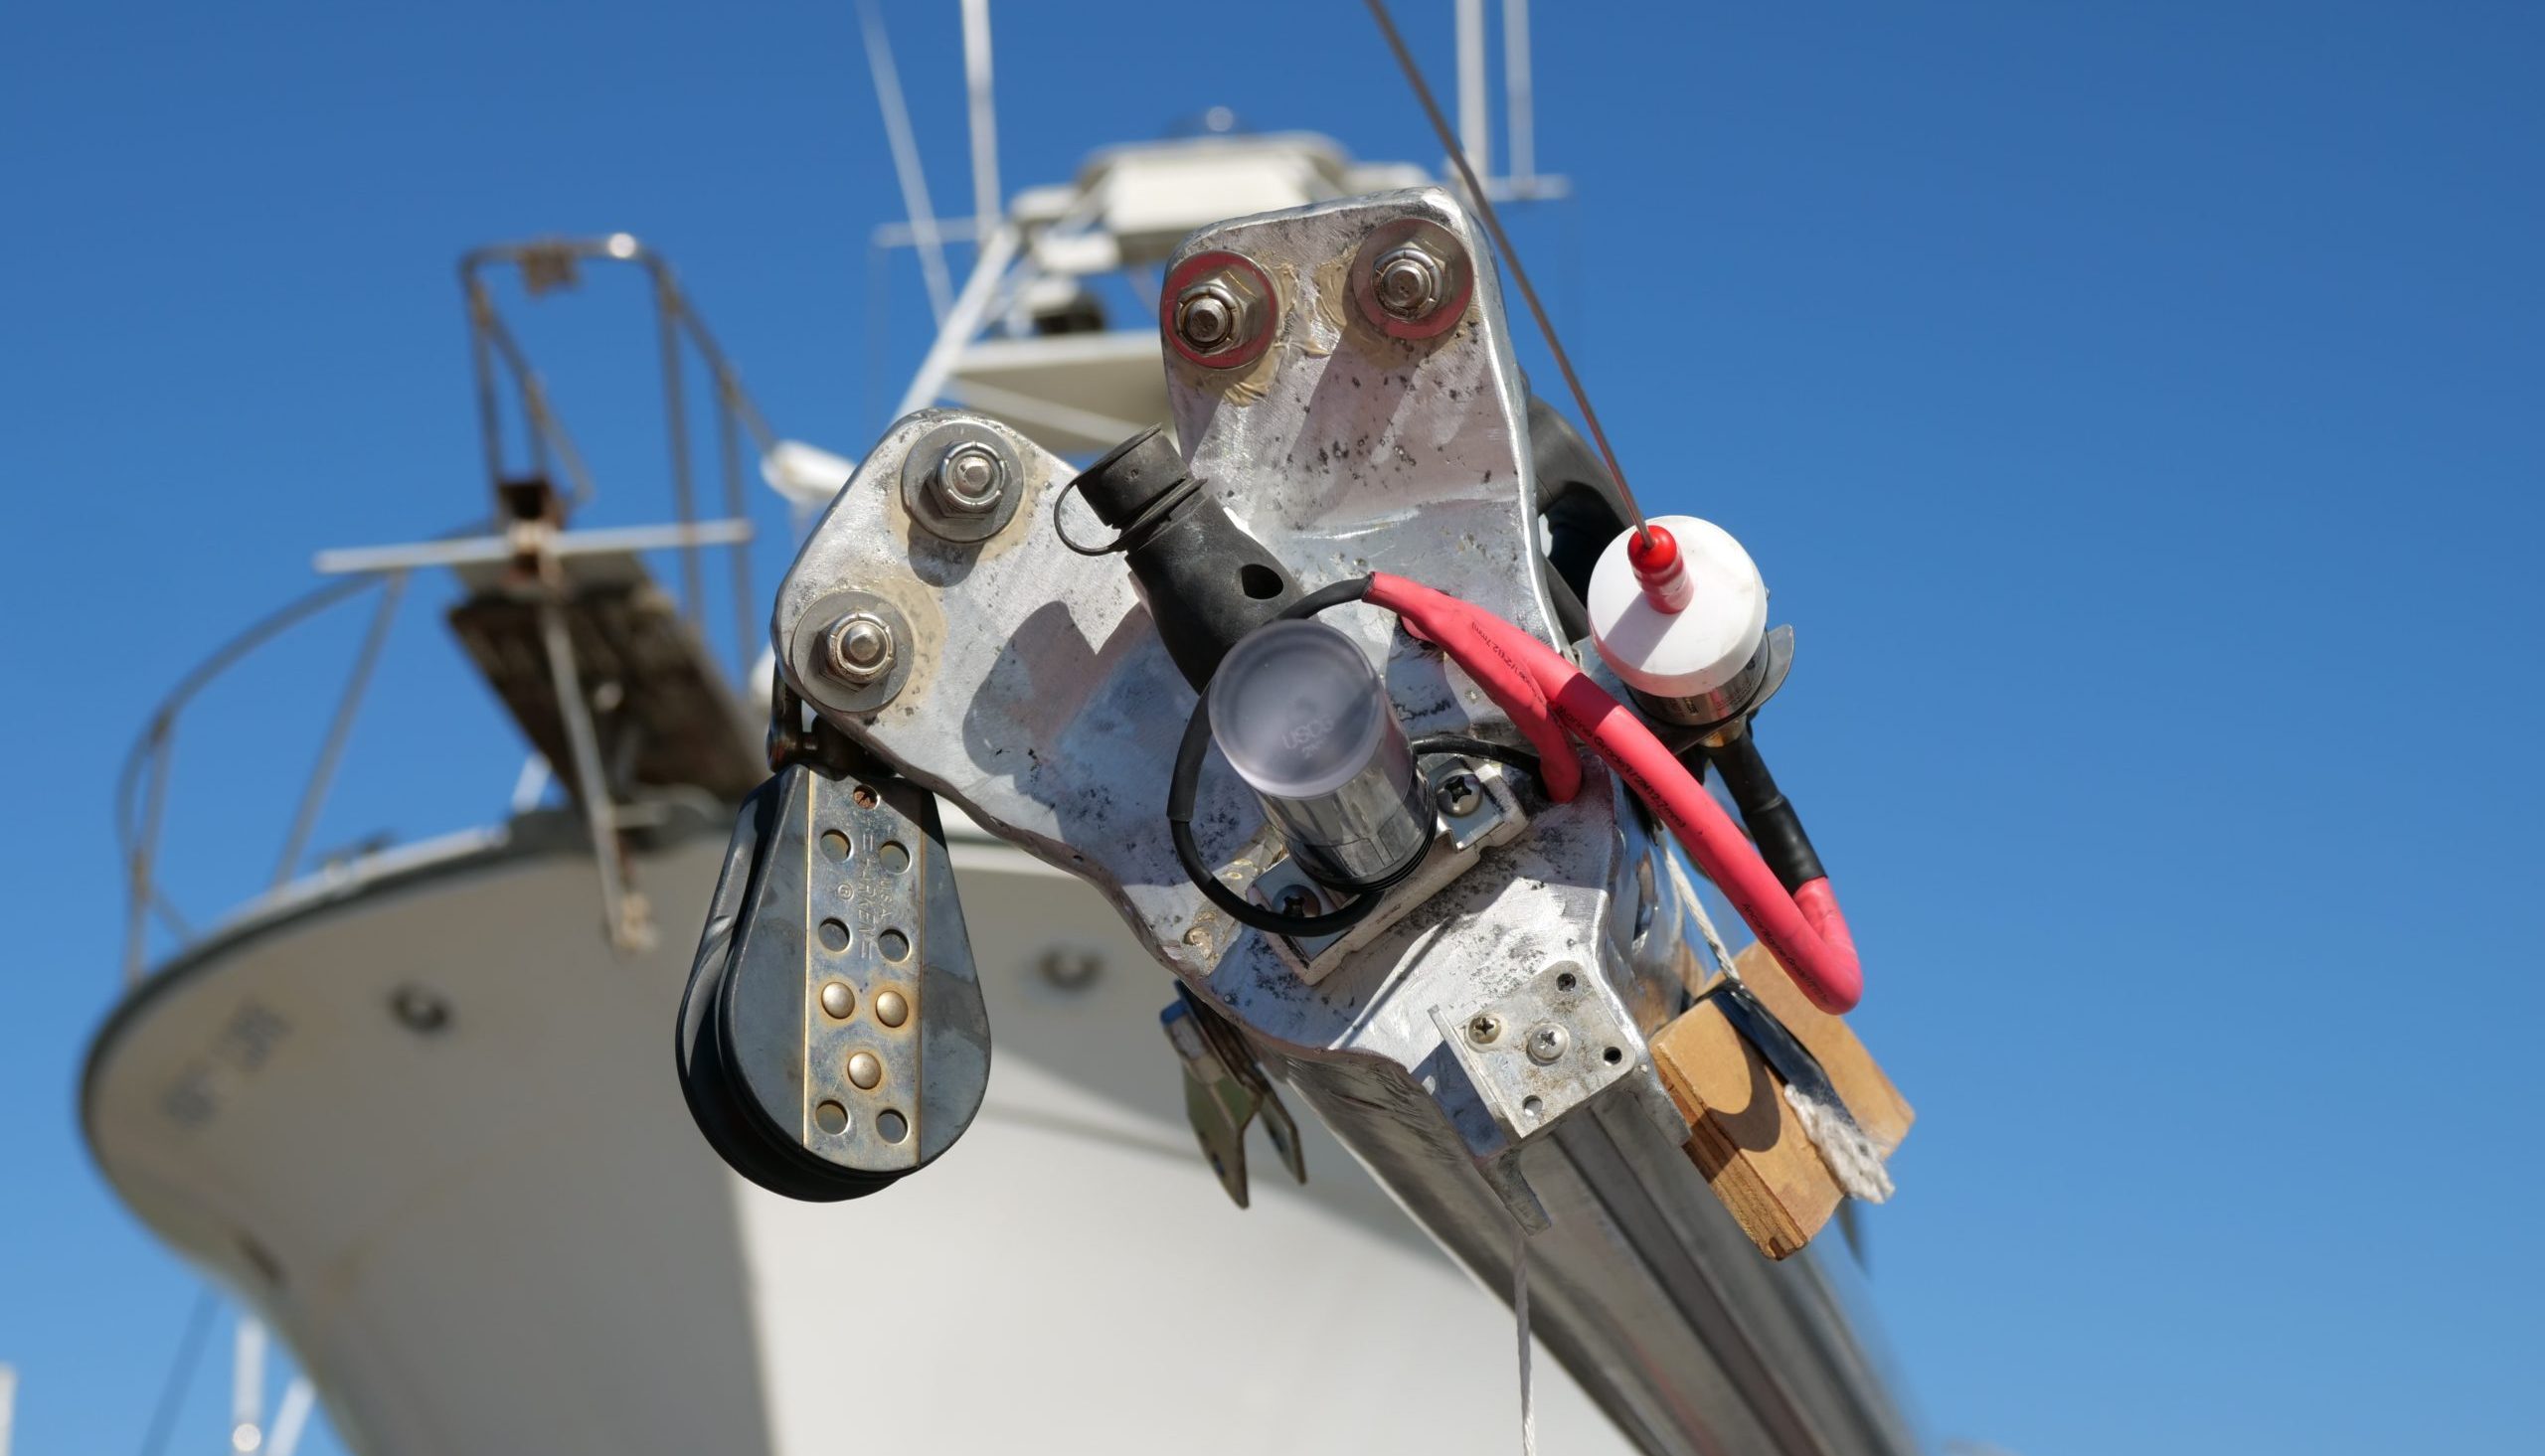
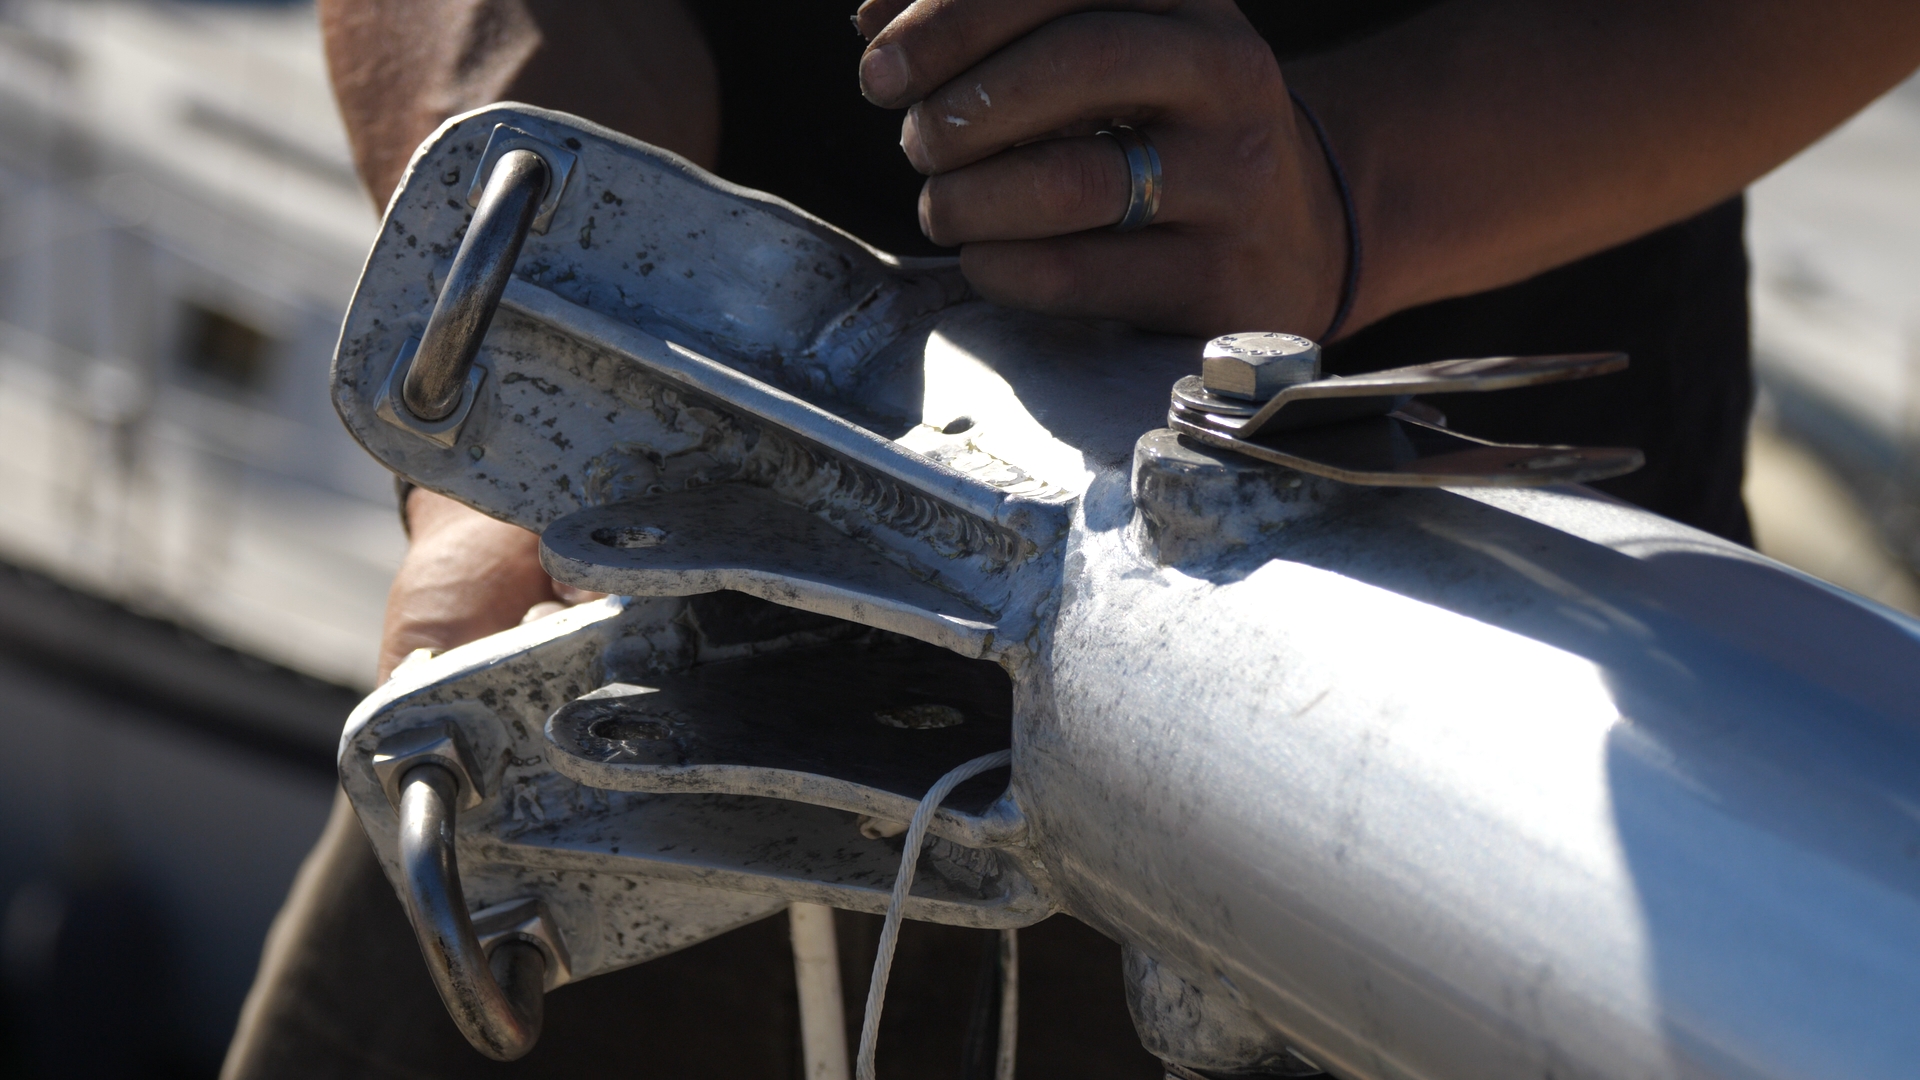
One of the major reasons we decided to remove the mast was because when we were reinstalling our genoa after taking measurements for a new sail, it was nearly impossible. After further investigation, Chris discovered that the jib sheet sheave was totally seized which is not ideal at all. To remedy this, we replaced the old with new Delrin sheaves and new ⅝” and ¾” stainless steel pins. After the sheaves were installed Chris added the forestay and backstay toggles before turning his attention to the “electrical stuff”. We were very excited to install our new Signal Mate anchor and tri-color light that we had bought at the Annapolis Boatshow at the show price. It was a major upgrade from the old technology that we had and we cannot wait to put it to good use! With the shining star installed, Chris welcomed back the Raymarine ammeter and a brand new VHF antenna even though our old one was fine, but had the idea that it was only $50 and wrote it off as preventative maintenance. With the rest of the pieces in place, Chris reinstalled the spreaders then moved on to one of the biggest parts of this rebuild: the standing rigging.
Avocets sloop rigged mast has standard 3/8ths” 1×19 316 inch wire for the forestay, capshrouds, and backstay and 5/16ths inch wire for the four lower shrouds. This is a very common sized wire for masts of our height. Although our standing rigging didnt show any aggressive signs of wear or causes for concern, wire has a suggested replacement time of 10 to 15 years and Avocets rigging had just passed its prime when we became her owners. Doing our best to practice preventative maintenance, we decided to replace the rigigng while we had the opportunity and resources at hand. There are two options people have when it comes to replacimg their rigging: they can hire a professional rigger to make the shrouds with traditional sweage fittings (which is the common, but sometimes more costly option) or they can DIY it like we did. I will preface this by saying we had professional rigging friends teaching and supervising our project to ensure success, so please take that into consideration when deciding how to proceed with your own project.
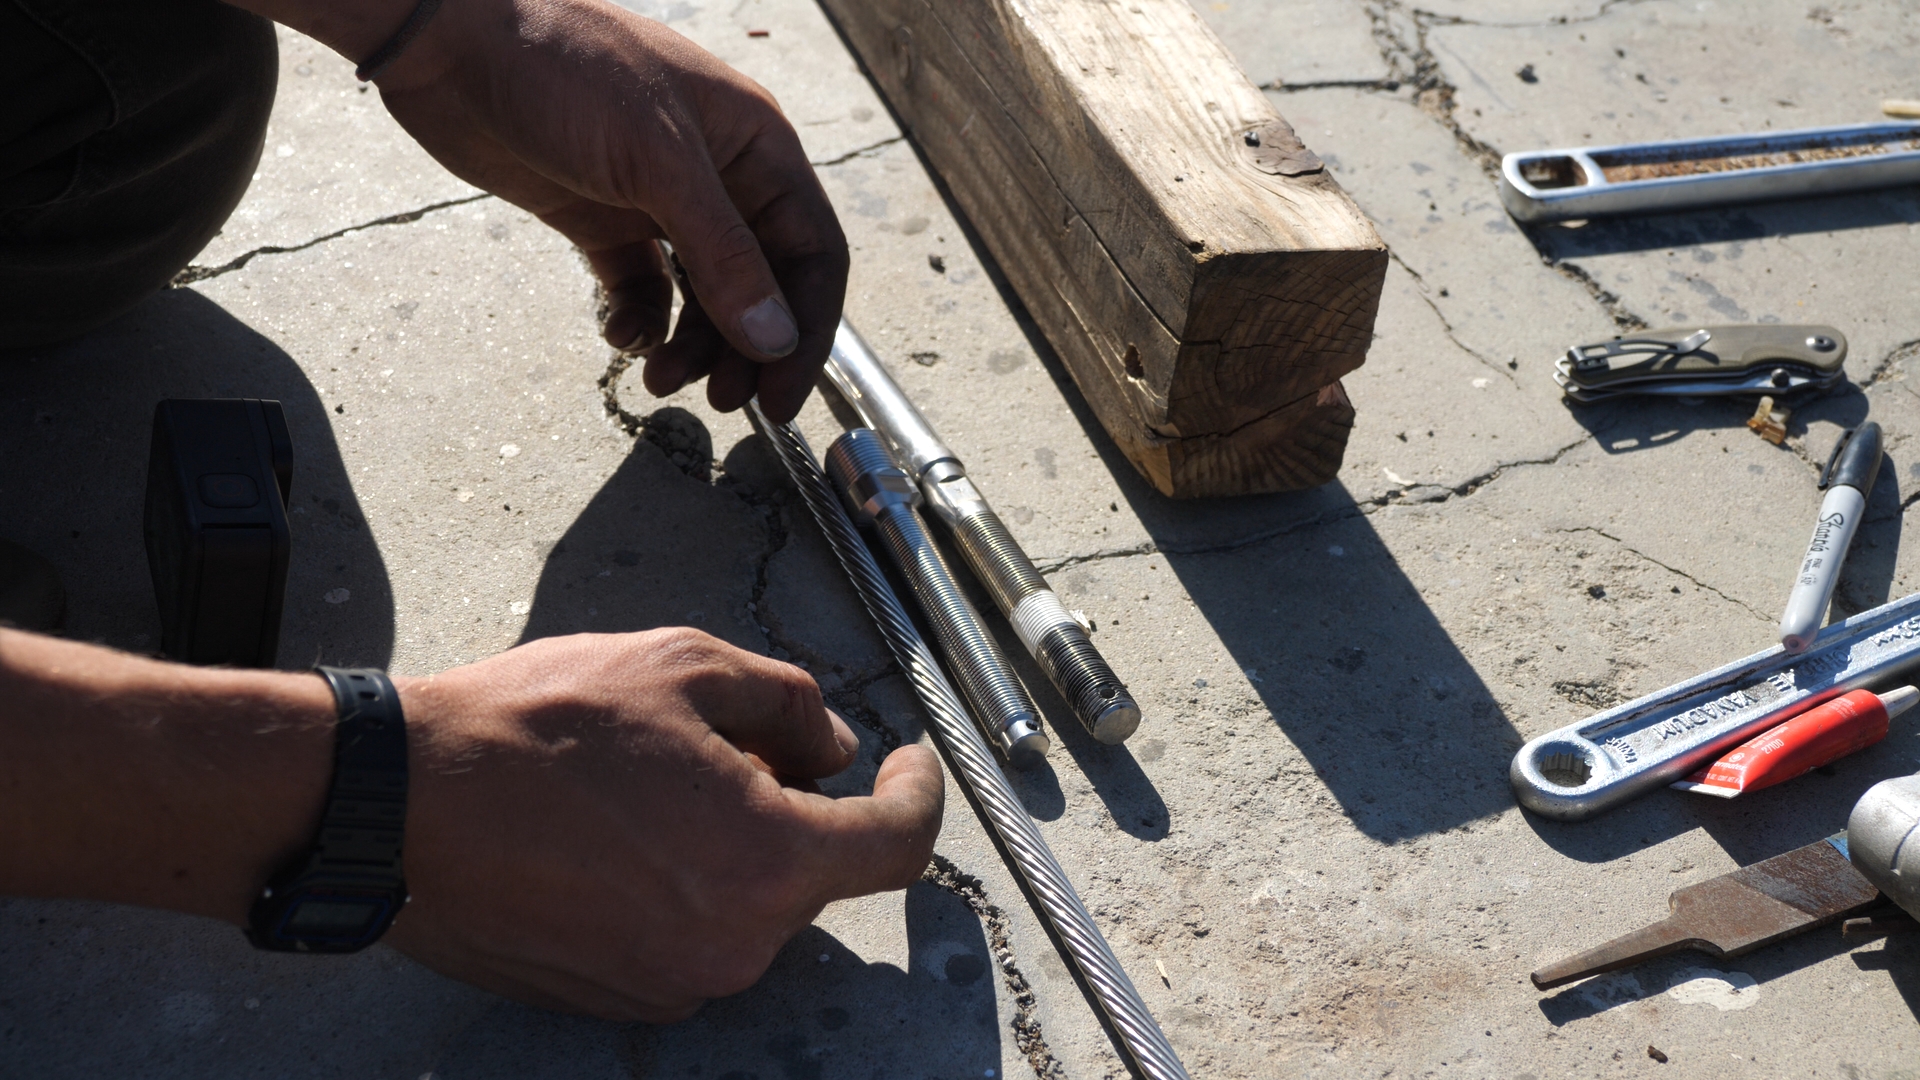
We went into this rigging project with some experience under our belt having replaced out 4 lowers in the summer of 2020 with the help of our friend Mitch, who taught us a few tricks and how to create the new stays with hi-mod compression fittings. Tapping into that knowlege once more in the yard, Chris sat down with his materials and got to work assemballing the rest stays starting with the cap shrouds. Using the old wire as templates, and working one stay at a time Chris would lay out the full length of the wire from eye to eye next to the new spool of 3/8ths” wire purchased from fisheries supply. At the top ot the wire, he installed the hi-mod eye fitting then tied the new eye to the old eye so he could mirror the lengths perfectly. Once happy with the length, Chris used his hack saw to cut the wire and assemble the stud fitting which completed the stay. Although simple in theory, there are a lot of ways this project could go ary, most commonly in the measuring process, but we did our due dilligence to mitigate the possibility of error.
When using new wire you have to anticipate the stretch that the wire will go through when tensioned properly which heavily influenced where you make your cut. Before we removed the stays, we marked the location of where our turnbuckles threaded onto the studs so we could either add or subtract wire length where it was needed. A properly tensioned rig will display studs that have equal distanced turnbuckle adjustments on both the starboard and port side. Some more useful tips for building your own stays: a hacksaw is absolutely necessary because angle grinders with a cut off disk will get the metal so hot that it anneals the metal which turns it britle which absolutely compromoses the compression fittings strength. A good set of files, both normal and tubular, will do you well because the cones that are inside the hi-mods that go around the inner core of the wire can sometimes have burrs – Chris used a rat tail file to remove any sharp or jagged edges of the inner cone to ensure a perfect fit. Additionally, once you make your wire cut a file can be handy in smoothing out the roughness of the wire which makes it easier to work with and limits the possibilty of stress loading. Always refer back to hi-mod’s installation manual; it is exactly what Chris followed in addition to the tricks he learned along the way.
Day 7 and 8 – New Crew
 In 7 days we were able to tear apart and rebuild our mast, stronger and better than before. Although we could see the light at the end of the project tunnel, we decided that there was just no way we could finish in our 8-day-timeline mostly due to material delays – specifically awaiting the G10 that we needed to build our new mast step. With a newfound pace, Chris shifted gears to accomplish some smaller yet equally important projects such as rewiring the steaming and spreader lights, making a new backstay, running new hallyards and attaching the new lazy-jacks’ tangs. Avocet’s mast melted into the surrounding scenery, the aluminum once again bathing in the sun’s light at golden hour. Although disappointed that we did not meet our mast stepping-goal, we were thankful to have the project near finished and a little more time to enjoy the process and sunsets from Derecktor Boatyard. Together we covered up the mast and packed up our tools for Thanksgiving weekend which we spent in Fresno with our families.
We returned to the boatyard a day sooner than anticipated with the good news that our materials arrived! Not only did we come back to Ventura full from a feast yet hungry to finish this project, we came with helping hands. While visiting with Chris’s sister we offered to bring back our oldest nephew Troy (13) for some time with us away from his younger brothers. To our absolute shock, he declined our offer due to “school work” but his little brother Truman (7) was quick to volunteer to take his place. With the “OK” from his parents he packed his bags and hopped in the car next to Cleocat (who travels with us everywhere, and does not like children) for our 4 hour drive south.
Day 9 – G10 for the Win!
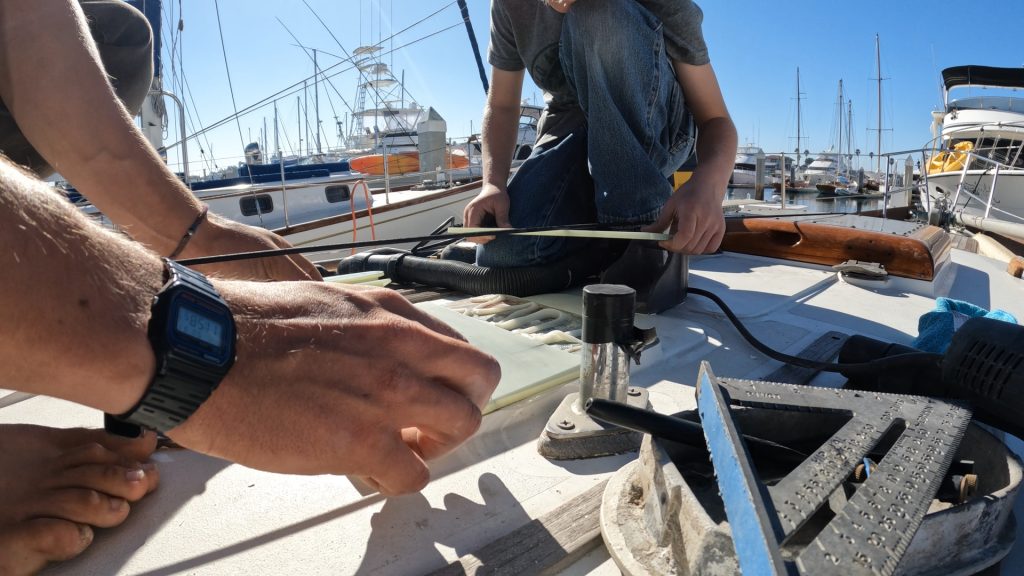
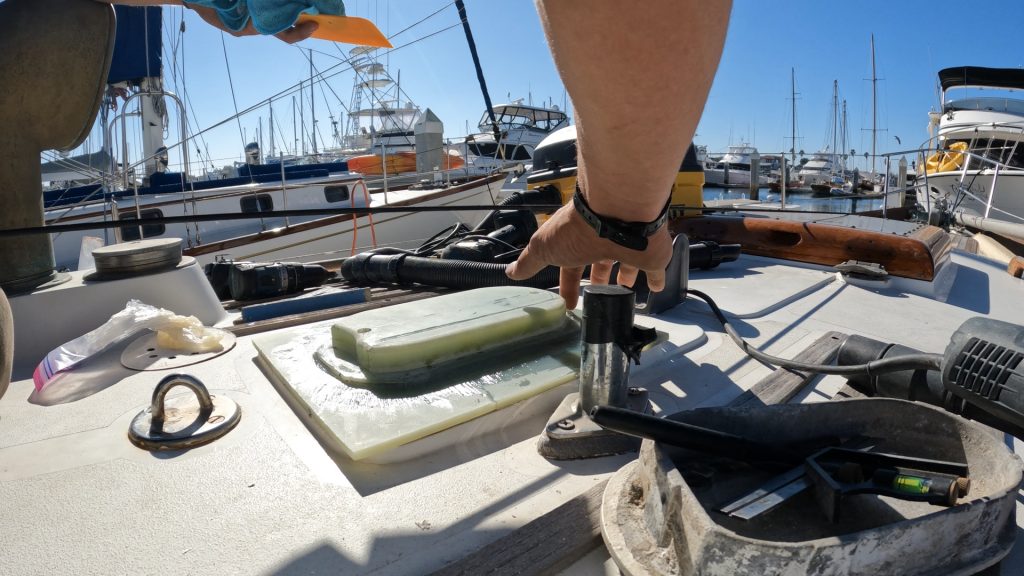
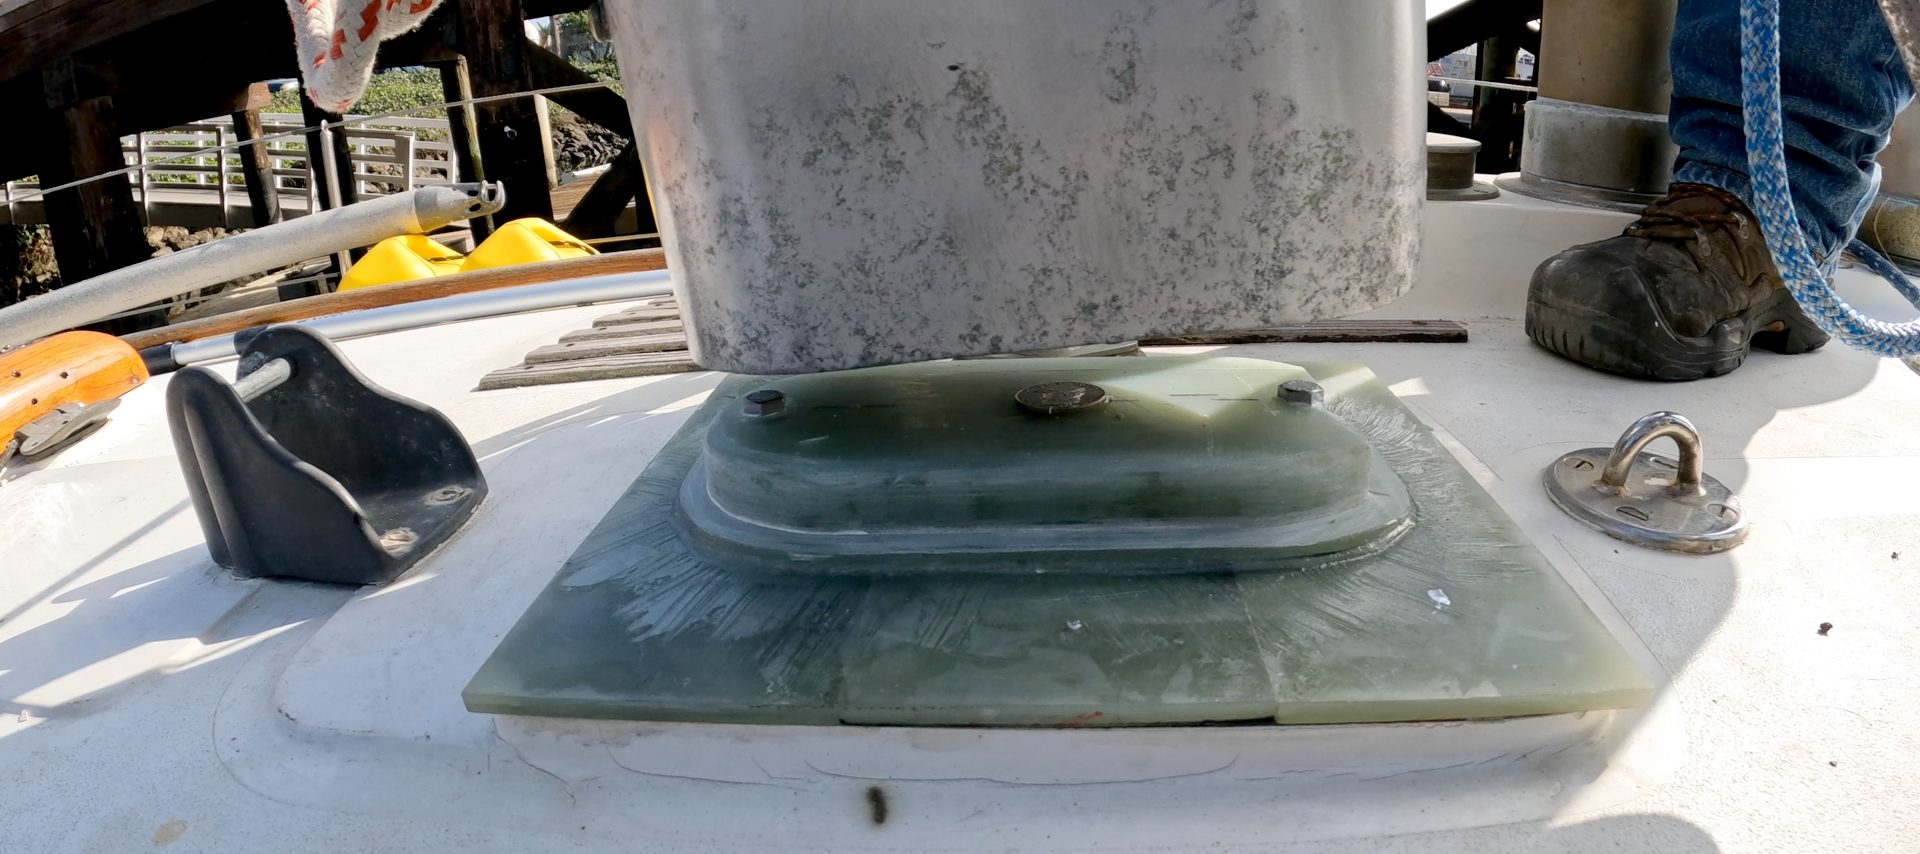
Back in the yard Truman and I finished running the rigging while Chris created our new mast step. The original mast step was made out of cast aluminum which is not ideal for sea life because it is easily contaminated with inferior metals at the time of pouring and it is very porous which leaves room for salt water and air to mix, often leading to crevice corrosion. When our mast was removed we were eager to sift through the dust that had settled inside the step to search for the coin that is left as tradition. Unfortunately, Avocet did not have a coin hiding in her mast step but rather something more unsightly – a 3” crack right down the center. Now, Chris had his suspicion that the step was compromised because instead of the base being flat (as it should be) it was convex. Over time, water had gotten under the mast step, in between the fiberglass and aluminum, causing the metal to react and create pressure that had nowhere to go but up which resulted in the “bubble” that caused the crack. Always determined to build better, Chris opted to go with G10 to construct the new mast step which would be infinitely more durable due to its composition and inability to corrode.
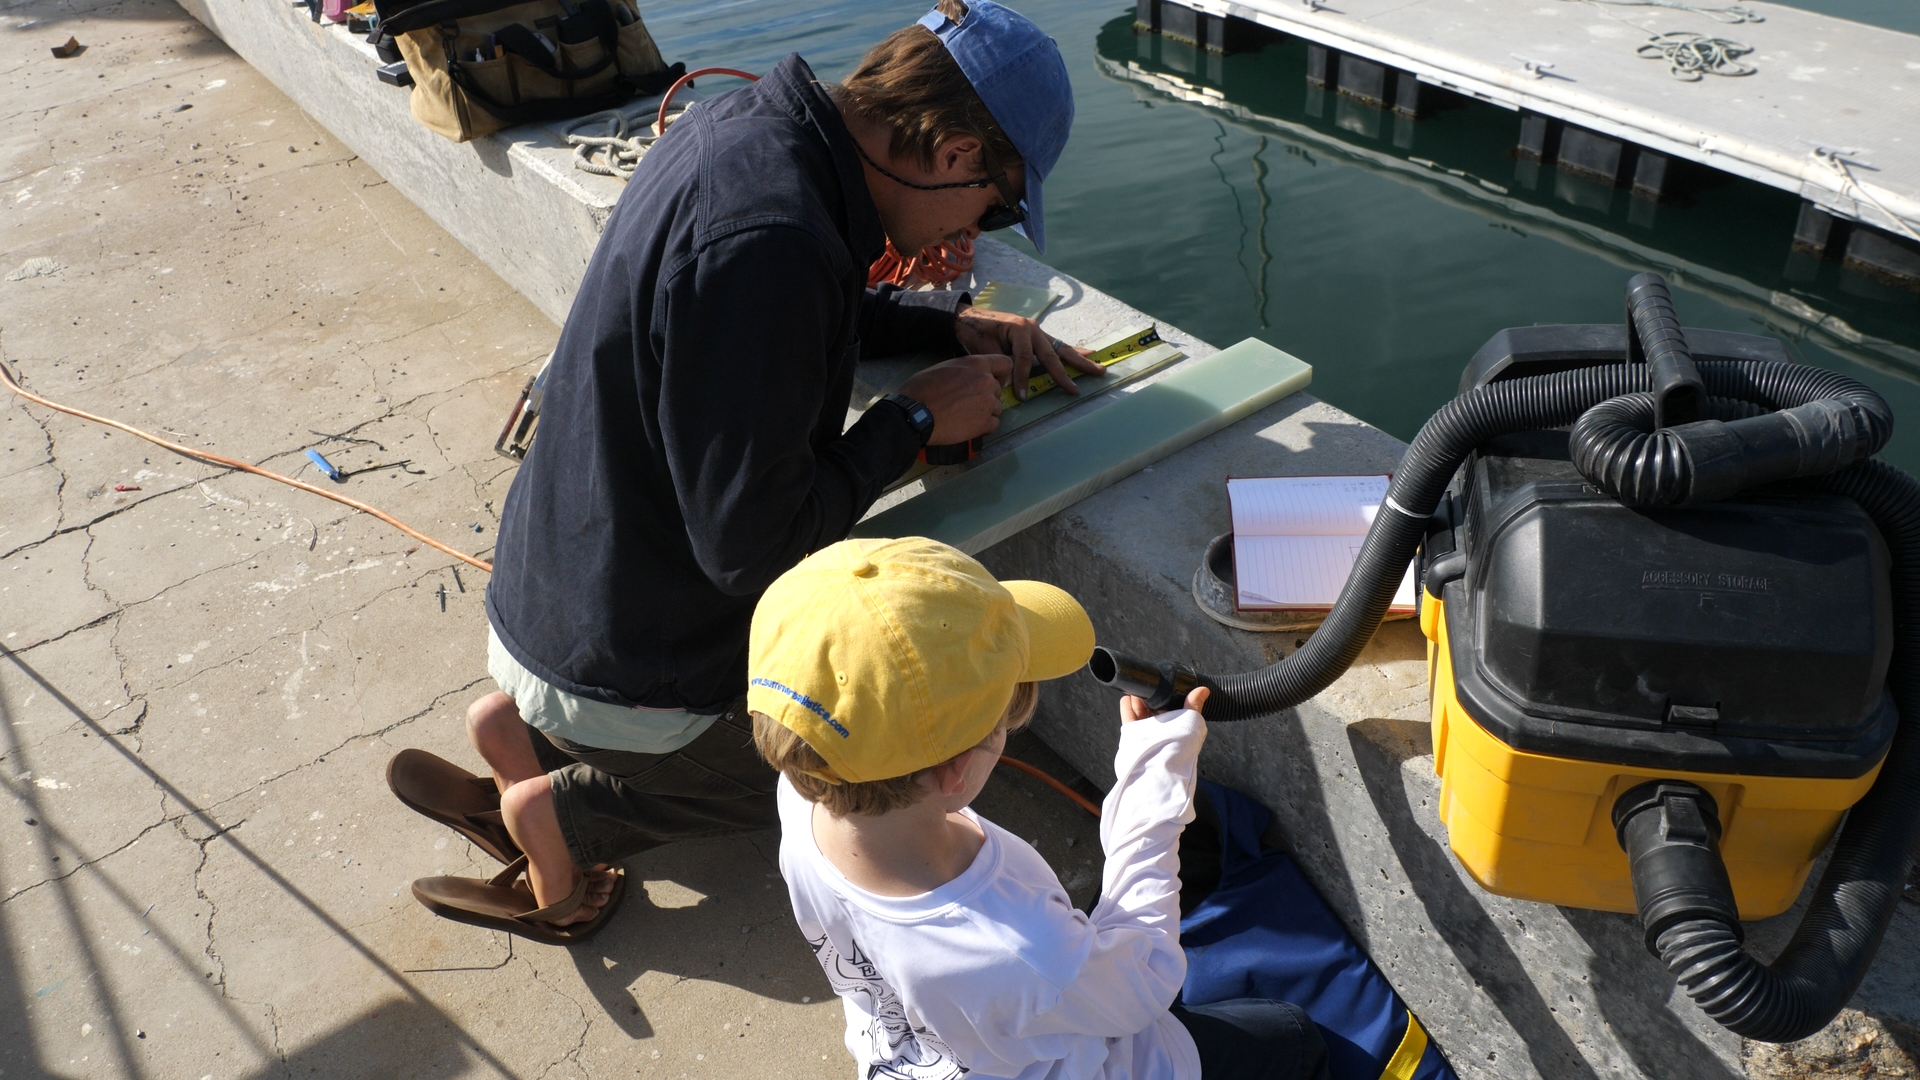
More hands make less work!
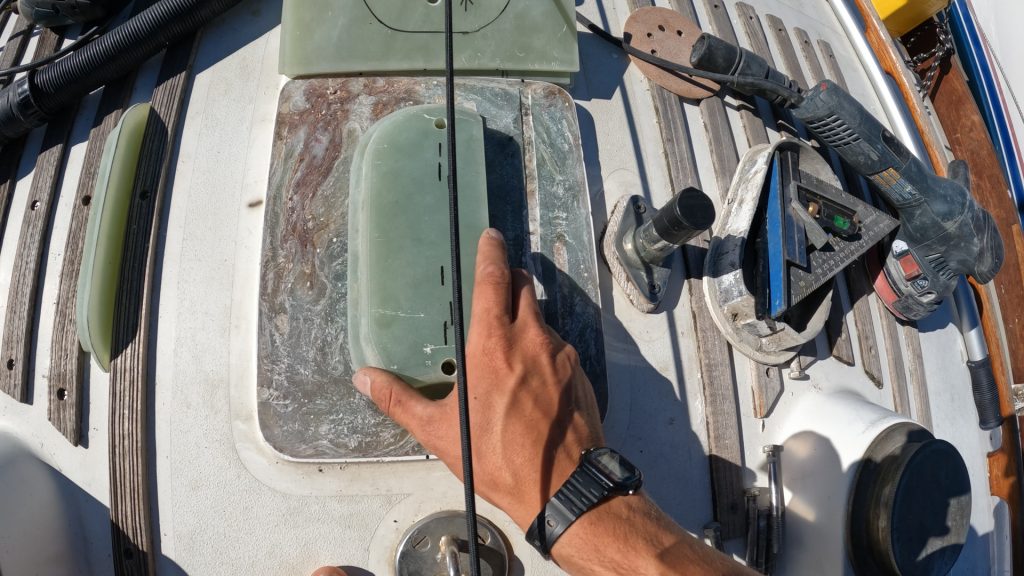
The original mast step had a 1”¼ lip that sat inside the mast. Utilizing that same concept, Chris took 2’x1”x4” of G10 and used the old mast step as a template, cutting the material with an angle grinder, router and circular saw. In preparations for installation, Chris took a better look at the step platform that by today’s build standards was insufficient. He noted that the mast load was not initially distributed as well as it could have been – using the cracks around the base as a prime example – so he took what he knew about vessel composition and design to make a new, slightly larger, platform out of G10 that would hopefully better suit Avocet’s needs.
With the step and platform created the last thing to do was to adhere it to Avocet. It was crucial to ensure that the step was center, or else the mast would be crooked for eternity. To find the centerline, Chris and Truman used a piece of shock cord that ran from the middle of the stem piece to the aft chainplate for the backstay. Once the centerline was determined the boys carefully mixed epoxy and laid the materials in place, using a trowel to evenly disperse the epoxy on all mating surfaces. One of the best parts about using G10 is that it’s extremely easy to adhere to things!
Day 10 – Another Project for the Books
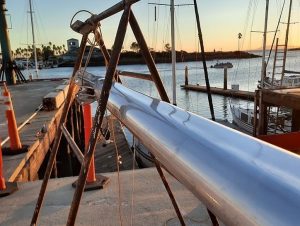
 It was the first week of December and I as I drove to the boatyard I couldn’t help but realize how excited I was to check off our first accomplishment of the month. There was Avocet, sitting patiently in the haul out que waiting to be reunited with her mast. The early morning sun glistened across the aluminum as the Nyalic did it’s job protecting the smooth finish. Chris’s family was in town visiting which made the perfect audience to watch the nerve wracking event. Audie was at the controls of the crane once more as we lined up our spar to be airborne.
“Do you want me up here or down there?” I asked Chris from the platform above Avocet. He motioned for me to join him onboard and I quickly relinquished the camera duties to our eldest nephew Troy who was careful to capture all the action. From Avocet’s deck we watched the mast get lifted slowly above the ground, then above the boat, suspended in mid air as we waited anxiously below. Tom, the owner of Derecktor Boatyard, was onboard besides us helping to ensure everything went smoothly. With his assistance we secured the mast in its place atop of the new G10 mast step, but not before our brother in law Jason could sneak in to secure our new coin – courtesy of my brother – which we hope will bring us good luck for years to come.
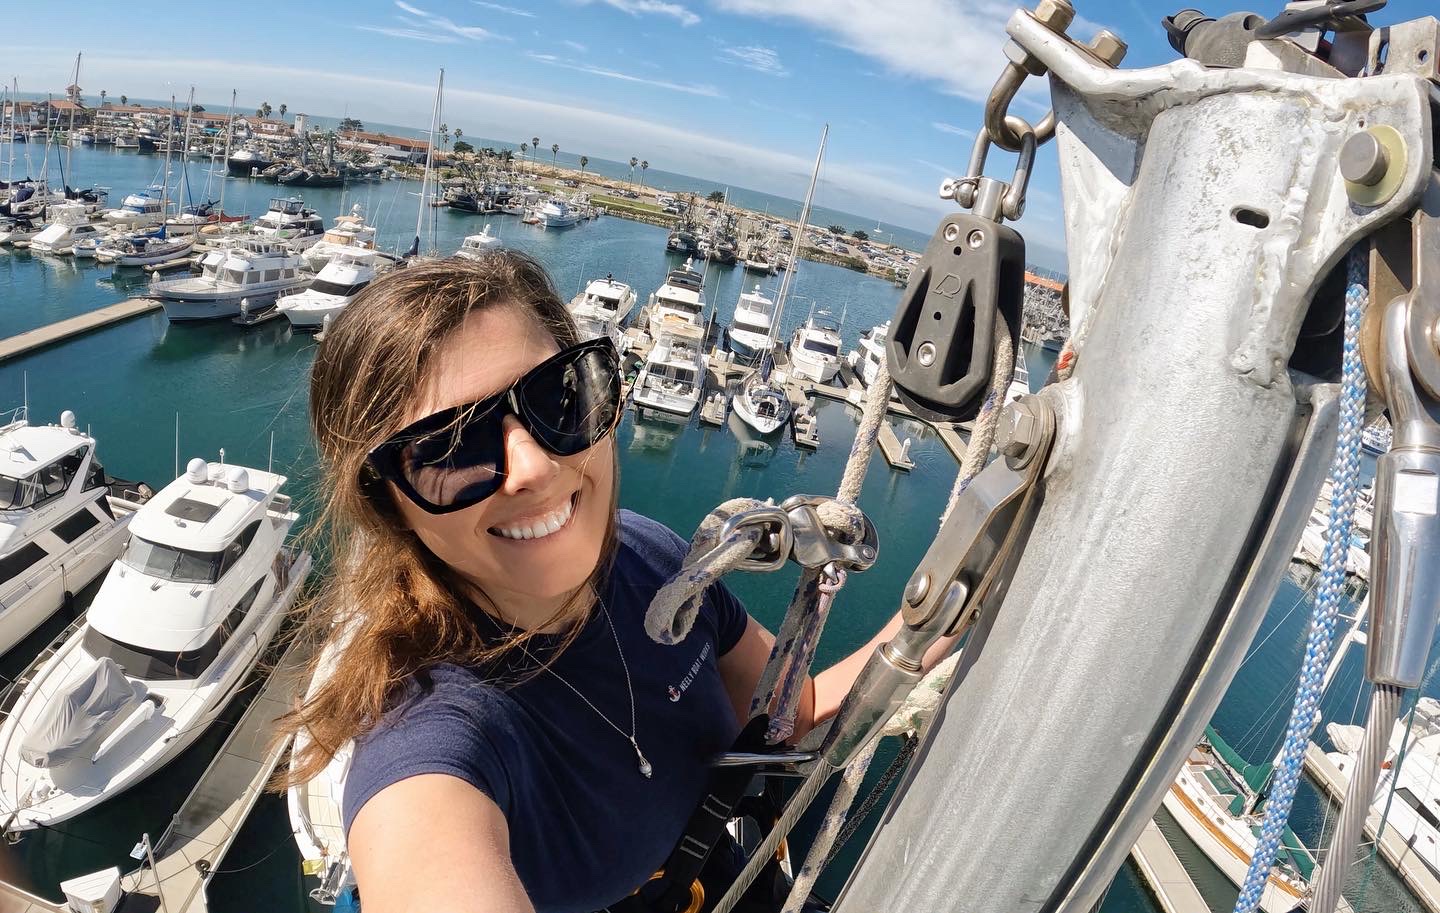
Once secured in place we looked up the mast and saw that our forestay was still tied to the spreader and Audie’s crane line was stuck around the radar. I climbed into our harness then secured our primary and secondary line for my ascent while Chris winched me up. It was our first test using our new-to-us self tailing winches that we had brought back with us from Annapolis, and it was a night and day difference from our previous ones. The view from mid-way up was blinding between the shine of the aluminum and the incoming fog that was rolling through the breakwater. I untied the tangled mess around the spreaders and took a good look at our boat below as I lowered the lines to Chris – thinking about how far we have come since 2018.
Back on deck we picked up the various tools and pieces scattered about and headed back to our slip. Champagne popped and glasses were shared as the family gathered to appreciate another job well done by the Avocet crew. It has been 3 weeks since the mast was stepped and we are still thrilled with the outcome! There are still a few final pieces that we are anxiously awaiting so we can install our new furler and NEW Precision head sail, but once we are seaworthy we will be Channel Island bound once more! Until then, we will pivot to our next project: upholstery. Wish us luck!
Fair winds,
Marissa, Chris, and Cleocat
HUGE Thank you to Derecktor Boatyard for hosting us, Jose for the welding, Mitch and Jeff for the extra hands, Ross Hubbard for the insight on Nyalic (and on a Saturday!), Kim Weir and Scott Nordeng for the rigging expertise and last but not least to Audie from Legacy Crane for delicately handling our mast – we appreciate you all!
[UPDATE: February 25th, 2022]
It has been four months since our mast was stepped back onto Avocet, and five months since we ordered our new Harken Ocean Series Unit II Furler. After fighting various sourcing and shipping issues our furler toggle finally arrived right when we thought all hope was lost. By this point, Chris and I were already well into other projects (details coming soon) but had no problem putting those on pause to jump right back into where we left off on our rig.
I should have worn gloves I thought as I sat at the top of the mast. My legs were beginning to fall asleep in my harness as I tried to carefully remove the cotter pin holding our forestay up. It was like playing a more complex version of the classic game Operation, where no matter how hard I tried to finagle my pliers in between the other rigging to remove the very bent pin. “It’s really stuck in there!” I called to Chris below while reaching for another pair of needle-nose pliers. “Well yeah, it better be!” he responded. Right when I thought I would have to reluctantly admit defeat I was able to remove the pin, but was not anticipating the weight of the wire or how sweaty my hands had gotten.
“Oh Sh!t!” I exclaimed, my curse could surely be heard across the marina as the wire slipped through my hands. I clenched the slipping end tightly in my grip, quickly assessing the situation and thinking out my next move. I looked below where Chris stared up at me, wide-eyed, standing on our freshly painted cabin top – a project we finished while anxiously awaiting our furler toggle. I reached to my side for the messenger line then tied the best darn one-handed-knot I could, utilizing my teeth to pull it tight. I prayed to Poseidon that the knot would hold as I belayed the wire down to Chris.
Back on the ground, we got to work measuring the new wire and building our final round of Hi-mod fittings, which felt routine at this point. Chris laid out our furler pieces and began to skim the manual while I started to dry-fit the pieces together hoping everything would go according to plan – newsflash, it did not. Chris’s brother Jon had warned us that when he installed the same furler on a friend’s boat that the screws don’t line up with the holes in the foils. Considering the first four screws went in without a problem, we had surely thought that Jon’s issue was isolated but as soon as we moved onto the next foil we sadly confirmed that this was a widespread issue and would likely need to be brought to the attention of the manufacturer. Fortunately, we had the tools needed to modify the foils just ever so slightly to make the perfect fit.
A dab of tough gel on the stainless screws and a dab of toughstuff on the holes before tightening the screws would help prevent dissimilar metal corrosion and further protect the hardware from weathering. Soon the foils were secured around the wire and the furler drum was anchored to the end, ready to be set in place at the bow. At this point, our friends Mitch and Quincey had pulled up in their dinghy and were ready to lend their helping hands.
I sent Chris up the mast using the windlass while Q and M carefully walked the forestay forward, secured with a messenger line. Together we carefully belayed the heavy wire up to Chris, making sure we didn’t scratch anything in the process. Once secured at the top, we connected the bottom with the toggle we had waited oh-so-patiently to receive. When Chris finished everything at the top of the mast and took one last good look at everything I lowered him down, leaving him hanging with his feet just high enough off the deck where he couldn’t stand – a cheeky tradition at this point. Eventually, I let him down and the four of us stood back to admire the finished product. After four months of hard work and patiently waiting we could finally say Avocet’s rig was complete and all that was left to do was put it to the test. Stay tuned for that, very soon.


Very cool and well written
You described perfectly the amount of work involved in just one aspect of the mast.
We did the same thing with our 1980 Cheoy Lee 38
Found a used mast in the yard, cut it, and re-rigged her (She was from a 40 footer with a keel-stepped mast.)
We also reinforced the weight support inside with stainless steel plates split in two and mounted to the existing bolts holding the top outside plate to the deck. Felt we needed to do this since we replaced a wooden mast with an aluminum mast – added 150lbs give or take
Love it! Awesome I was able to help and Truman got some quality one on one with you salty dogs.
Such a wonderfully detailed project!