S/V Avocet’s Lithium Conversion
Battleborn, Victron, Relion… These are only some of the most common drop-in lithium battery brands available today. While many boats are converting to lithium batteries, they are not always financially feasible for the cost conscious sailors such as Chris and myself. When we were first looking to replace our soon-to-be-expiring AGM batteries, lithium was not really a part of the conversation due to budgetary restraints, but when we thought outside of the box (battery box, that is) we were pleasantly surprised.
In July of 2020, Chris flew to North Carolina to help his brother, Jon, with boat projects. During the many discussions regarding life afloat, the brothers had landed on the topic of lithium batteries since Jon had recently upgraded the batteries on his boat, Prism, to Renogy lithiums. Although pleased with the upgrade, Jon mentioned that in retrospect he would have likely gone the “Do It Yourself” (DIY) route since learning that building a lithium battery is more cost effective and provides unique features in comparison to the standard drop-in batteries. Thanks to mentioning his missed opportunity, Chris was inspired to dig deeper and see if building our own lithium batteries would be as feasible as Jon said.
With the idea fresh in his mind, Chris ran with the concept of building our own lithium batteries and began to curate credible resources that supported the project. Prior to purchasing any items we read countless articles, watched hours of YouTube videos (specifically Will Prowse), and consulted with notable experts in the area to get their collective input regarding the future project we would be starting. Armed with an extensive resource list we were confident in the information gathered and finally began purchasing the items necessary to begin. Before diving into how we built our batteries and the materials used, let’s discuss what type of lithium batteries we are dealing with.
What the Heck is LiFePo4?
 The lithium iron phosphate battery (or LFP battery), is a type of lithium-ion battery using LiFePO ₄ as the cathode material, and a graphitic carbon electrode with a metallic backing as the anode. The energy density of LiFePO ₄ is lower than that of lithium cobalt oxide, and also has a lower operating voltage. Unlike its chemical cousin lithium ion, lithium iron phosphate has excellent thermal and chemical stability meaning virtually 0% risk of combustion. Epec engineering technologies goes on to explain that:
Manufacturers across industries turn to lithium iron phosphate for applications where safety is a factor. Lithium iron phosphate has excellent thermal and chemical stability. This battery stays cool in higher temperatures. It is also incombustible when it is mishandled during rapid charges and discharges or when there are short circuit issues. Lithium iron phosphate does not normally experience thermal runaway, as the phosphate cathode will not burn or explode during overcharging or overheating as the battery remains cool.
Another safety advantage of lithium iron phosphate involves the disposal of the battery after use or failure. A lithium-ion battery made with a lithium cobalt dioxide chemistry is considered a hazardous material as it can cause allergic reactions to the eyes and skin when exposed. It can also cause severe medical issues when swallowed. So, special disposal considerations must be made for lithium-ion. On the other hand, lithium iron phosphate is nontoxic and can be disposed of more easily by manufacturers.
Advances in battery technologies have placed lithium chemistry at the head of the pack for being the best power source for high energy use devices that are portable. It’s long shelf life and the benefit in providing a continuous source of power over long periods of time is why lithium iron phosphate is a reliable alternative.
Currently, lithium batteries are still on the pricey side when compared to nickel metal hydride and nickel cadmium batteries. Yet, the long life of lithium batteries can equal out the initial high costs. For manufacturers trying to decide whether lithium-ion or lithium iron phosphate will be ideal for applications, consider these key factors.
- Highest energy density: lithium-ion
- Good energy density and lifecycle: lithium iron phosphate
- Stable chemical and thermal chemistry: lithium iron phosphate
- No thermal runaway and safe when fully charged: lithium iron phosphate
- Portability and lightweight characteristics: lithium-ion
- Long life: lithium iron phosphate and lithium-ion
- Low costs: lithium iron phosphate
There are only a few companies that have been producing lithium cells for a considerable amount of time, CALB being one of the longest operating suppliers recently rising in popularity specifically because of their lithium iron phosphate cells. Although CALB has supplied cells mainly for industrial purposes including backup battery solutions for large buildings and mine boring equipment, we chose to purchase their cells because our primary goal was to build a safe lithium battery that would serve us for a long time. Even though there are cheaper lithium cell alternatives available, we also chose to invest in CALB because of its safety and performance track record, supported by the many examples of success over the past decade.
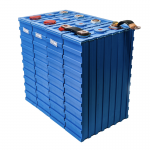
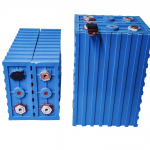
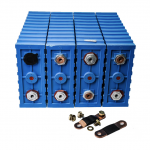
Note: Although mentioned that CALB was on the pricier side, they were still significantly cheaper than buying a drop in battery.
Battery Management System
In addition to the cells, we needed a battery management system (BMS). Without going into too much detail, a BMS is defined as an electronic system that manages a rechargeable battery (single cell or battery pack) by monitoring its charge state, calculating secondary data ie: temperature and power current , reporting that data, protecting the battery, controlling its environment (if it has a heater element), and/or balancing cells or entire banks of cells. Similar to our reasons behind choosing CALB, we purchased our BMS from a company that has a great product history with plenty of examples of being reputable and safe.
DALY has been in business for many years and provides a variety of management systems based on the amps and voltage of your specific battery bank. Despite our positive experience with DALY, the business has had some bad press for misleading buyers with the technical information for a product not lining up with the actual physical product. For example: With our BMS, DALY lists in the description that there is a low temperature cut off, but it has been shown by multiple first hand users that there is not even a temperature sensor in the system. YouTube battery expert Will Prowse has taken a handful of DALY BMS’s completely apart and they either lack a temperature sensor completely or it doesn’t function, whatsoever. Personally, we believe that this is a communication issue that stems from the initial translations from Chinese to English. Besides the mysterious temperature sensor the cell balancing, high and low voltage cut-offs, other functions, and build quality are top notch and work great.
*Note: Many drop in lithium batteries use DALY components.
Fun Fact: you don’t technically need a BMS. If all cells stay healthy and you have other failsafes when it comes to high voltage, low voltage, and low temperature your batteries can function without it; however with that being said, we think that the DALY 200a BMS is a great option for only $160 USD. The unit itself is built like a tank and in the past year that we have been using the system, there has never been a discrepancy in cell voltage which proves that the BMS has done a good job at balancing. The DALY BMS we chose is very simple technology, meaning there are no fancy bells and whistles, but after using our Victron BMV-712 that has Bluetooth capabilities we can see ourselves upgrading to a more advanced BMS in the future so we can monitor the independent cell voltage and temperature from our phone via Bluetooth. This leads us into our next point regarding customization and upgrades.
Our battery bank is not only unique because we built it ourselves but also because unlike drop-in lithium batteries we have the ability to replace the BMS. One of the main reasons that name brand lithium batteries fail is because the BMS is located inside a sealed case. If the BMS fails, it renders the entire battery useless and forces the owner to replace the entire unit rather than just the individual cell/ BMS that is at fault.
Completely Lithium Powered… Almost
Although our house bank is now lithium, we decided to keep a lead acid starter battery for a couple of reasons, the first being is redundancy. On a cruising boat that uses sufficient power while at anchor or sailing, there is peace of mind presented with having a plan B. For instance, if something like an inverter was accidentally left on overnight and pulled a large load and depleted the house bank completely we would still be able to start the engine since it is connected to another battery, the “starter” battery.
The second reason we kept a sealed lead acid starter battery is because there are inherent costs involved with switching from traditional batteries to lithium that goes beyond the price of the batteries themselves. Lithium iron phosphate is a completely different battery chemistry compared to lead acid batteries which means they require much different charging parameters. When a lithium battery charges and gets to 100% the battery is “done” accepting power and will immediately stop due to the BMS high voltage cutoff, unlike lead acid that will continue to absorb power regardless of its charge state. AC-DC chargers without lithium profiles will not work, and charging the batteries with the engine also will not work with standard alternator regulators. This presents you with the choice to swap everything over to lithium compatible chargers and regulators, or to keep the current charging equipment and only purchase a DC-DC charger. Obviously, we chose the latter.
The DC-DC charger takes the power from our one lead acid (starter) battery and funnels it into the lithium batteries in an appropriate “Lithium Profile.” On Avocet we decided to change our AC-DC charger to a Sterling 40a with a lithium and custom profile option for when at the dock. When it comes to solar, we purchased lithium compatible MPPT chargers from Renogy (400watts of solar, going through two 20a Rover Chargers). All that was left was the alternator on the engine which is a 120a Balmar. Instead of ordering a lithium regulator we decided to use a DC-DC charger to utilize the existing system and save some money in addition to keeping the redundant and safe 2 battery bank combo aboard.
When we charge the lithium batteries with the engine, the power comes from the Balmar straight to a group 31 lead-acid battery, which then the 60a Renogy DC-DC charger directs the power into the lithium bank. This does not put any load on the lead-acid whatsoever; it acts as the pathway for the power to go from the alternator to the lithium safely.
Wiring the Batteries… and the Entire Boat
During our battery build we solved a few issues aboard Avocet that will ensure our safety as we sail to places far and wide. Prior to even thinking about installing the batteries, we came to the conclusion that we would have to replace every wire aboard. For some reason, our previous owners favored wiring with speaker wire which is a great temporary fix for small things, but when used to fix larger problems for what seemed to be long term can be extremely dangerous. When we bought Avocet in 2018, a lot of the immediate issues were resolved, but we found that there were a lot of inconsistencies and after working around it for nearly 3 years Chris decided to rip it all out and start over.
Note: We highly recommend you add the Boatowners Mechanical and Electric Manual
to your onboard library.
While rewiring, we relocated our control panels from the floor under our nav station to our newly constructed nav desk that housed all of our electronic systems and added a new design element to Avocet’s interior. With clean new electrical panels and fresh wiring we were ready to wire in our batteries, but first we had to make a few adjustments.
Our batteries used to be located at the bottom of the companionway steps similar to how our control panel was under our nav station. Being right under the companionway posed a big issue: if we were to ever take a greenwave in the cockpit and water made its way down below, the batteries would be at risk of getting wet or getting completely submerged. During this battery build process we relocated the batteries to a watertight locker and acid proof battery box under our bed which also subsequently offered up space in their old location, inspiring Chris to build more tool and gear storage.

painting the battery box
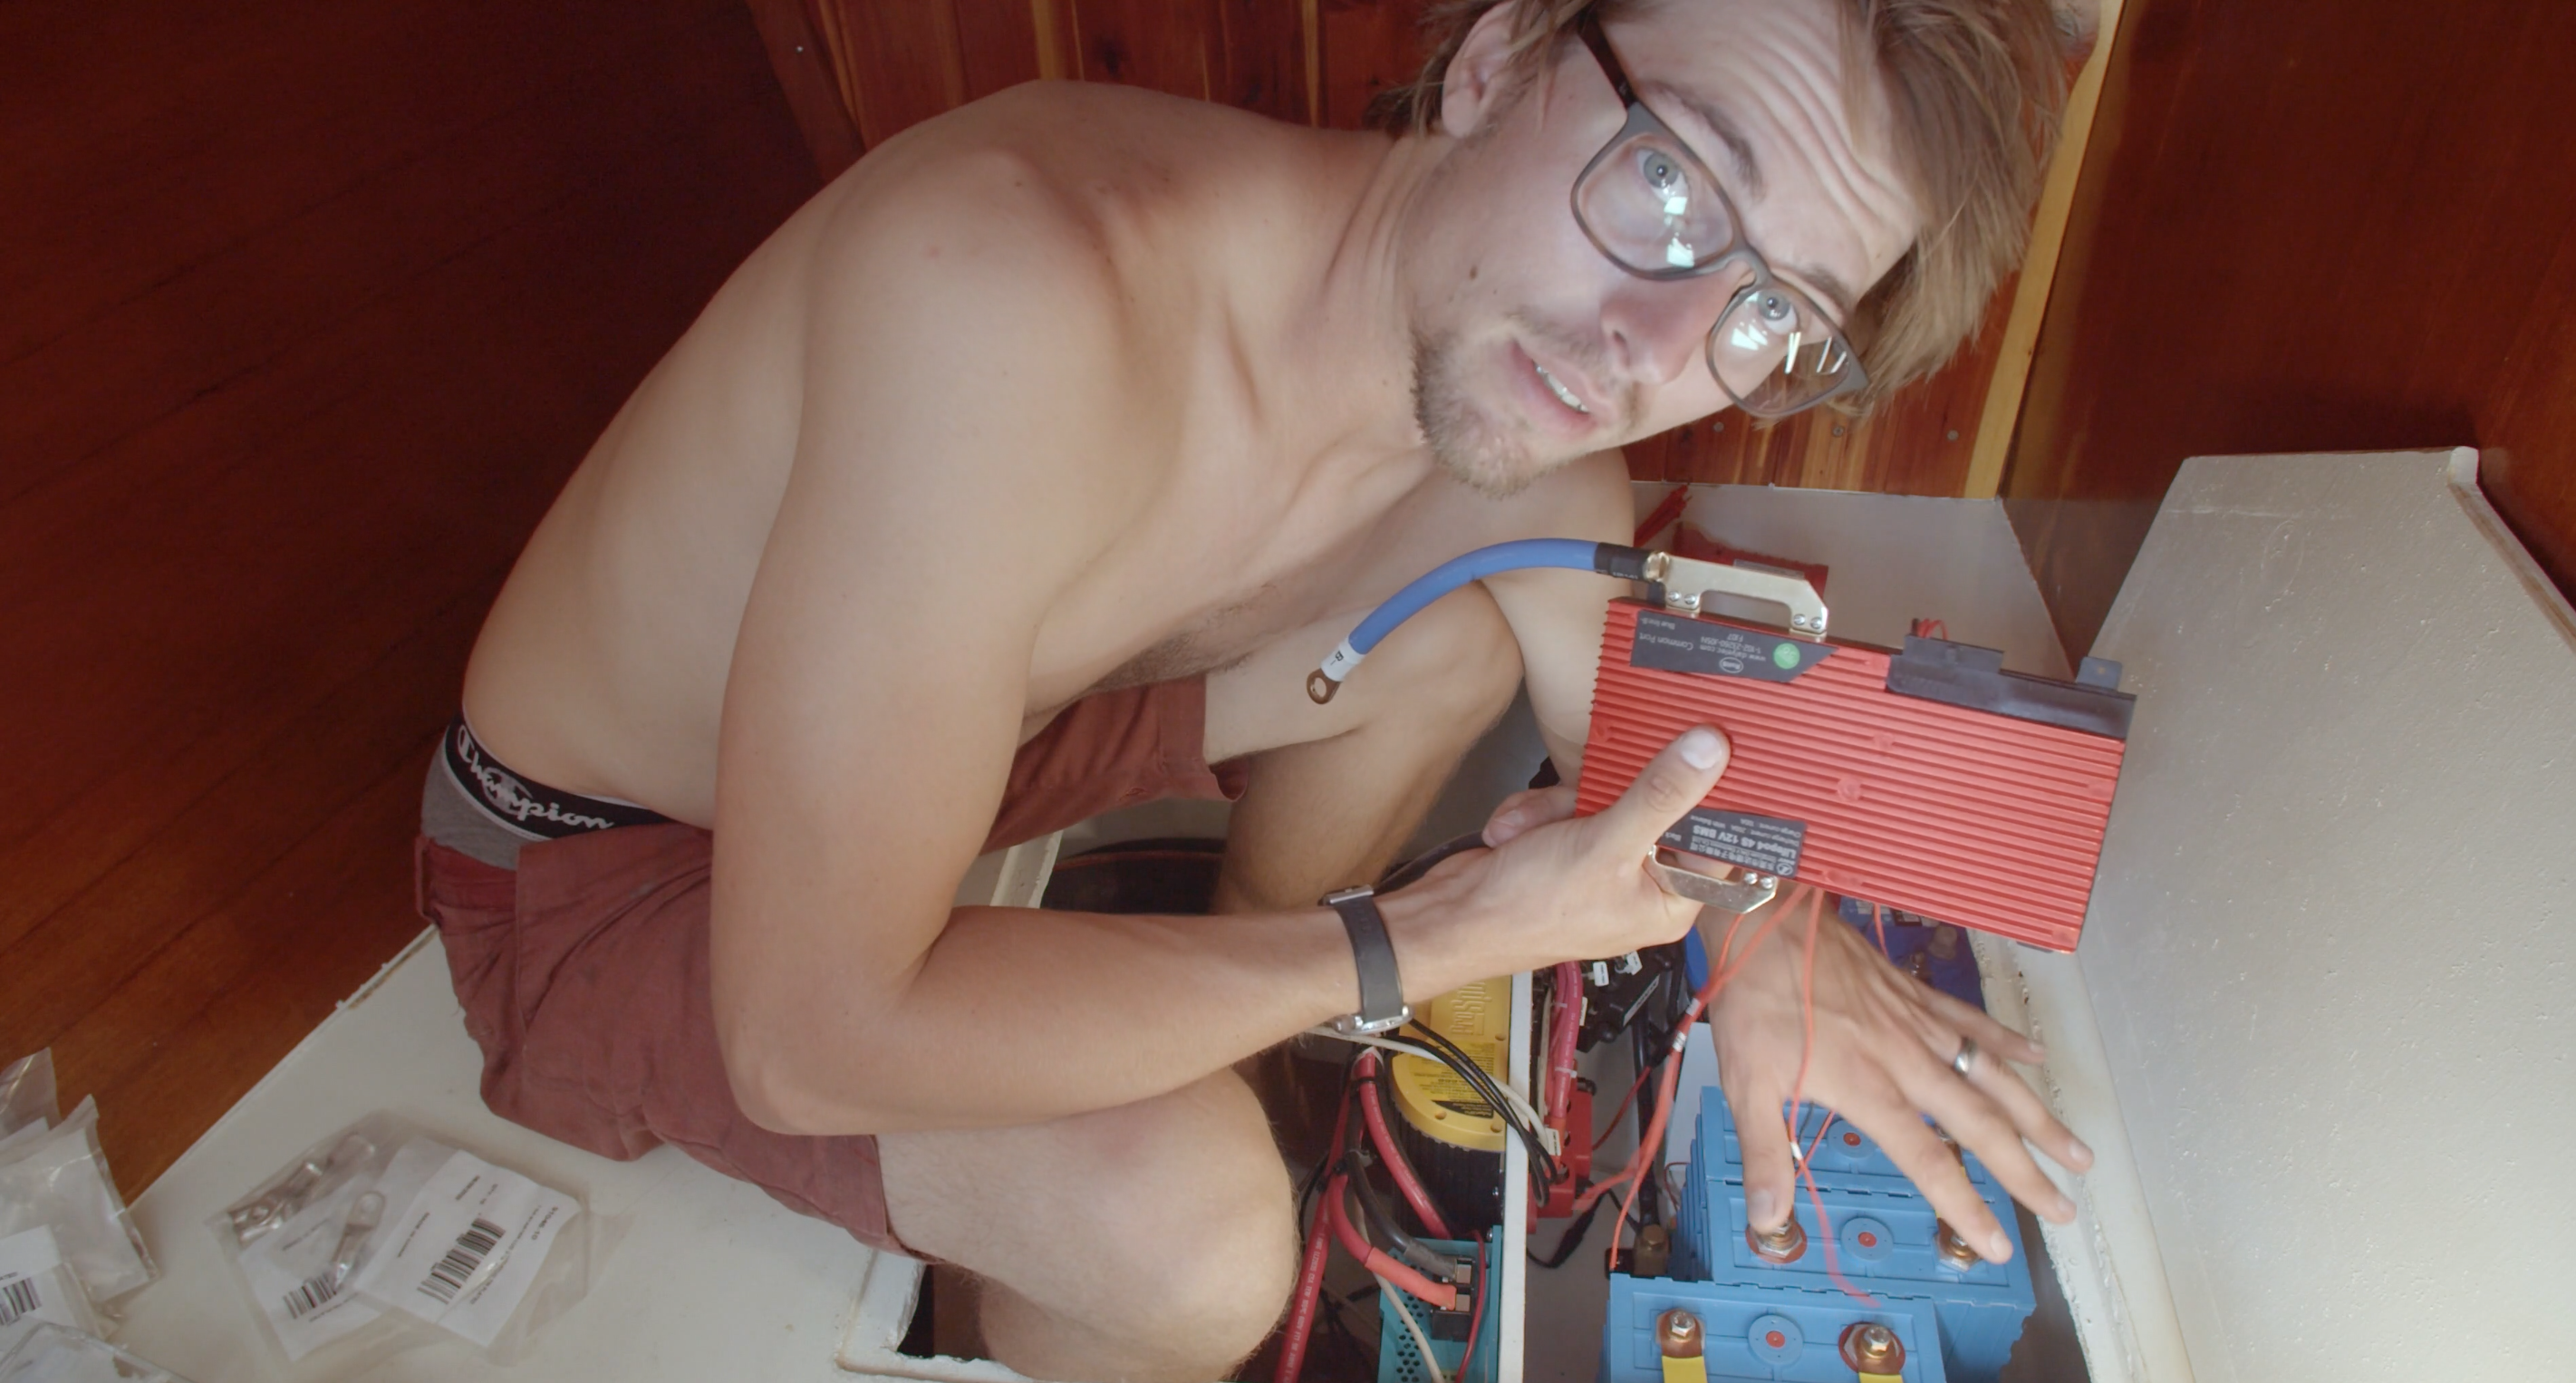
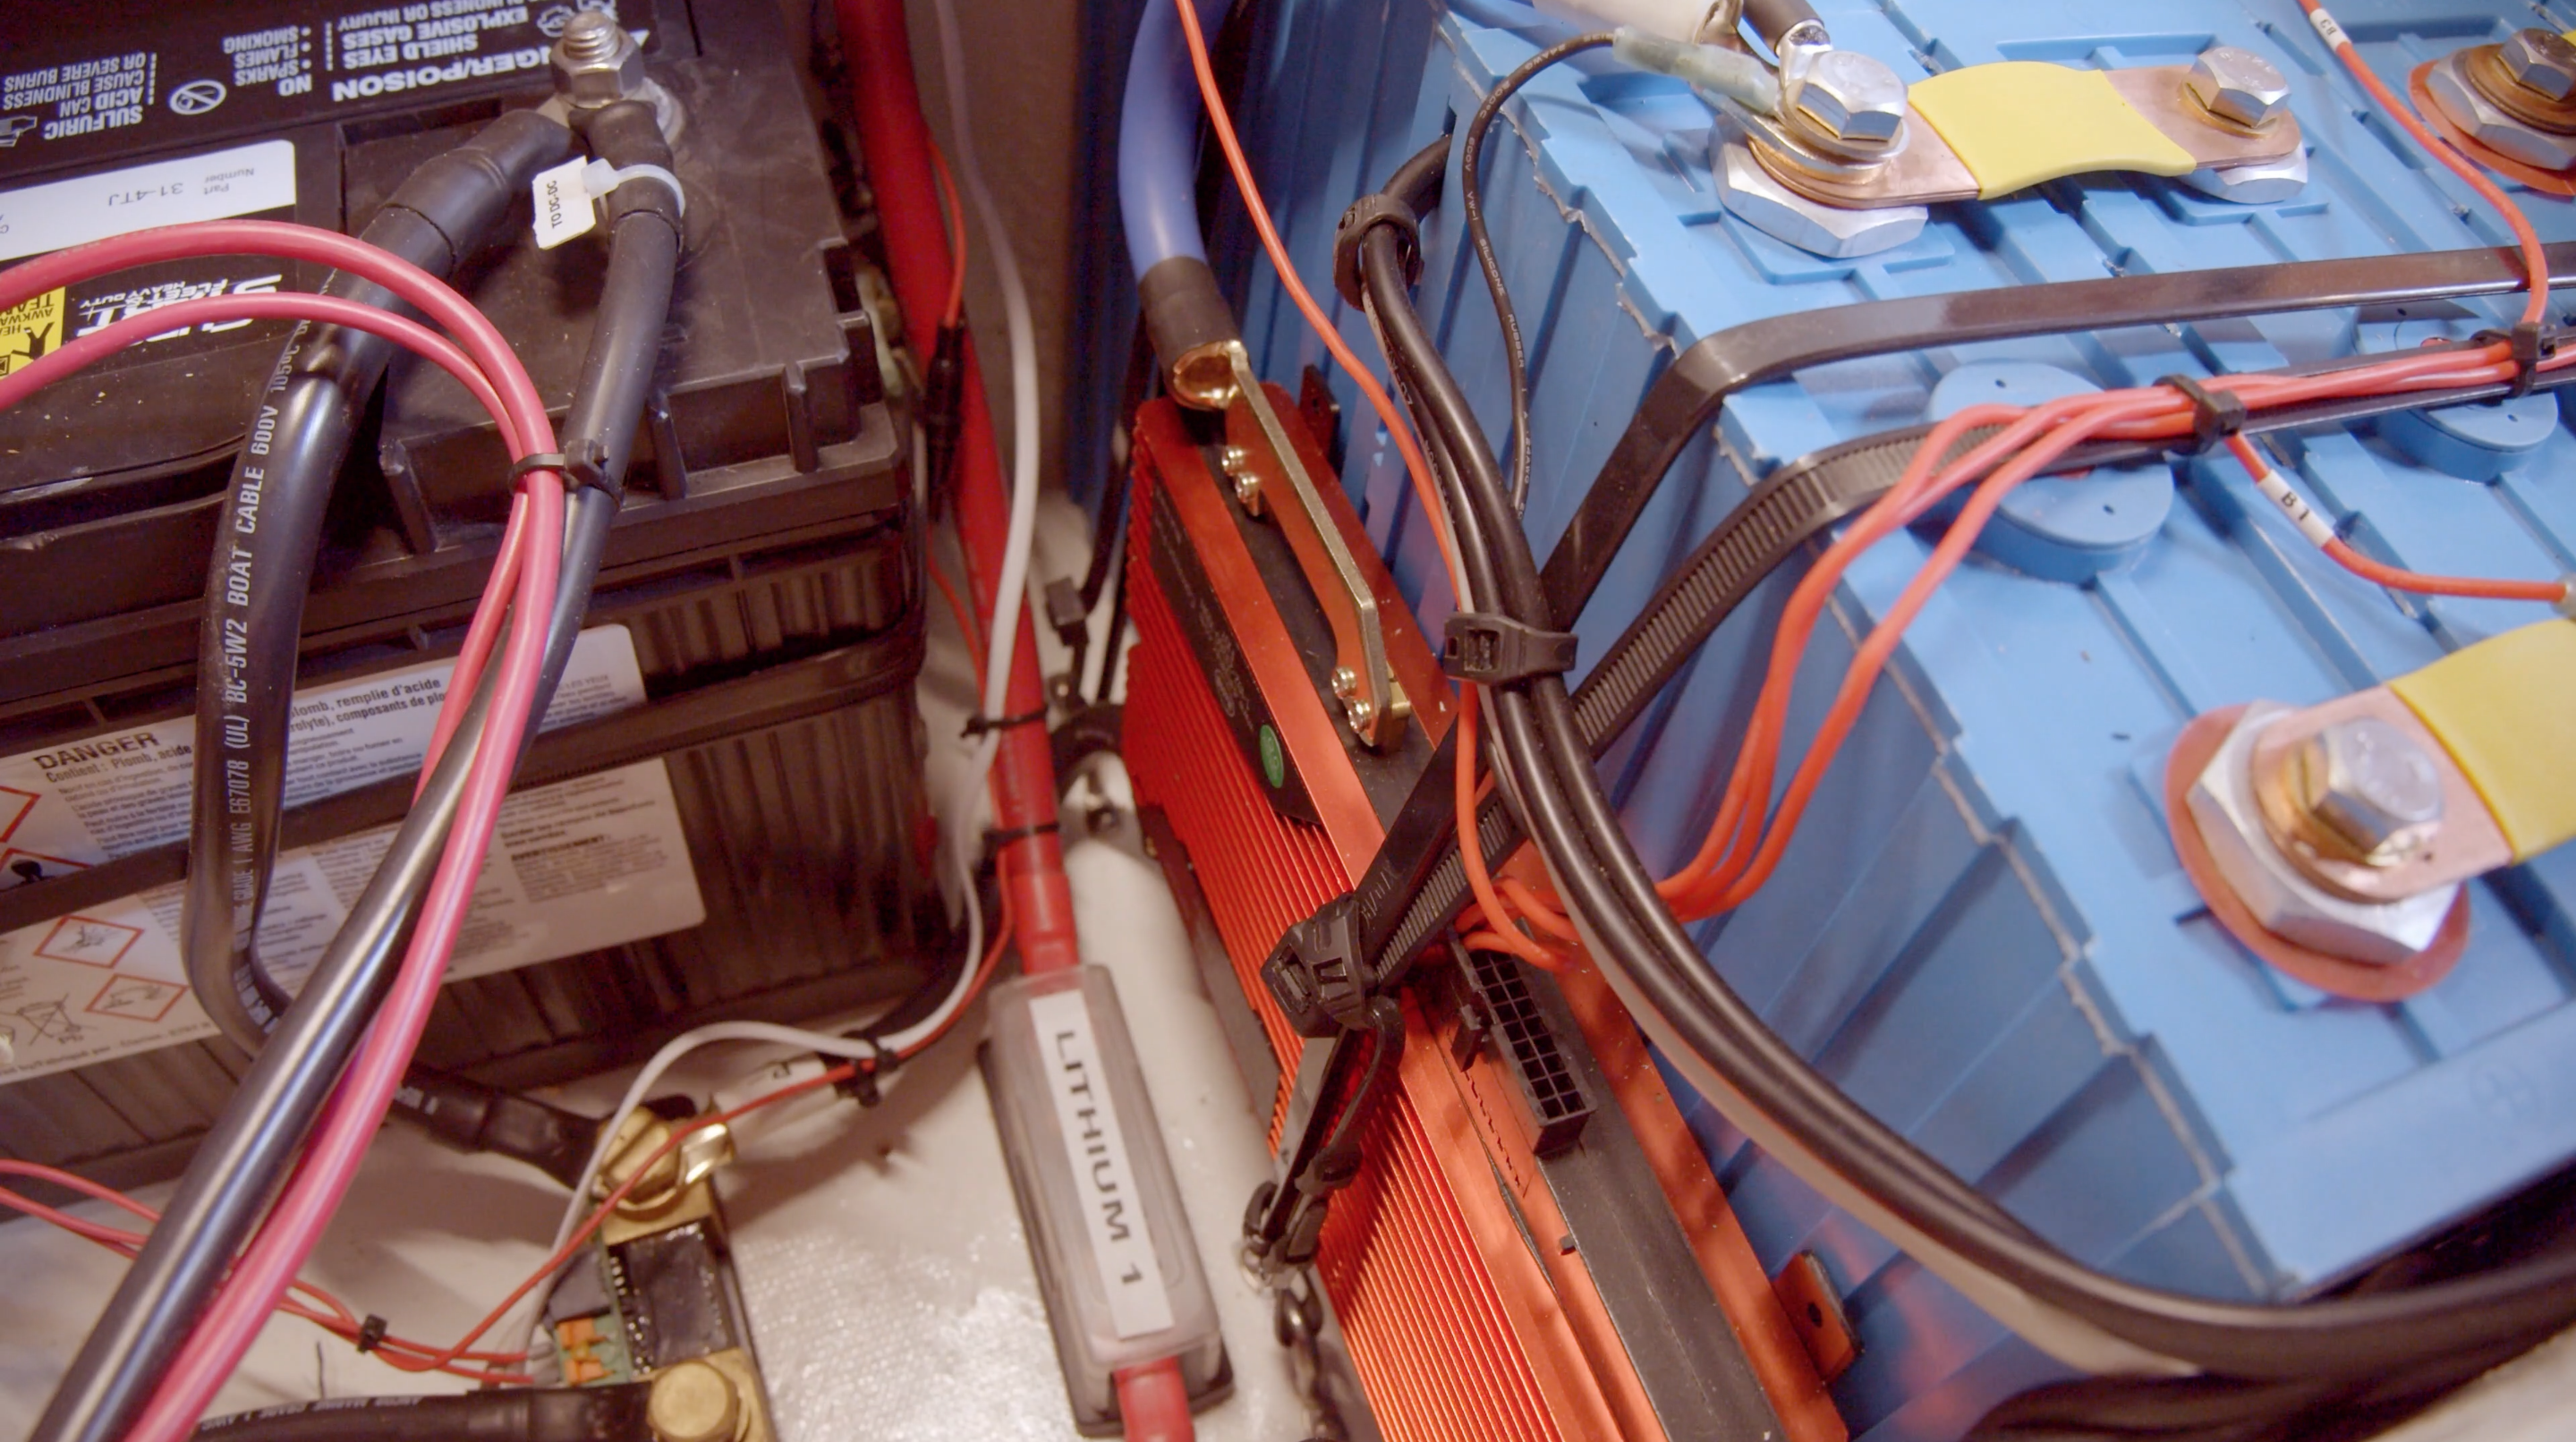
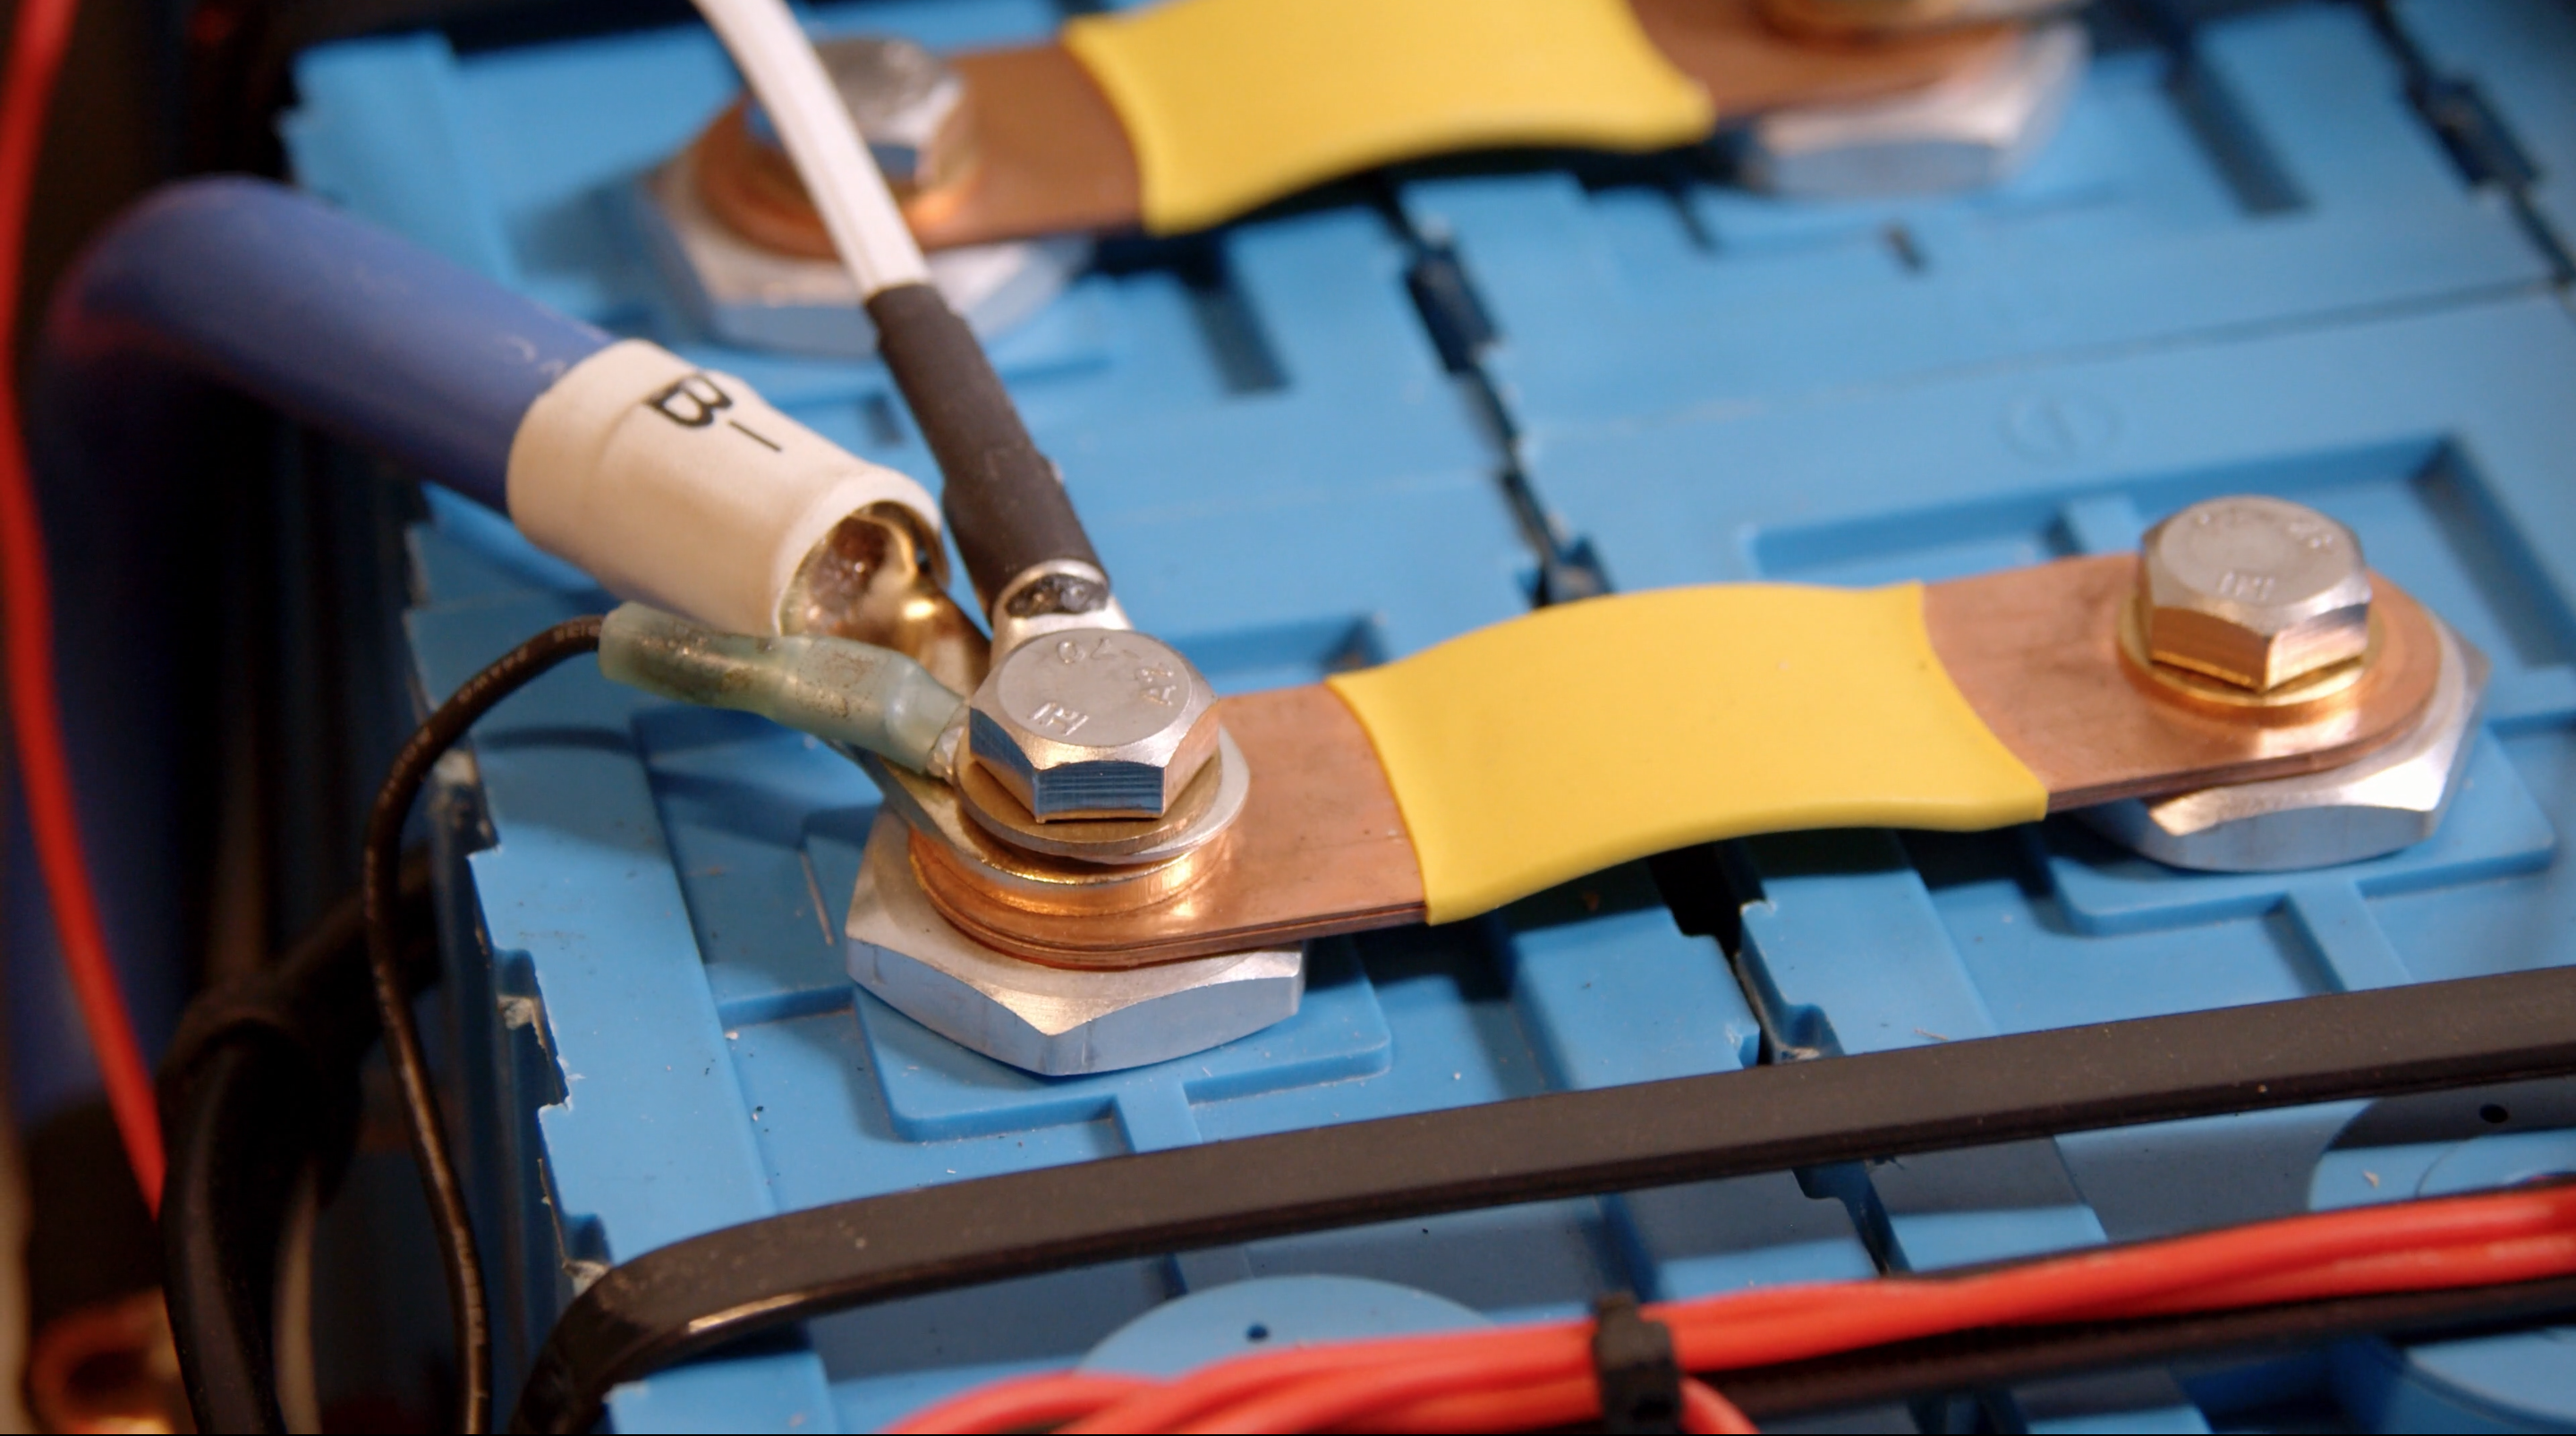
We not only eliminated multiple hazards by moving the batteries and rewiring the entire boat, but we also installed new safety measures to ensure we were as safe as could be. Inside the battery box Following ABYC electrical standards, both battery banks immediately went to appropriately sized burn out fuses (200amps). The positive lead from the lithium then goes directly into a 4 post bus bar where all large battery cables from DC-DC charger, solar controllers, panel pickup, and windlass are connected to. The negative lead off the lithium bank comes directly from the battery into the 200a DALY BMS then into the Victron Smart Shunt finally leading into the main negative bus bar just next to the positive.
It is crucial that the lithium battery and lead acid battery do not connect positive leads anywhere. The only way the DC-DC charger will be able to protect the lithium bank is if the starter battery to the engine is completely isolated from the lithium positives. There was an option to wire the starter battery to the main battery selector switch so we would have the ability to combine the two banks together if the starter battery were ever to die. However, we chose not to connect them because if the switch was accidentally left on (combined) when the engine was running the power from the alternator would go directly into the lithium bank. This is obviously not good because the non-lithium friendly alternator regulator would eventually cause the BMS to initiate high voltage cutoff, or fry the battery cells if the BMS were to malfunction. If there is ever a time we have to start the engine with the lithium bank we will need to use a jumper cable. From the main positive bus bar (apart from the chargers) the only power output goes directly into the On/Off Ancor switch before supplying the main electronic panels and the windlass.
It took three days to rout all the new doublex, triplex, seatalk, nmea, single wire, battery cable, etc. through the floors, walls, bulkheads, and headliner. While doing so, we also replaced all the 120v outlets with GFI Protected outlets as well as adding 12v plugs and USB power throughout the boat. Having the wiring done correctly with properly sized tinned copper wire, heat shrink terminals, properly sized breakers and fuses made us feel like we had dismantled a time bomb. The relief that washed over us knowing there was no more questionable speaker wire waiting to catch fire definitely made this project one of the most notable on Avocet.
Our Review To-Date
One year into living with our lithium battery system, we can confidently conclude that our batteries are working as intended. Weekly cycles of our battery bank show that the system is repeatedly hitting and surpassing the listed battery capacity; 20% discharge of our 360ah battery bank gives us 288 usable ah of power, however we have always shown that our battery cells actually perform much better than they should, giving us about 300-315 ah at 12.85 volts, with 20% charge left. Chris periodically pops the lid on the battery box and individually checks the cell voltage to ensure that all of the cells are matching like they should, showing a properly balanced battery bank. The 200a DALY BMS is doing a fine job of keeping proper cell voltage equal across the 8 cells.
Since uploading our first Lithium Battery project video to YouTube, we have received an overflow of excellent questions, many asking if they should switch to lithium. Although lithium is fantastic and definitely the way of the future, if there is no immediate “need” to replace your batteries then just wait. Lithium Battery setups- DIY or drop in- are only getting cheaper. Example: A 100ah Battleborn battery cost $1000.00 in 2020, and now one year later only costs $800.00. If your batteries aboard are still in safe operating condition, use them for as long as you.
Before You Build
If you find yourself in our shoes where the electronics aboard your boat are dated, the wiring is unsafe, and most importantly the battery bank is on its way out, there is no doubt that lithium is the way to go. With cycle ratings, depth of discharge, physical size to amp hour capacity, lithium iron phosphate can not be beat. Additionally, If you have time and patience to wait for materials to ship from China, we highly recommend looking into building a DIY battery, but please keep this in mind: Reputable cell manufacturers like CALB will give you a guarantee on replacement for anything related to faulty cells but if you experience issues due to improper installation or mistreatment of the cells, you are the responsible party. In addition, there are risks involved with building a DIY battery including (but not limited to) electrical fire. Please do your due diligence and research LiFePo4 for yourself and consider consulting with a marine electrician before proceeding.
We hope you enjoyed reading this recap of our project and look forward to sharing more in the near future. As always if you have any questions, feel free to send us an email sailingavocet@gmail.com … fair winds and happy DIY’ing!
– Marissa, Chris, and Cleocatra


Hey you two, great video describing the process for upgrading you house bank to lithium. I have been following Will Prowse myself for a while. Your installation is exactly what I’ve been thinking of doing on my boat as well. Would it be alright to ask you a few question, like where you got your batteries, how large of a bank did you end up going with, how do you like the Daly BMS? I am thinking of adding the BT dongle to keep watch of individual cells, or do you think the info you get from your victron app is enough? And finally when you got the cells, did you need to top or bottom balance them like Will suggests in some of his videos?
I think you mentioned switching on the DD to DC charger to charge the lithium. If so, isn’t there a device that will since the lifepo4 needs charging and automatically charge them?
Hey Joe! Sorry for the late response. Feel free to email us sailingavocet@gmail.com and we can discuss more in depth!
Hay guys keep living the dream. Love the vids. Weekend warrior and costal cruiser SV Eurybia considering going lifepo4. Principal design would be as you have done. Epically like the one BMS. Considering 300 amp hr w/ 8 cells. I think you posted or mention somewhere you did this w/ 8 cells in pairs of 2, 4 pairs in a 4s configuration? If so, do they continue to balance well and where did you connect the balance leads? I envision the leads screwed/taped in center of the buss bar between the two cella’s that make-up a pair. What are your thoughts? Best …. j
Hey Joe!
Shoot us an email so we can discuss in depth. sailingavocet@gmail.com